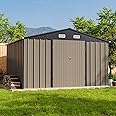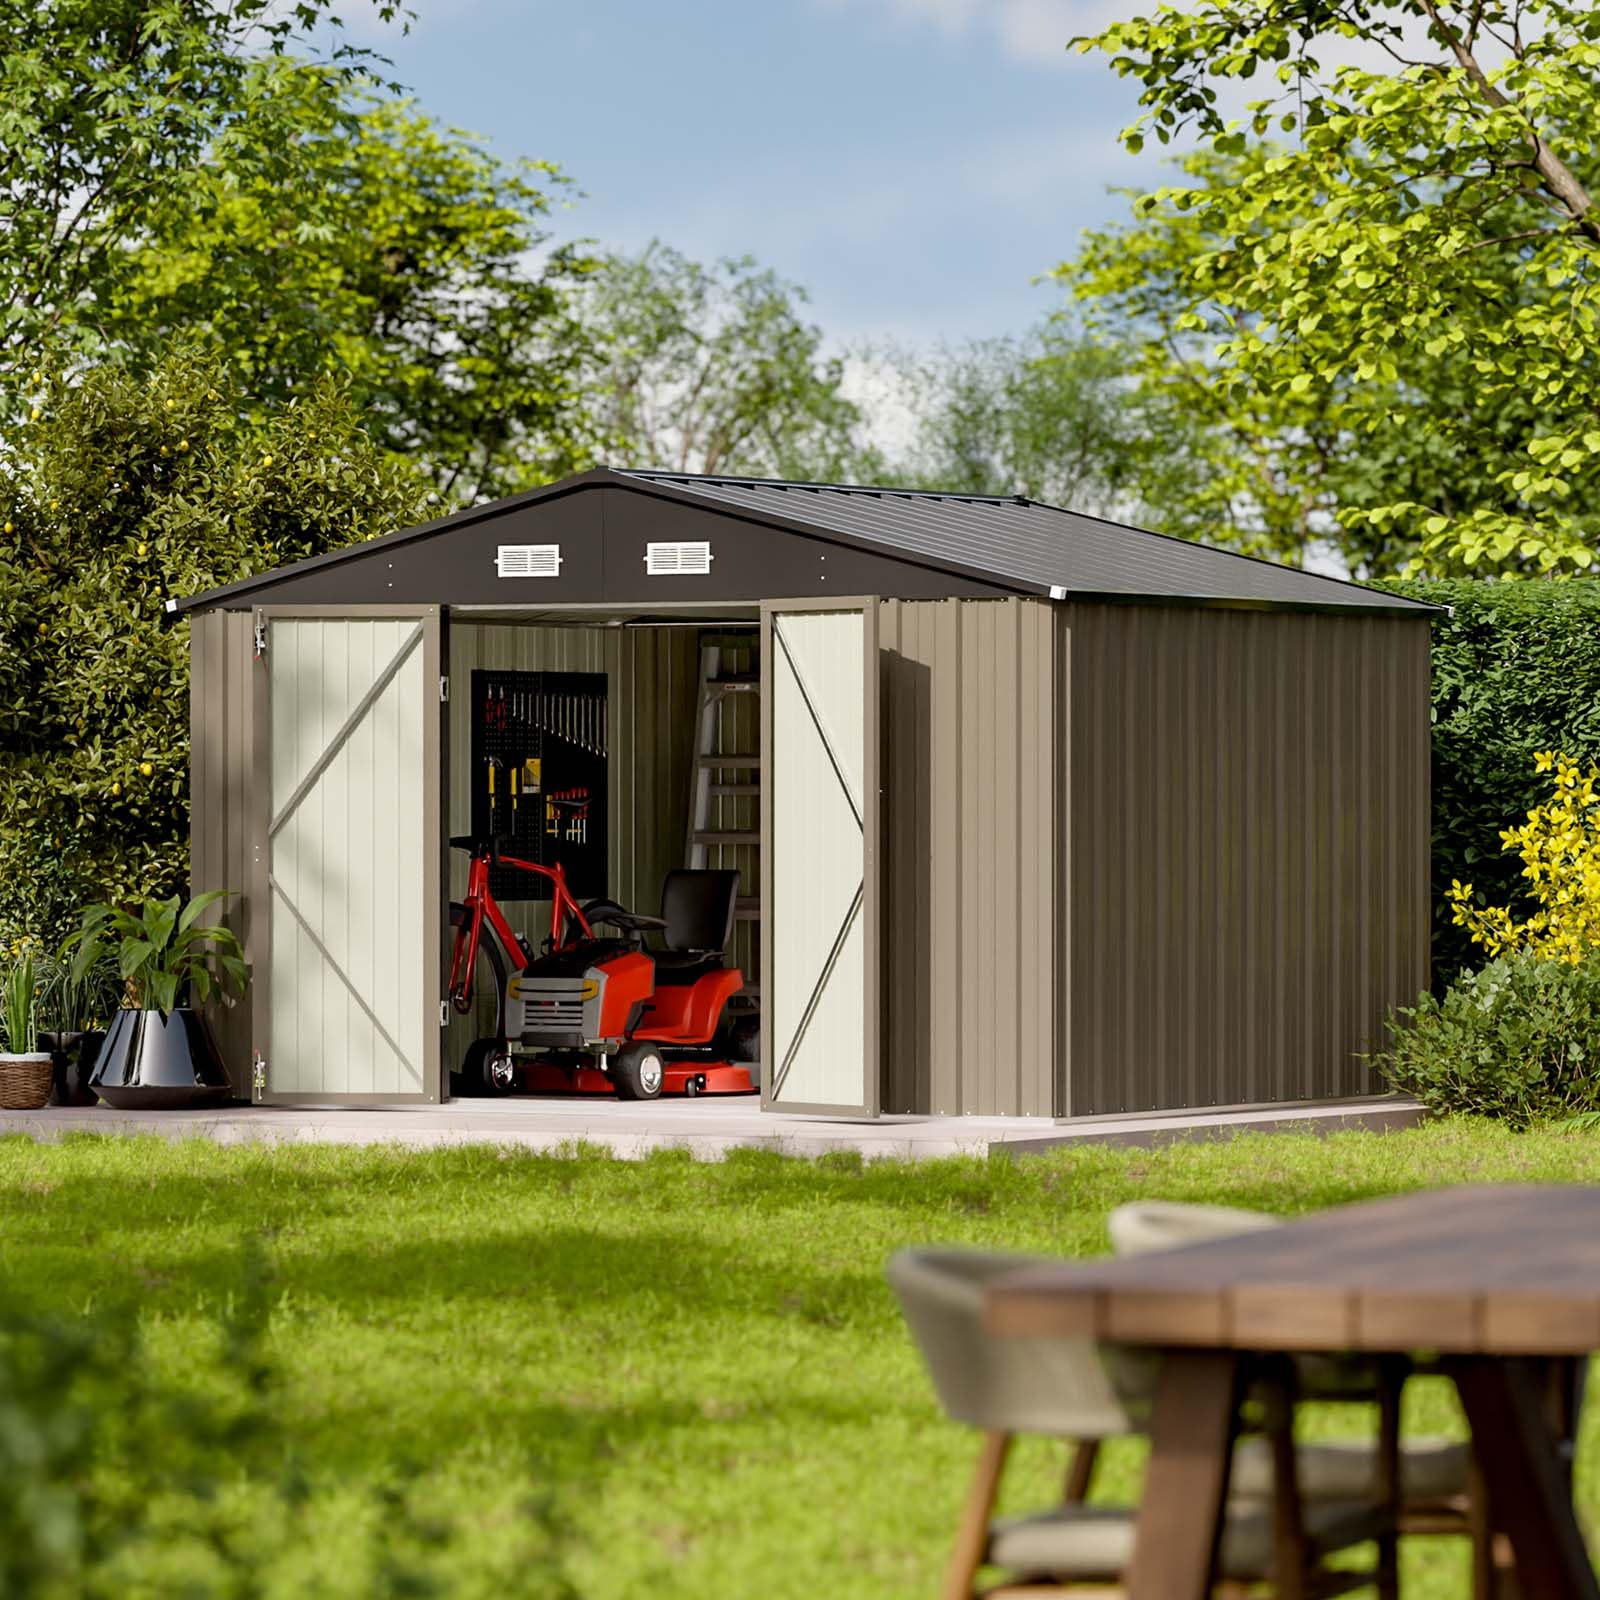

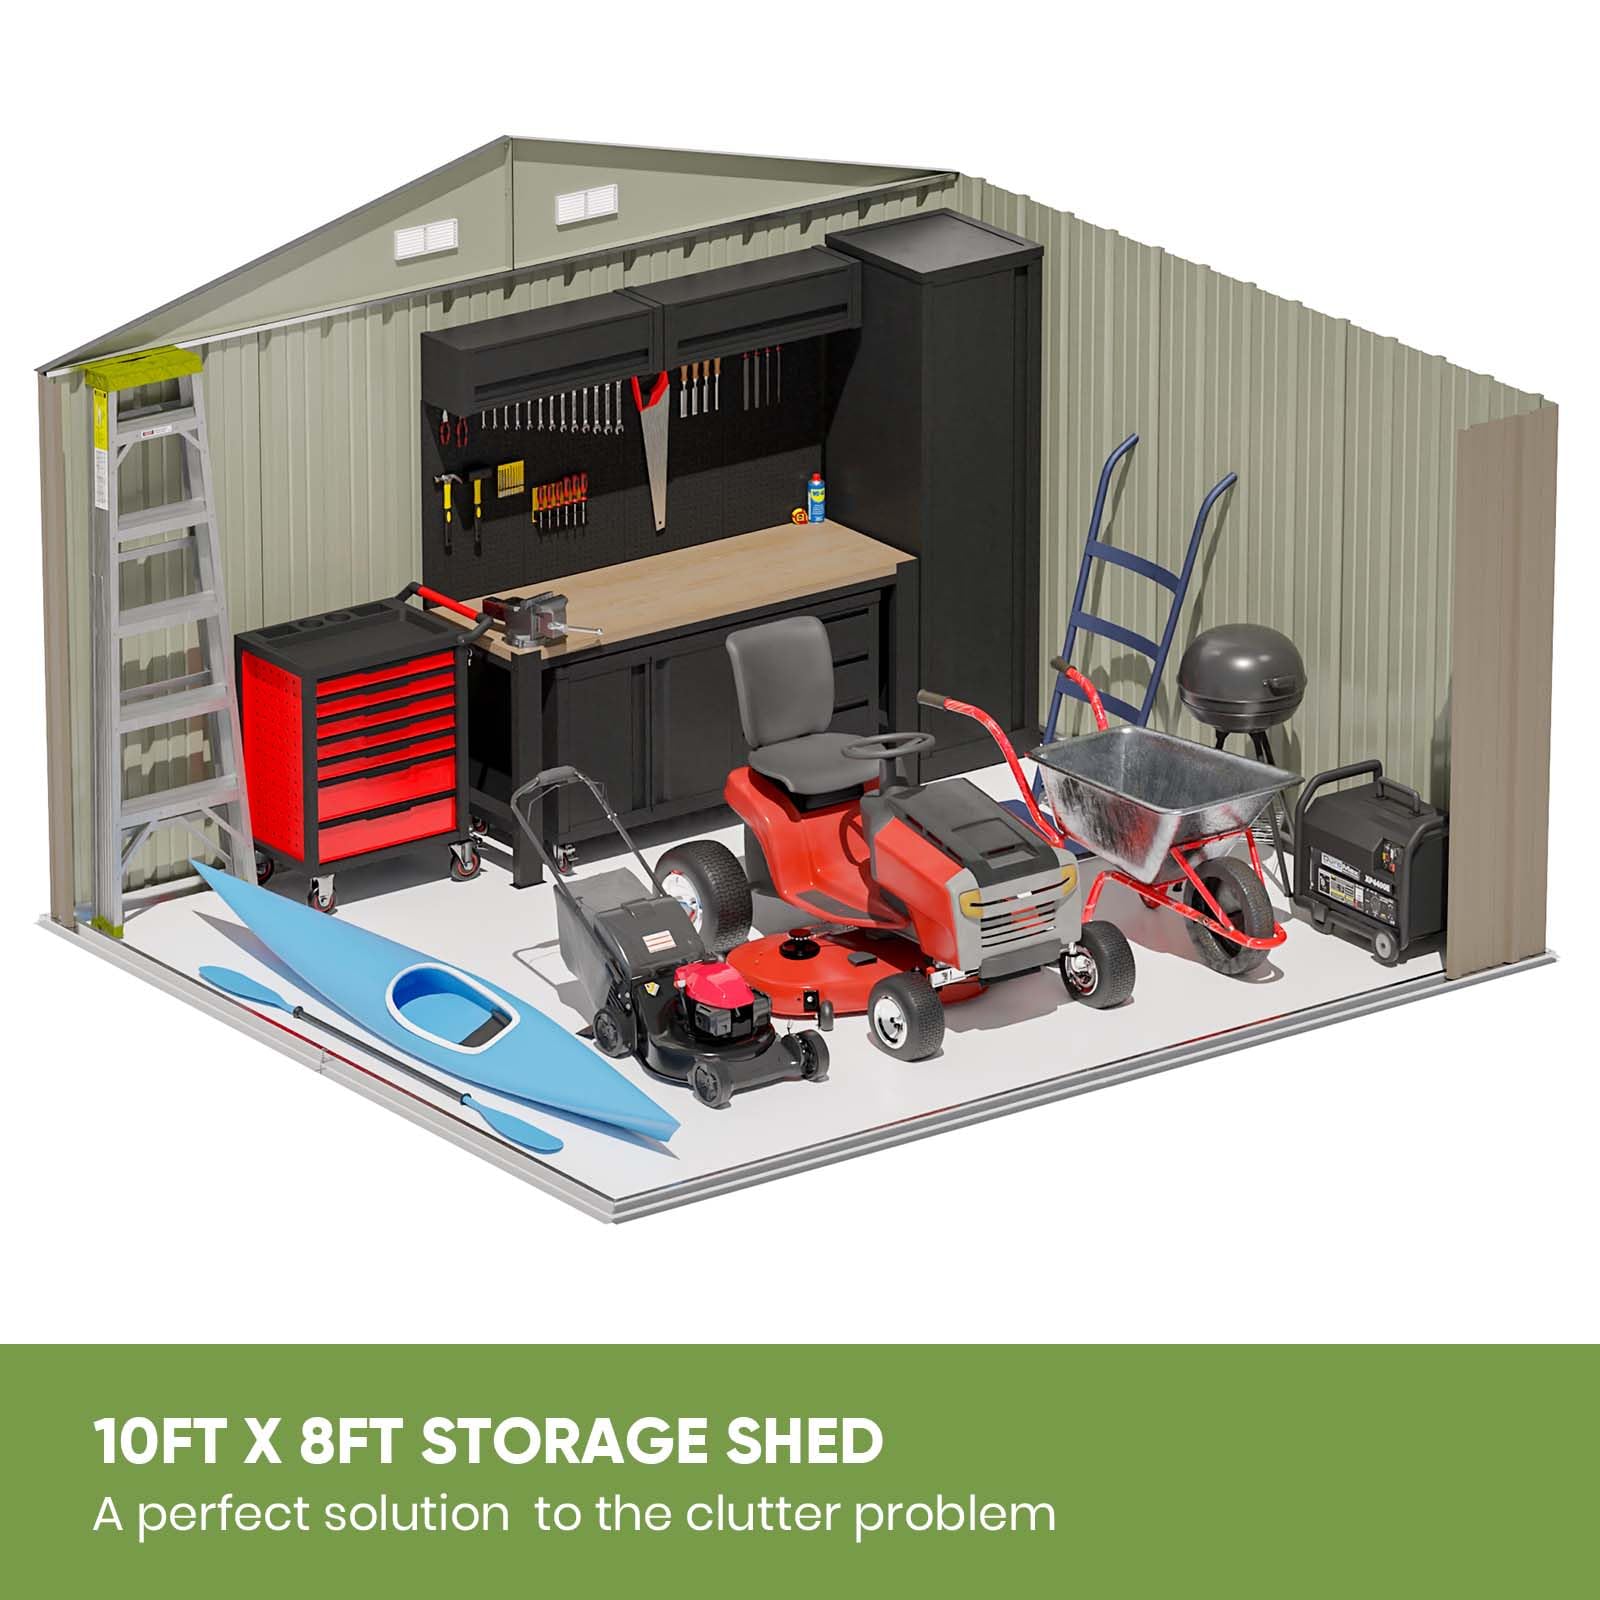

🏡 Elevate Your Outdoor Storage Game!
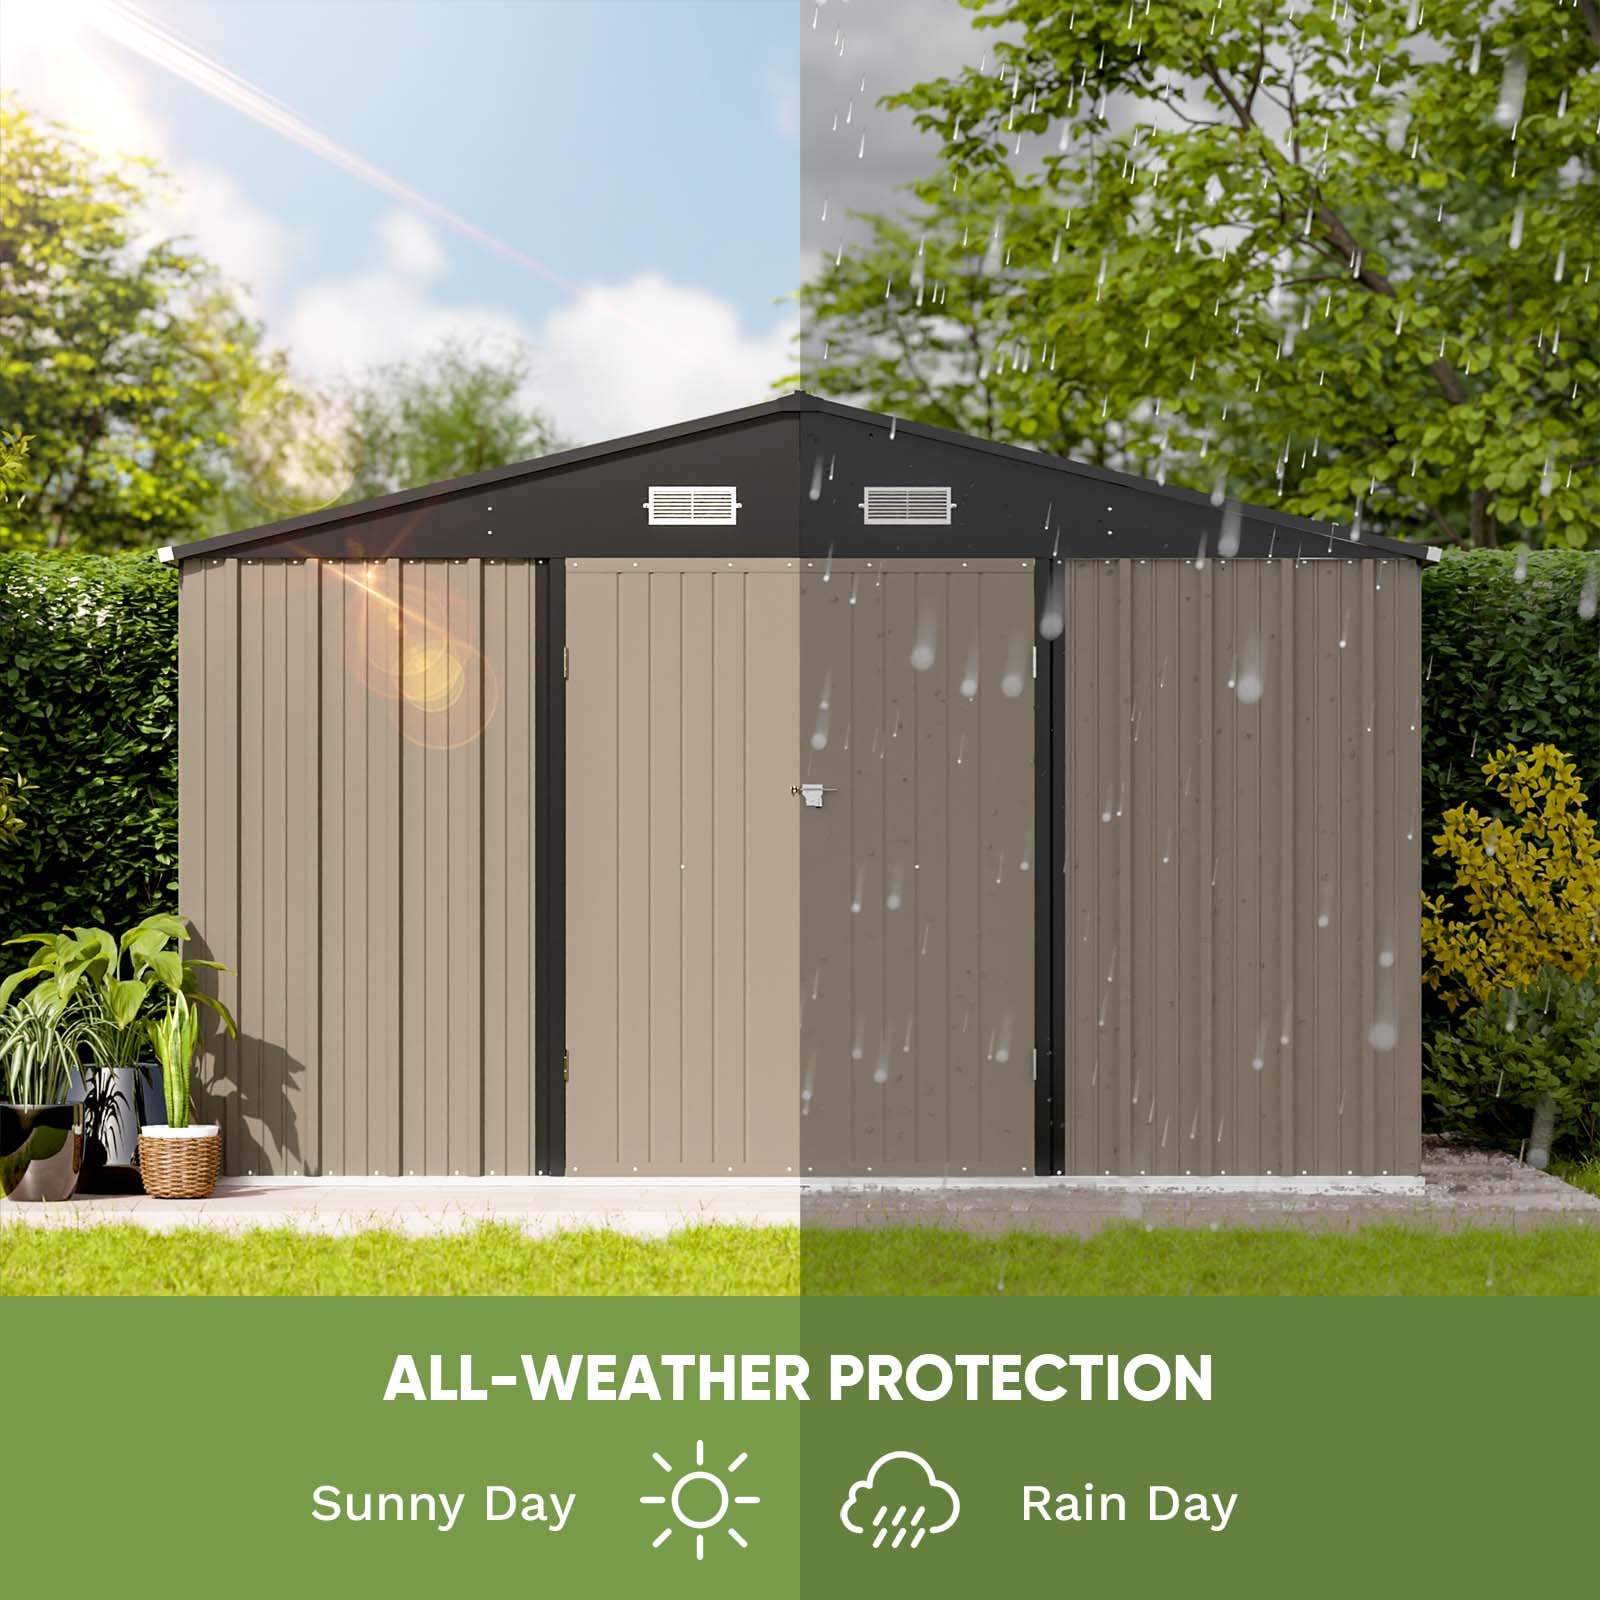
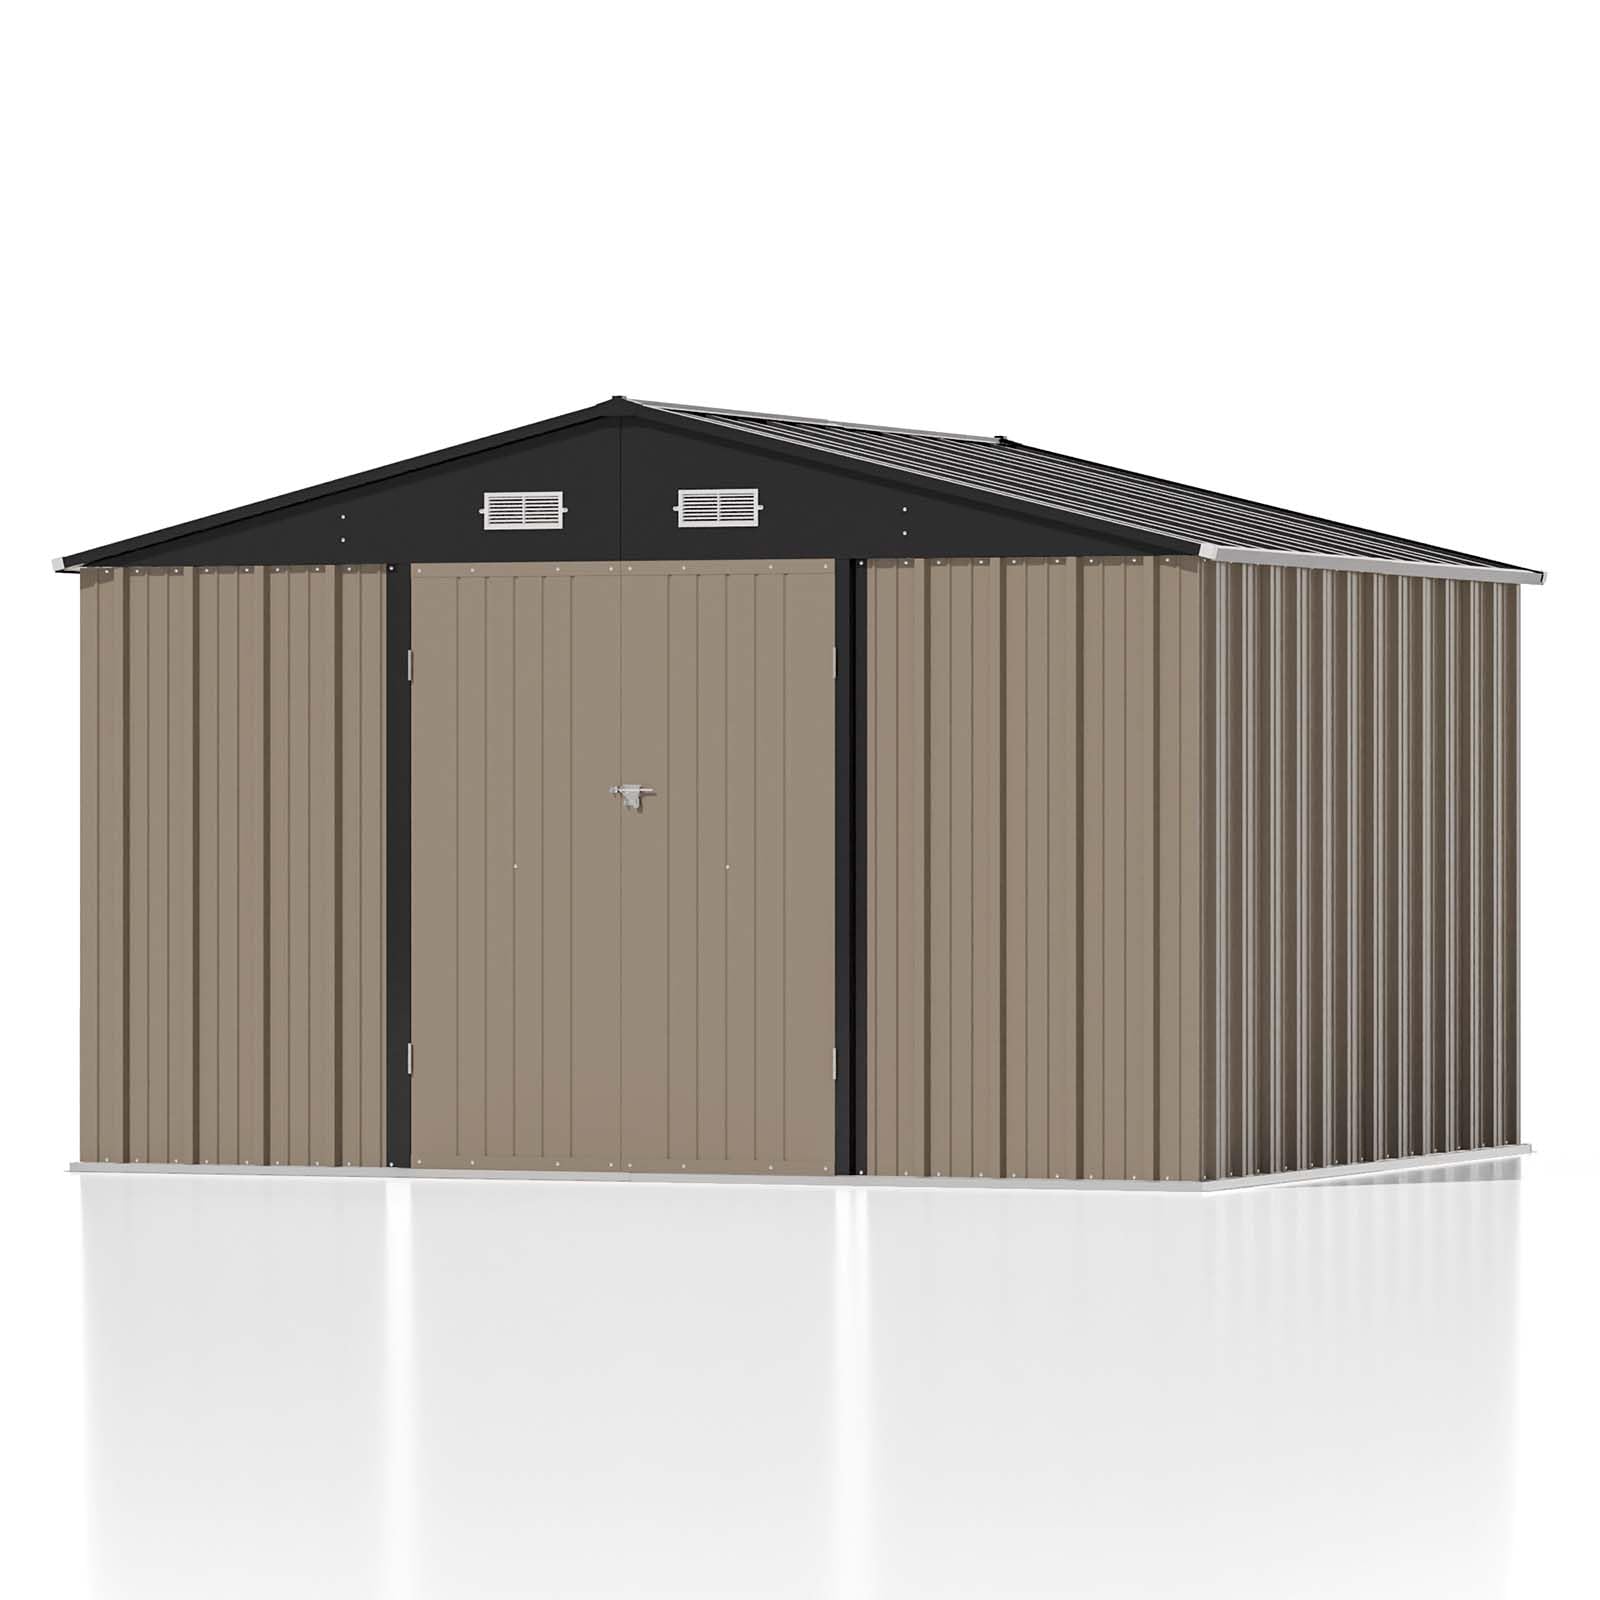
The Patiowell 10 x 8 FT Outdoor Storage Shed offers a robust 431 CU. FT of storage space, designed with a sloped roof for effective rain runoff and lockable doors for enhanced security. Its four air vents promote airflow, preventing moisture buildup, while the pre-cut assembly parts ensure a straightforward setup process. Perfect for organizing your backyard, this shed combines functionality with durability.
| Door Width | 44.4 Inches |
| Door Height | 64.5 Inches |
| Chamber Depth | 80.3 Inches |
| Item Dimensions D x W x H | 108.3"D x 90"W x 75.6"H |
| Style | Garden,Lawn,Lockable,Outdoor,Patio |
| Door Style | lockable door |
| Color | Brown |
| Top Material Type | Alloy Steel |
| Frame Material | Metal |
| Base Material | Alloy Steel |
| Material Type | Metal |
| Is Assembly Required | Yes |
| Weight Capacity Maximum | 440 Pounds |
| Water Resistance Level | Water Repellent |
B**N
Bigger than I thought which was the perfect size we needed.
Not gonna lie it was a pain in the ass to put together and some of the holes didn’t line up by like an eighth of an inch but we just drilled some new ones in the places they should’ve been. Had a few dents nothing major, door closed good a tiny bit off but still works. Looks nice. Without a base on it I can literally pick it up from the center beam and move it anywhere without problems so not heavy at all put all together. Was a fun thing to do with my boys. If I had to buy again I might 😂 would like better instructions though they were a little difficult to read with the pictures being a diagram had to YouTube it and look at the book but wasn’t too hard. Definitely wear gloves, we all got sliced up it’s SUPER SHARP !!
C**S
Great Value for Small Shed
This is a great value for a small shed. It arrived before the anticipated arrival date, and was packaged well. There was a small ding in the box which resulted in a dent on 4 of the corner pieces. Honestly, it’s so minor wasn’t too worried about it.It is NOT the highest quality and the metal material is thin and pretty flimsy. That said, this is a budget shed and still a great value. It assembled easily and there are some videos on you tube although the instructions were well written with very good illustrations. I do have an issue with door closing very tight and I had to flip the latching hasp upside down to accept the bolt (required drilling a small pilot hole for the screw). It was estimated that two people can assemble in 5 hours; I did it myself in less time, in the dark, with a flashlight (would not have been possible in the wind).I’m planning to make some modifications to create an exhaust port, add electrical outlets and use it as a place to keep my generator out of the rain and snow on some rural property.I would definitely buy this again as a smaller budget shed but might not give it a prominent spot if I had a meticulous backyard.
A**R
Patiowell 5x3 FT Outdoor Storage Shed
This 5'x3' shed is surprisingly good quality, and I think a bargain for $125-ish. Here are my thoughts after the install:PRO's:Very affordable.Every single hole except the two tiny little overlapping holes on the middle roof panels lined up. I had to re-drill those 2 holes - no big deal.Door hang perfectly level.Instructions were pretty easy to go from - except for the RH and LH door frame parts and the top and bottom door reinforcement ribs (see CON's for more info).No missing parts, even had a few extra fasteners.Looks good after assembly, finish pant durability yet to be determined.Structure is surprisingly rigid after tightening down all the screws.CON's:Instructions (drawing detail) was not clear enough regarding the top and bottom door reinforcing ribs, just too dang small, I even used a magnifying glass to try to determine the orientation.The manufacturer put the door frame labels over the protective plastic, so when we tore off the plastic, we lost track of which side was LH or RH. After some trial and error, got it figured out.The protective plastic wrap. OH my .... what a colossal pain in the rear. I had seen a couple reviews saying it's a 3-4 hour install. I call BS on that. It took my wife and I about 7 hours and other than the two "problems" mentioned above, it went well. I even used an electric drill for all the fasteners.There were some dents in the metal, about half way up from the ground. I'm assuming from the package being palletized for shipping? I did not notice any damage to the box. Instructions say you can "fix" the dents with a pair of pliers - good luck with that. This shed is not in my back yard where I would notice the dents on a daily basis, otherwise I might have complained, and I did not get to put it together until well after the return period.It did leak a little, but it was a hard, driving rain. If you have something in it that MUST be kept dry, then bag or containerize it.Install tip - do not tighten down ANY fasteners (other than the bottom frame after making sure it's square). Put everything together, then go back and tighten all the fasteners. I believe that is why 99.9% of the holes lined up.Despite the CON's, I'd still recommend this shed. Just allow at least 6 hours to assemble, unless you don't care about removing the protective plastic wrap.
M**K
Almost every panel was damaged.
I bought this shed to cover our well up at our recreational property. We had to get a new well and it had to be outside the old pump house. This shed was the perfect size to cover the well and pressure tank.The box had no signs of damage from shipping. When I unboxed the shed parts almost every steel panel has damage in more than one spot. I needed to cover the well components so i built the shed with the damaged panels. Plus there is no way i could have ever got the pieces back in the box to return it.The shed looks great and will do a good job protecting the well components. The instructions could have been a little clearer at very important spots. I had to disassemble parts a few times because they were backwards. The instructions could have made it clear what direction the piece went instead of having to stare at the drawing to see what direction the part goes.The shed is very sturdy and most of the panels paint surfaces were protected by a plastic film so the paint would not be damaged. It was a pain to peel all that plastic off but it did protect the paint.All the parts fit together well and the pre drilled holes lined up. The metal is a nice thickness and i think it will last years.I am very disappointed in all the damaged panels.
Trustpilot
1 month ago
1 day ago