🛠️ Leak-proof your ride, fast and flawless!
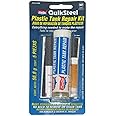
The Versachem 90214 Plastic Tank and Radiator Repair Kit delivers a permanent, chemical-resistant solution for gasoline and diesel fuel tank leaks. Designed for quick application without draining or welding, it repairs holes up to 1/2 inch in under 20 minutes and withstands temperatures from 40°F to 200°F, making it an essential emergency fix for professionals and DIYers alike.
Global Trade Identification Number | 00085117902140 |
Manufacturer | Versachem |
UPC | 085117902140 |
Model | 002-90214 |
Item Weight | 0.01 ounces |
Product Dimensions | 6.4 x 3.5 x 0.8 inches |
Country of Origin | USA |
Item model number | 90214 |
Is Discontinued By Manufacturer | No |
Manufacturer Part Number | 90214 |
R**T
It worked for my backpack leaf blower plastic gas tank (so far)
8/29/18 update - Three years later and this repair is still holding tight! Amazing! It’s essentially a permanent repair if you work on a dry tank and follow directions. My original review is below:I was skeptical about this product for my intended application which was to repair the plastic gas tank on a Husqvarna 155BT leaf blower. A shovel fell and hit the top of the fuel tank leaving a 1/4 inch hole. I tried Devcon plastic epoxy and it worked for a while but then it started to leak again. I tried regular 5 minute epoxy and it was useless. I then tried marine sealer rated for expose to fuel and that was really lame. So my final choice was try Versachem 90214 tank sealer or pay $60 for a new fuel tank and spend a hour or two fooling around installing the new tank.When the package showed up I was even more skeptical about using it for a plastic gas tank. I could not find any data about the product being rated for gasoline exposure on or in the package. I went online to VersaChem's site and that stated that 90214 was rated for exposure to gasoline and diesel fuel but curiously, no obvious data to that effect on the package. The 90214 package contains the two part epoxy in a conjoined plastic pouch. You squeeze the bottom half (black) into the clear upper half of epoxy. You are supposed to knead the joined epoxy components for about a minute. I did that and then emptied the contents into a small plastic cup (not recommended but it better suited my needs) and mixed it another 15 seconds with a tongue depressor (not included in the kit).There is a pint sized flux brush in the kit for applying the epoxy along with a 2" x 4" piece of fiberglass cloth, a similar sized 2"x4" piece of 80 grit sandpaper for roughing up the surface of your damaged tank. I have access to a lot of tools so I cleaned the tank near the leak up with a Roloc wheel on a die grinder - it was a lot faster. One piece of advice, have ALL your prep work done, have disposable gloves on (not included in the kit) pre-cut the fiberglass cloth to fit your needs with a new razor blade or REALLY sharp scissor. Have ALL this done AHEAD of time because once you mix these two halves of epoxy you have less than ten minutes before the product sets up and cannot be spread anymore. It's probably less time in a warm environment - I was working at about 65 degrees.The final epoxy product is gloss black (see photo). This is a once and done deal with the epoxy and it covered and area about 4" x 3" with three coats of epoxy - a base coat followed by fiberglass, covered by fiberglass again and then a top coat. By the time I got to coat #3, the product was beginning to gel up and in another minute, it was hardening - less then 10 minutes total. The instructions said to wait 20 minutes or until the product was barely tacky to add fuel and go. I waited about an hour, filled the tank to the top and ran the leaf blower for about 40 minutes with no leaks.Time will tell how well this holds up but initially it looks good, works as advertised and has not leaked (yet). More to come if/when it leaks. Cheers!
M**W
did not work waste of money
Had a small crack in the plastic on my radiator sanded the area and cleaned it then let dry for a day had high hopes seemed very solid but after 1 days use radiator fluid just leaked out of the edge of product was hoping this bandaid would work not the case time to do it right and replace the radiator
G**N
Works great but very messy and short working time
This kit worked good at repairing the plastic fuel tank on my off-road motorcycle. Follow the directions carefully and I imagine it would work on just about any tank. Here is some important information from my own personal experience with this product:1. There is a VERY SHORT period between the time when you begin mixing the 2 epoxy parts to the time when the epoxy begins to set and is no longer workable. I am not kidding! One moment it was liquid and gooey, the next moment it was firm and I could no longer spread it across the fiberglass patch. So be prepared to work VERY quickly. Have the patch cut to fit and ready to go, and certainly don't waste any time fiddling with anything else besides applying the epoxy and the patch.2. Toward the end of the very short workable period, the epoxy got very hot, nearly too hot to handle. I am not a pansy either, the chemical reaction produces a lot of heat. Be aware of this.3. The epoxy is extremely messy. If possible, place the surface to be repaired in a HORIZONTAL position so the epoxy does not run all over the place as it did on the side of my dirt bike gas tank. If it's not possible or convenient to do this, be prepared to have a mess on your hands... literally. Put down some cardboard so your garage floor doesn't get epoxy stains. Also I recommend wearing rubber gloves (nitrile).Hope this helps you!
D**N
Easy to use and It works amazingly!
I used it on a cracked plastic radiator just as what the product is intended for. The crack was almost 4 inches long and at an easily accessible location (top front near the cap).Warning: the mixed epoxy will set very fast in under one minute to a point you can no longer apply it to the affected surface. Therefore, as other reviewers have mentioned, work in small area (i.e. use small amount and in small batches). I made a mistake for not knowing the setting time of the mixed epoxy so I mixed in the entire package thinking it should cover the entire 4" crack. The amount of epoxy was definitely enough for my application and I was able to apply it onto the entire affected area in time. Not knowing the fast set in time, I was hoping to apply a second coat, but the reset of unused epoxy has already hardened into a rubber like cake (not spreadable).30 min after the application, the epoxy pretty much became the reinforced hardened plastic of the radiator. Drove the car around town just enough for the radiator pressure to build up --- and no sign of leakage so far. Very happy with the result but will consider a new radiator next time if another crack occurs.
I**R
[temporarily] Fixed my plastic radiator / 6 inch hairline crack
It fixed my radiator.Update 3 months later:It completely didn't fix my radiator. There was a ridge that had a crack through it and there was no way it would have ever worked. The ridge was horizontal and the crack was a vertical crack in the plastic tank through the ridge. The rigidity on the radiator was added by the manufacturer (of the vehicle) because it was a plastic tank. Unfortunately, the only fix was to get a new radiator, the crack kept expanding after using this kit.Pros:A really strong carbon fiber patch kit-- for flat surfaces this may actually work as a permanent fixConsidering the materials you're working with and the conditions under which the product is subjected to, the set time is relatively quickCons:The materials are toxic and moderately carcinogenic. That's not goodFiber glass in this manner just doesn't work well over ridges, and most plastic tanks have some rigidity to keep them from cracking in the first place.
Trustpilot
1 week ago
1 day ago