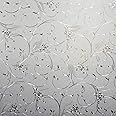
Niviy Static Cling Non-Adhesive Window Film Frosted Glass Bathroom Door Decoration Privacy Covering (17.7"x 78.7")


| Item Dimensions L x W | 78.7"L x 17.7"W |
| Size | 17.7" x 78.7" |
| Installation Method | Static Cling |
| Color | Pure |
| Ultraviolet Light Protection | UV Protection |
| Material Type | Vinyl |
P**E
easier than you think and very effective
So much easier than I expected. I applied it on 3 windows hoping to block the sun and keep the house cool during summer. I can't speak to its effectiveness there yet, but if you are worried this is going to be a difficult chore- it was not.It took me about 30 minutes per window, including cleaning, cutting, and applying the film.. and I did it alone.A few notes- I used masking tape to help remove the backing film, a misting sprayer, a shower squeegee, and water with the tiniest bit of dish soap- worked GREAT! I could slide the film around when the pieces were @ 24 inches long, anything longer seemed to have too much adhesion. One warning- it's full of static electricity so it attracted some cat hair. It didn't seem to affect adhesion, but I suppose it could if it gathers enough fuzz.I chose to buy two sizes and piece them together on the window because the price of the smaller rolls was excellent. I could have lined the seams up better if I wanted to spend more time, but I'm fine with the appearance... it sort of looks like velvet.I'll update later when I have an idea of how much heat it deflects.Update: I've had this on windows for a couple of days. for reference- I live in Michigan and have two windows that get full sun for 3-4 hours in the afternoon. Prior to adding the window film, my house was regularly heating up to 77+ degrees by late afternoon. I do not have central air, so I am looking for a solution to keep the home cool. I put the film on the larger of the two windows. Each day since, it has been sunny with outdoor temperatures in the 60's. The inside temperature has been no higher than 74 degrees. That's at least 3 degrees less and much more comfortable than before I added the film. I expect this will help my portable air conditioner run more efficiently, and possible less often.I'm really happy with the purchase.I also use the white film for privacy, but it does not have the same sun blocking effect, just an FYI.
B**T
Great design and quality, value for your money
As described, frosted with flower design throughout- grandma chic cute! I did not look at the width when I purchased (my fault and too lazy to send back) but still worked on the window great while letting in light.It went on easy and gives privacy that I was wanting. This was my first time ever putting film up and it went great.Overall a great product and would purchase again.
L**M
No more fingerprints on fridge!
Why did you pick this product vs others?:I chose this for the design , it would go with the silver color of the fridge, and it’s cling-NOT adhesive. Good quality and thickness. Easy to cut to size and apply (water backside after removing film and object it’s going on, more water is better). NO MORE FINGERPRINTS-YAY!Value for money:Great priceEase of application:No adhesive! Great cling. Color:Clear frost
A**H
Window film
This is just what I needed on my bathroom window to hide an ugly view. The pattern is beautiful and though you need some patience and skill, the application went smoothly. This window film is lightweight but sturdy. Just make sure before you apply it that the glass surface is very clean. This film replaced a piece of curtain fabric, and it gives me both privacy and added light to a very small bathroom that is facing away from the sun. I would recommend this to anyone!
M**Y
Pretty good
I’ve actually purchased this item multiple times for all my windows, holds up great even in summer heat. I’ve only had one window which was in direct sunlight peel slightly due to half fast work.. great product and looks good if your looking for privacy and still receive plenty of sunlight. Good value too
D**L
Product Looks Good and Easy to install
Easy to cut to size then install. The instructions call to remove a certain amount of the overall dimension but for my application I only took off 1/16" total on both horizontal and vertical directions and it fits very nice. I'd buy again for sure!
D**I
Works Like A Charm!
My sister was getting married and we were having an intimate wedding at home. We wanted to hold the service in front of the bay window. I noticed there was a terrible glare when I tried to take pictures in front of it so thought to purchase the window cling. The product is easy to use and I didn't even use soap and water to have it stick to the window. I put it up a week prior to the wedding and it stayed in place for the special day. The photos I have here are kind of in reverse order but wanted to show the final window first after completion. The price was great and instead of purchasing the larger size for the bigger window, I was able to use two smaller rolls for it and simply line up the pattern. I am very pleased with the results. There was no curling, and it held up like a champ. I recommend using this product even if it's for a temporary situation - it is easy to remove and leaves no residue. If you're looking for a permanent solution it will last and hold up since the first time it was put on the window. I highly recommend this product and give it a 5 star rating.
Trustpilot
3 weeks ago
2 months ago