🔥 Join the elite league of aluminum pros with Hobart’s precision brazing rods!
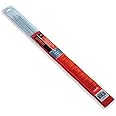
The Hobart 770206 Brazing Rod is a 1/8-inch by 18-inch aluminum rod designed for low-temperature brazing at 700°F. Its self-fluxing formula simplifies aluminum and magnesium joining, making it ideal for professional and DIY applications. Sold in a convenient seven-pack, these rods offer consistent quality and length for versatile use.
| Brand | Hobart |
| Included Components | Brazing Rods |
| Handle Material | Rubber |
| Item Length | 18.13 Inches |
| Upper Temperature Rating | 700 Degrees Fahrenheit |
| Style | Pencil |
| UPC | 715959283809 |
| Global Trade Identification Number | 00715959283809 |
| Manufacturer | Hobart |
| Part Number | 770206 |
| Item Weight | 8.4 ounces |
| Item model number | 770206 |
| Size | 1/8-Inch by 18-Inch |
| Color | Aluminium |
| Material | aluminum |
| Item Package Quantity | 1 |
| Batteries Required? | No |
T**R
These work great if you are careful with your heat.
I tried to get some 6063 angle iron up to 700 degrees to melt this rod and the angle turned to liquid at about 500 degrees. That being said, once it got up to 450-500 degrees these rods melted fine, and held strong. The trick is to watch for the oxide layer to bubble up slightly and then scratch these rods right under it. Once the rods start to melt, the whole process is so easy a child could do it.
S**D
Pertty good
Chainsaw side handle 40+yr , mapgas hand torch . Follow instructions on pack , and it went well . Flows like hot solder. Heat control is key . Flame on & off as needed . Patched major holes & cracks , installed handle . No flux no muss
L**A
Work great
I have used these before. This time to repair a cast aluminum handle 1/4 thick. The key is to scrub the surface with the rod as it just starts to melt in order to clean the oxidation off the part being repaired. I have also used a stainless steel brush in the past but either way you must remove the invisible oxidation. Do that and it will form a very strong joint. Don't do that and the joint will fail.
S**E
Your weld is only as good as your prep.
I've used these on a few things, and wanted to share my experience.These are not a "quick-and-easy" item. To use these well, time and effort needs to go into the weld just like any other type. The trendy thing to use would be MAP gas, but I've had equally good success with propane too.Some things are "Hurry up and wait", these are "wait and hurry up". Aluminum will soak up a lot of heat, and wick it to unheated portions of the parent metal (much more than any type of steel), so you'll need to heat-soak the part for longer than you might expect, even if for small parts. Then, once the part is up-to-temp, you have a few, short moments to get the weld you're wanting.Once the rod starts flowing, it will alloy with your parent metal, which has a lower temperature than it did before. I once tried to get a perfect looking weld by grinding down and re-applying rod to the same part over and over, and ended up inadvertently melting a puddle through the part even through the weld only penetrated a fraction of the thickness of the part. And, no, it wasn't because I overheated the part, it was very localized to where I was welding, not where I was heating, and the remaining metal (which still had the original alloy) was scalloped like it had been eaten away by acid. I can't agree with anyone saying these don't actually weld, the flow WILL erode your parent metal if you're not careful, and it WILL penetrate the joint if you prep properly.Weld prep requires at least an aggressive brushing, but should remove any surface anodization at the point of the weld. I prefer a flap-disk on an angle-grinder. A slight bevel on both sides helps the flow go where you want it. In spite of what I show in my images, I can't recommend an up-hill/down-hill weld, the rod will not "stick" to your prepped surface, but (like I said previously) it will eat away at the parent metal leaving a gouge behind it. Ideally, all surfaces your going to weld should be level (to gravity) to make the rod cooperate more for the 1.5 seconds you have influence over the joint.In my photos, I have two identical (though mirrored) joints for a bracket involving two sections of 1" angle extrusion.The first weld (as it appears in the photos) is actually my second attempt at the weld because my work-holding shattered (sometimes ceramic works great, other times it cracks with great force). I didn't heed my own advice about keeping the weld level, and the two pieces of angle weren't particularly square, resulting in a noticeable gap. This joint (which I've labeled with "Weld 1") had molten rod flow into the valley of one of the pieces of angle. I tipped the part so gravity would feed the metal back into the joint, which re-flowed some of the parent metal. For my purposes, this is acceptable.The second joint (Weld 2) is the result of my work-holding behaving nicely the first time, even if one leg of the weld was uphill. The amount of heat, parent metal, amount of rod, and technique I used were the same in both joints, but the outcome was far better the second time because I took 30 seconds more in ensuring things were flush, square, and prepped.I hope this helps folks get decent results, and have more reasonable expectations.
F**A
Great Product for a Great Price!
Great Product for a Great Price!
A**R
Not sure how to review this product
I’m not sure how to review this product, I bought a tube of this as joke to mess with one of the welders . If you have tig welder , tig the aluminum or if you have a mig process use thatThis stuff will stick something together but it’s not going to be that easy or that pretty. It’s probably not going to save you money . Take your part to a shop that’s qualified to make the repair, the cost probably will be similar
J**G
Good
Is as described
G**G
It made a strong weld.
The brazing rods were used to repair a small hole in an aluminum timing cover for a 1974 Pontiac. The cover material is about 3/16 inch thick and the hole to repair was about 1/8 inch. The entire cover is approx. 6 x 8 inches. I used Mapp gas and a TS8000 Bernzomatic torch. For added heat I placed the cover on an electric burner and set it to max. After a few minutes of heating, the area to repair was approximately 700 degrees f, per thermocouple meter reading. I applied the brazing rod to the hole and it melted and flowed perfectly, filling up the hole and making a bead on the opposite side. The repair turned out excellent and very strong.
Trustpilot
2 days ago
1 day ago