
DOWNLOAD THE APP


Customer Services
Copyright © 2025 Desertcart Holdings Limited
DOWNLOAD THE APP
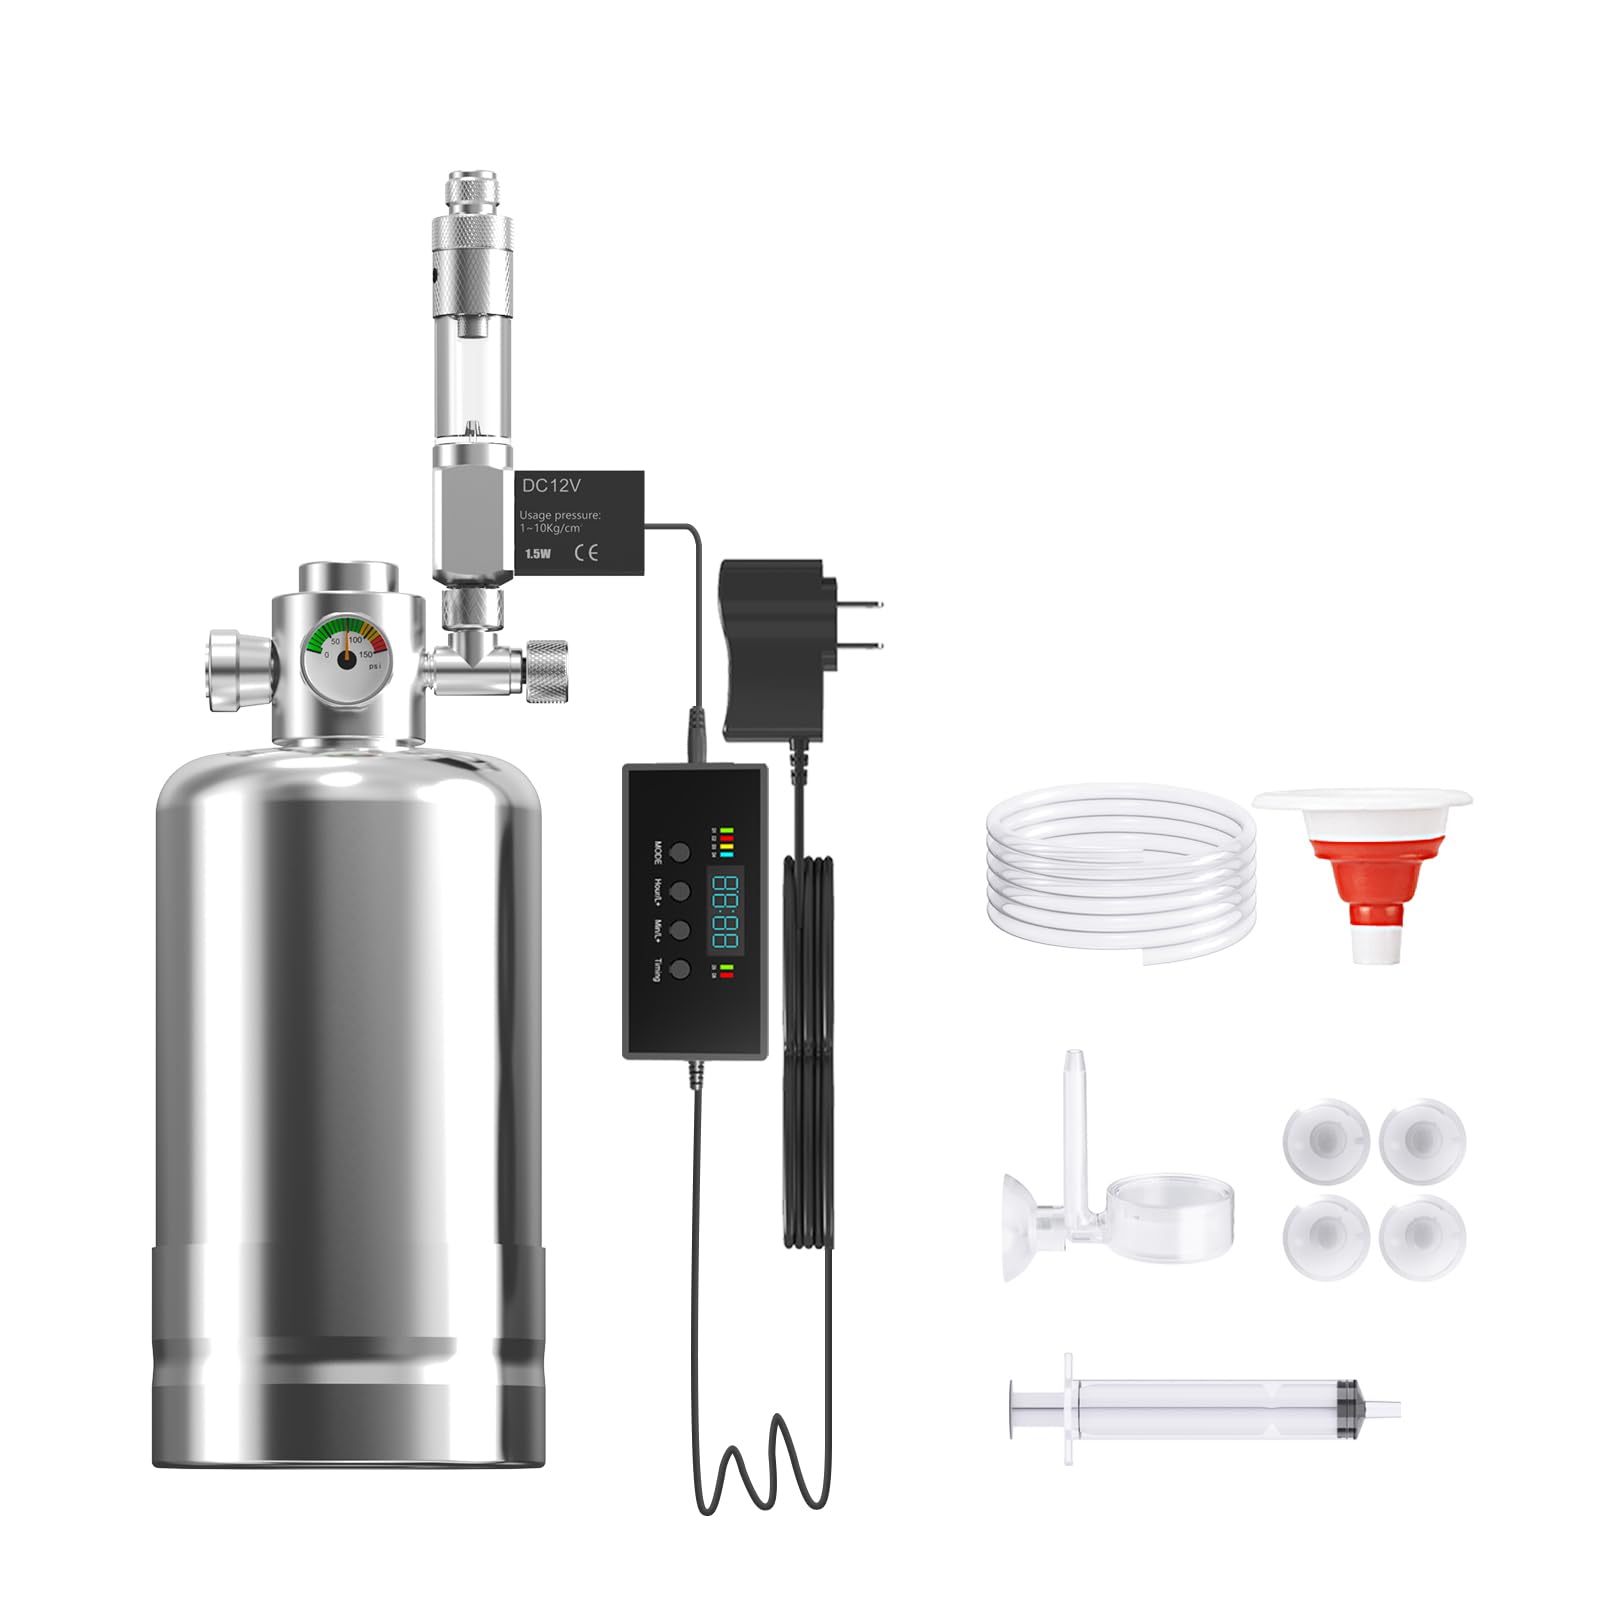
🌿 Elevate your aquarium game with effortless, stable CO2—because your plants deserve the VIP treatment.
The ZRDR Aquarium CO2 Generator System features an upgraded automatic timing motor valve with a stable 12V DC low-noise motor, a bubble counter equipped with a check valve to prevent backflow, and an innovative design allowing water refills without disassembly. It enables cost-effective CO2 generation using common household ingredients, ensuring optimal plant growth and vitality in your aquarium. The system comes as a complete kit with all necessary accessories and clear instructions for easy setup.


| ASIN | B0F87VM92N |
| ASIN | B0F87VM92N |
| Best Sellers Rank | #120,941 in Pet Supplies ( See Top 100 in Pet Supplies ) #587 in Aquarium Air Pump Accessories |
| Brand Name | ZRDR |
| Color | 1L |
| Customer Reviews | 3.7 3.7 out of 5 stars (339) |
| Date First Available | June 16, 2024 |
| Date First Available | June 16, 2024 |
| Directions | Aquarium feeding |
| Included Components | accessories |
| Item Package Dimensions L x W x H | 13.43 x 4.53 x 4.41 inches |
| Item Weight | 2.7 pounds |
| Item model number | FSQDJ-X-1L-FX |
| Item model number | FSQDJ-X-1L-FX |
| Manufacturer | ZRDR |
| Manufacturer | ZRDR |
| Package Dimensions | 13.43 x 4.53 x 4.41 inches; 2.71 Pounds |
| Size | 1L |
| Specific Uses for Product | Indoor |
| Target Audience Keyword | fish |
T**N
Great all inclusive CO2 package
You get exactly what you see in the pictures. I got the $99 one with 2 pressure meters for low and high. And the quality of the components are pretty good. The CO2 takes a few hours for it to build up pressure. It starts fast then slows down a lot to the point where it seems it stops reacting, but within about 4 hours, the pressure in the canister was at 10 and by the next day it went to 20. Within the first 30 min, the canister gets cold on the bottom from the chemical reaction, so place something underneath it to capture condensation. Also the solenoid gets really hot, but seems to work just fine. I've seen others note this too so maybe that's how it is designed? Only time will tell how long the solenoid will last. Otherwise, a very solid package. ***Update 11/25/2020 Everything still works fine. Very easy to refill. Sometimes, I get crusties at the bottom and I just use a long wooden stick to break it up so it comes out.
T**G
Best Co2 tank for planted aquarium
After hours of research on Co2 tank kit, I finally found a “nearly perfect” Co2 tank kit which is the magtool that fit my budget. But this one is even a better price! Like bruh! Dont go for those brand one that charge you like an arm and a leg. Trust me, you need Co2 if you plan to start a planted aquarium. This is my Co2 tank kit first one is magtool and second one is this one. No leak whatsoever. I’ve always failed to start a planted aquarium without using Co2 and just focusing on aquarium plant. Hella algae and I gave up. This is the first time and I said F it and just get myself a Co2 tank with citric acid and baking soda as a reactant to get Co2. It sounds easy to go to a store and refill your Co2 tank but I’m too lazy and I live in the Bay Area, and I yelped and found that they charged like $15 to fill up a 4L Co2 tank. So I just use the baking soda and cictric method for a cheaper price and dont have to go anywhere. Baking soda from Arm and Hammer get you like 13.5lb for $12 at Costco. Citric acid is like 6lb for $23 with Milliard. Every reaction, you only need to spend like $5.2 per 4L for Co2 bottle with 450 - 550 PSI. People are really bad with math on here like bruhh, use freaking chatgpt if you are bad at math and chem. To sum it up, to create Co2, for every mole of citric acid you need 3 mole of baking soda. So you need 457g of citric acid and 600g of baking soda with 934mL of water to produce approximately 641psi of Co2. This is based on perfect calculation, usually you will get around 450 - 550 psi of Co2. 1:1.3129 (citric acid, baking soda) Water required to dissolve citric acid: For 457 g of citric acid: 457g/148g/100 mL=3.09× 100 mL=309mL of water Water required to dissolve sodium bicarbonate: For 600 g of sodium bicarbonate: 600g/96g/100 mL=6.25× 100 mL=625 mL of water This is the reason why you need 934 mL of water to dissolve everything correctly. Just plug in different gram of baking soda (sodium bicarbonate) and citric acid to get your required water. Since citric acid is more expensive than baking soda that you can get in Costco, I set the citric acid as a limiting reagent. TLDR; remember 1gram:1.3129gram (citric acid, baking soda) then calculate the required water to dissolve everything! Now you just need to add those baking soda, citric in and shake that stainless steel and add water at an angle. Easy peacy no cap. The diffuser for this suck, similar to the magzone one, so buy a different diffuser from fzone or something. My first time starting the magzone one and I stare at the freking thing for like 3 hours with no Co2. Keep thinking there is a leak or something but it’s the bad diffuser and searched all on reddit….. get yourself a different diffuser. Now I know to get an extra diffuser for this brand too, cause this diffuser kinda bad and make noise like the hell? Also get yourself an alexa outlet or something outlet with a timer that you can control with your phone for your solenoid. Since I use this Co2 tank with a Siesta Method. No algae whatsoever!!! First time I got no freaking algae with this algae and maximum brightness. I got 4 tank and I used hygger and Brite light. Brite light is the best trust me. Easy to set up and can set up when it is turn on in correlation with your Co2 turning on. The Co2 tube is kinda rigid to stick it to the bubble counter. I kinda have to use a lighter and loosen up to tie the nut to the bubble counter. Co2 7-11am on 3-9:00pm on Light 8-12on. 12-4pmoff 4-10 on One hour before light turn on to build up Co2 for the tank so plant can use right away. 1 hour turn off before light turn up so light can use all excess Co2. First time setting my planted aquarium and it grows beautifully without algae. Im obsessed with growing plants now haha. Look at my red lotus before and after photo. It exploded! Oh I also added easy green fertilizer everyday too and no algae compared to the bad thrive NA and flourish excel that kill my snail and shrimp. The CO2 PSI in the photo that I have is after 2 weeks of 3bps and still around 500 PSI remain. Way better than those refilled Co2 tank. When I first add all the ingredients, it is only go up to 100PSI but the next day it jumped up to 400 PSI and has remained at 500 PSI since.
C**K
What a Waste of Money
What a waste $96, and another $35 in citric acid and baking soda. Worked great for 2 or 3 months, then it started to leak. After filling it and building up the pressure, it works ok for about a day, but then for some reason it goes flat again. Made sure that everything was nice and tight, but it still leaks. Now I have to do what I should have done in the first place; find a cheap tank on craigslist.
D**E
Not really recommened for grow tent/room
Well this product does what it says it will do, however if your using it for a grow tent you should be aware the Co2 won't last you very long, especially if your tent is not 100% sealed. Any fans or exhaust systems will deplete levels very quickly. I used the whole tank up in a single day trying to keep it at the very least around 900-1200 ppm and it really never maintained the 1500 ppm that is suggested. This tank is rather difficult to control and figuring out how many bubbles per minute and size of bubbles is a real pain. There were times I set the bubbles at the rate I wanted only to come back an hour later and it wasn't bubbling and the ppm was way back down. I don't really recommend this for growing, it's use for aquarium is probably spot on but it's too difficult to find the right setting with the valve and it lacks consistent dispersion. It gets costly when it comes to the citric acid and the amount needing to be used when it needs to be recharged every couple of days at most. I would also like to note that the tube you fill with water leaks horribly and need to be refilled often (if you care to see the bubbles) a little Teflon tape helped but didn't fix the issue completely. As for the quality of the product, I would say it's made well. It does run rather hot so be careful.
B**O
Premièrement, L objet est beau , facile. À utiliser , les proportions pour créer son CO2 sont sur la bouteille elle même , de plus il est robuste . Le seul petit soucis est les jauges, pas très précis , mais la libération et le réglage du débit de CO2 se font facilement ,cet objet va me durer des années , donc vite rentabilisé
D**.
So easy to set up for co2 injection for aquarium,baking soda,citric acid and water.Great product.
M**L
Very easy to set up. Comes with everything you need. Plants growing fantastically as you would expect. Highly recommended.
Trustpilot
4 days ago
1 month ago