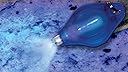


ProCaliber Products Granite & Marble & Quartz & Cultured Marble Chip & Nick Repair and Fill Kit for Countertops, Sinks, Tubs and Tile - Clear LCA Flowable Nano-Gel: Tile Epoxy Adhesives: desertcart.com: Industrial & Scientific Review: Excellent Product with Excellent Results - I used this kit to repair a chip in a dark granite countertop, along the edge of my recessed sink. The chip was about the size of a dime, and about 1/16 inch deep. I was skeptical as to what to expect. The finished result; however, came out better than I imagined. I literally cannot see the repair, unless at an angle with a light shining directly on it, and even then, it is difficult to see. If I didn't know it was there, I would never notice it (and I'm fussy). I admit I didn't exactly follow the directions, and I think this is why the result came out as well as it did... but do at your own risk if you want to vary from the kit directions... What I did: First, I did follow the directions with the kit in that I used acetone to thoroughly clean the chip out, and let it properly dry. I then taped the clear plastic sheet to the lip of the marble (the edge of the sink), and followed the directions on how to apply the product with the syringe. This is where I did things differently. I applied enough of the product to (very) slightly overfill the area worked. Forming the clear plastic sheet to the shape of the lip chamfer was simple, as it is very thin plastic. I then suspended the blue light between two coffee mugs, each placed on either side of the chip, with a piece of tape suspending (bridging) the light through the attached key ring. I centered the light from the suspended piece of tape, focusing it on the chip. I walked away and let it sit for about 20 minutes like this. I then removed all tape from around the fill, and used a single-edged razor blade, laid parallel to the countertop, to shave the repair area with several gentle passes, each time removing a small amount of the material (think of a wood plane blade against wood). The edge of the repair, where it met the granite, showed a "white" edge, until I shaved it to exactly flush with the countertop, at which point, the "white" vanished. The granite is hard enough that you won't scratch it with the blade, and the thickness of the tape would have just messed up my ability to get the area exactly flush with the granite surface anyway. Once level with the granite and smooth to the touch, I then re-hung the light over the cleanly-shaved repair, between the coffee cups, as before. I let it sit another 15 minutes like this. At this point, the repair was smooth but looked very dull (almost gray). Once I took the light off the second time, I used the kit's polish and cloth to buff it to a match with the existing granite. The color returned to exactly match the granite when polished. I never used the included sandpaper, and suggest against doing so, as feel that it would have only given moderate results. It would have been difficult to keep the surface exactly flat if sanding the product to the granite edge... especially if there had been masking tape in the way. The razor blade did a far superior job at keeping things level and smooth, and was the key to making the repair look as nice as it does. It has been over a month and the repair has proven to be very permanent. I have no hesitation on recommending this product. Review: Works as described - I am usally terrible at writing reviews. But after reading some of the negative reviews on this product, I felt like I just had to write a review of how it worked for me. As soon as I received it I opened up the package and tested the LED light. It was nice and bright which made me feel comfortable that the product was probably going to work as described because most of the bad reviews had an LED light that didnโt function as well as it should. I found the instructions to be very comprehensive and very easy to follow. I also googled for videos and found a video that showed a demonstration on how to use the product. The reason I purchased it was I have a granite countertop that had developed half a dozen pits very close to the fawcett. These pits were from a 16th of an inch diameter up to about 3/8 of an inch diameter and anywhere from about a 32ndโ to a little over a 16th of an inch deep. I did three of the pits at a time that were grouped pretty close together where I could build the masking tape framework. I followed the instructions closely being very careful not to overfill. This is very important because if you overfill the holes you are going to have a very tough time getting them cleaned up and sanded down properly. Once I got to the point where I need to cure them, I put the LED light very close to the pits and kept it on for a full threes minutes. One thing I noticed was if you watch very closely you can actually see the product cure as it turns from glossy wet looking to somewhat of a dry dull matte finish as it cures. I wish I wouldโve taken a before picture. But I forgot. The picture I attached is the Countertop after I completed the finish and unless you know the pits are there you would never be able to tell that there is any issue with the countertop. I am very satisfied with this product.


| ASIN | B001CMSD3G |
| Brand | Procaliber Products |
| Brand Name | Procaliber Products |
| Color | Clear |
| Compatible Material | Acrylic, Corian, Fiberglass, Granite, Marble, Plexiglas, Quartz |
| Customer Reviews | 3.9 out of 5 stars 1,257 Reviews |
| Included Components | (1) Light-Curing Acrylic Repair Gel Syringe |
| Item Dimensions | 7.09 x 3.15 x 1.57 inches |
| Item Form | Paste |
| Item Weight | 2 g |
| Item dimensions L x W x H | 7.09 x 3.15 x 1.57 inches |
| Manufacturer | ProCaliber Products |
| Material | Light-Curing Acrylic Nano-Gel |
| Material Type | Light-Curing Acrylic Nano-Gel |
| Model | 10-11-711 |
| Number of Items | 1 |
| Part Number | 10-11-711 Clear LCA |
| Style | Compact |
| Style Name | Compact |
| Surface Recommendation | Countertop, Tile, Tub |
| UPC | 890894002002 |
| Unit Count | 1 Count |
| Water Resistance Level | Waterproof |
J**M
Excellent Product with Excellent Results
I used this kit to repair a chip in a dark granite countertop, along the edge of my recessed sink. The chip was about the size of a dime, and about 1/16 inch deep. I was skeptical as to what to expect. The finished result; however, came out better than I imagined. I literally cannot see the repair, unless at an angle with a light shining directly on it, and even then, it is difficult to see. If I didn't know it was there, I would never notice it (and I'm fussy). I admit I didn't exactly follow the directions, and I think this is why the result came out as well as it did... but do at your own risk if you want to vary from the kit directions... What I did: First, I did follow the directions with the kit in that I used acetone to thoroughly clean the chip out, and let it properly dry. I then taped the clear plastic sheet to the lip of the marble (the edge of the sink), and followed the directions on how to apply the product with the syringe. This is where I did things differently. I applied enough of the product to (very) slightly overfill the area worked. Forming the clear plastic sheet to the shape of the lip chamfer was simple, as it is very thin plastic. I then suspended the blue light between two coffee mugs, each placed on either side of the chip, with a piece of tape suspending (bridging) the light through the attached key ring. I centered the light from the suspended piece of tape, focusing it on the chip. I walked away and let it sit for about 20 minutes like this. I then removed all tape from around the fill, and used a single-edged razor blade, laid parallel to the countertop, to shave the repair area with several gentle passes, each time removing a small amount of the material (think of a wood plane blade against wood). The edge of the repair, where it met the granite, showed a "white" edge, until I shaved it to exactly flush with the countertop, at which point, the "white" vanished. The granite is hard enough that you won't scratch it with the blade, and the thickness of the tape would have just messed up my ability to get the area exactly flush with the granite surface anyway. Once level with the granite and smooth to the touch, I then re-hung the light over the cleanly-shaved repair, between the coffee cups, as before. I let it sit another 15 minutes like this. At this point, the repair was smooth but looked very dull (almost gray). Once I took the light off the second time, I used the kit's polish and cloth to buff it to a match with the existing granite. The color returned to exactly match the granite when polished. I never used the included sandpaper, and suggest against doing so, as feel that it would have only given moderate results. It would have been difficult to keep the surface exactly flat if sanding the product to the granite edge... especially if there had been masking tape in the way. The razor blade did a far superior job at keeping things level and smooth, and was the key to making the repair look as nice as it does. It has been over a month and the repair has proven to be very permanent. I have no hesitation on recommending this product.
R**G
Works as described
I am usally terrible at writing reviews. But after reading some of the negative reviews on this product, I felt like I just had to write a review of how it worked for me. As soon as I received it I opened up the package and tested the LED light. It was nice and bright which made me feel comfortable that the product was probably going to work as described because most of the bad reviews had an LED light that didnโt function as well as it should. I found the instructions to be very comprehensive and very easy to follow. I also googled for videos and found a video that showed a demonstration on how to use the product. The reason I purchased it was I have a granite countertop that had developed half a dozen pits very close to the fawcett. These pits were from a 16th of an inch diameter up to about 3/8 of an inch diameter and anywhere from about a 32ndโ to a little over a 16th of an inch deep. I did three of the pits at a time that were grouped pretty close together where I could build the masking tape framework. I followed the instructions closely being very careful not to overfill. This is very important because if you overfill the holes you are going to have a very tough time getting them cleaned up and sanded down properly. Once I got to the point where I need to cure them, I put the LED light very close to the pits and kept it on for a full threes minutes. One thing I noticed was if you watch very closely you can actually see the product cure as it turns from glossy wet looking to somewhat of a dry dull matte finish as it cures. I wish I wouldโve taken a before picture. But I forgot. The picture I attached is the Countertop after I completed the finish and unless you know the pits are there you would never be able to tell that there is any issue with the countertop. I am very satisfied with this product.
W**N
Great results for a home fix
I had a particularly difficult repair; a corner chip about the size of a pea. I was skeptical that a home repair kit could do the job, but I figured it was worth trying for just about $25 - the worst that could happen is that I'd have to hire someone to repair my repair. After using this product though, I don't think that's going to be necessary as the results are good enough that I barely notice the chip now. First, using the kit is very straightforward; prepare the area by cleaning and taping it off, then attach one of the two included tips to the syringe and apply to the chip. I was very cautious not to over-apply, which resulted in a repair that didn't need much sanding. After curing with the light for a good 4 minutes and 30 seconds, I removed the tape and cured it a bit more around the sides. After all that, it was hard enough to the touch that I could sand right away. After sanding a bit I noticed that there were some areas that weren't as filled in as I would like, so I added a few more drops and repeated the process. When all was done, the chip was filled in and though there are just a few lines where the acrylic meets the stone, it is barely noticeable if I'm not looking for it, and that's good enough for me. My only complaint about the product is that the acrylic is clear, which means that it doesn't really match its surrounding. On some surfaces and with the right placement of the chip, this might not be noticeable at all, but on my super-white quartz counter-top, with the chip at the corner, it does stand out. Luckily because my counters are super white, I was able to add a little color on top of the first coat of acrylic before applying the second coat, and was able to get a pretty good color match. I'd like to see this kit come with a color matching kit of some sort that allowed users to mix their own color with a preferred coloring agent that could be mixed with the acrylic - I suspect that's how the "pros" do it, and it's something that would make a big difference for this home repair.
T**R
Waste of money! Poor customer support.
Don't buy this product. I followed instructions to the letter. Product would not cure. Called customer support, was told to use Acetone to harden filler (which I had to go out and buy). Nothing in instructions mention that product may not cure correctly. I was told that humidity, temperature, etc would make a difference. Again, nothing in instructions telling you about possible problems. Since I didn't dab Acetone on repair I lost some filler and now need to buy a second kit. Since the instructions don't mention possible problems you would think the company would at least send a replacement kit. Customer service said I should write in and maybe owner will send more filler or a refund. What should have been a simple repair turned into a nightmare. My time is more valuable! As long as your repair goes correctly it's alright. If it doesn't forget it. Better to find a alternative product than deal with these people. Customer service lady acted like I wanted them to send me a ounce of gold instead of small inexpensive tube of filler.
A**E
Great product
When I see an ad that "granite is indestructible", I want to say "meet my husband". So, we had several smaller nicks and a big one. 3 things that helped me with repairs: I started with smaller nicks to practice; I used a single razor blade to shave the filled area flat to the surface instead of sanding; and I suspended the curing light between 2 teacups to allow more time for curing than recommended. As a result, even though I know where smaller repairs were done, I can hardly find them. I was really concerned about the big repair because it was a bit more than half an inch wide & about as deep, AND on the counter edge, AND in a highly visible place. I started with sanding the nick & cleaning it with alcohol. Taped the clear plastic below the nick, filled it with gel, bent the plastic to cover, & taped it above the nick. I suspended the curing light between a chair back & a teacup for 20 min. Removed the plastic to discover that I didn't add enough gel in the deepest part. Added more gel, taped, & cured for another 15 min. Shaved it flat to the surface at the edges & cured without the plastic for another 10 min. This restored the edge but because the repair is so wide & deep that the light couldn't be reflected off the inner granite surface, it looked like a milky white blob on my mostly black granite. I used a permanent black marker on the blob, and then polished it with provided paste. Even though the repair is not invisible, of course, one can't find it unless one knows where to look & looks really closely. I spent a couple hours on all repairs (had to redo the first one two times because the gel was removed with the plastic when cured for only 5 min) but I couldn't be happier with the results. Good luck with your repairs!
R**.
Maybe it would work better on smaller cracks on a just flat part of ...
Not very impressed with it. Maybe it would work better on smaller cracks on a just flat part of the surface. I have 3 pretty deep cracks that go over the edge to the underside of my counter. The "curing strip" provided was not really enough to cover all of the areas so I cut it into several smaller strips and used it for just the top part since that is most visible. Also, because of the curved edge of the counter they did not stay down and kept popping back up. Now because my cracks are pretty big I was not expecting this to make them disappear. I really just wanted something to seal them with so that they do not get worse. For that purpose this product seems to work well, but I had a pretty hard time getting it to cover the entire cracks. When I put the curing strip on it seemed to shift or remove some of the adhesive I placed so there are a few gaps were the gel did not seal. The curing process was a bit time consuming, again because of how much area had to be covered and cured. The light provided was very small so it took a long time to hold it over each part of each crack to seal the gel. However, I guess if you just have one small crack, the process might not be as difficult. I attached pictures that show my cracks before and after the "seal". I am not the handiest person so maybe I didn't sand it down enough. The parts were the gel did fill the gap, it did a decent job sealing it. I just found it to be a little difficult to get it in all the areas properly.Perhaps if they had a kit with a bigger light, a larger curing strip and essentially for larger cracks it would have been be more efficient. For minor cracks, however, it might do the trick.
A**B
Worked Perfectly For Me
I had two chips in my 5 year old granite counter top, which is a variegated beige/brown/dark brown mix. One chip was very sharp to the touch, on the edge and top of the counter, perhaps 1/8th of an inch wide and a little deeper. I'd call it a gouge. The other chip was on the counter edge of the kitchen sink, about a 1/4 inch wide, and 1/8th of an inch deep. The first chip needed to be repaired, as someone could literally cut themselves on the sharp edge. The latter was an aesthetic repair, noticeable as it was next to the sink and in the light of the window. After watching a few YouTube videos, I searched Amazon for repair products. This ProCaliber repair kit had fairly good reviews, including a lengthy review which discussed the benefits of taping the blue light to a glass, allowing for optimum curing time. I was dubious, as these products often look and work good in "infomercial" settings, but not in real life. The small (easy to open) package arrived, and I followed the directions closely. Then I used the blue curing light, taped to a glass, and allowed for 10 minutes on the smaller repair, and 15 minutes on the larger repair. The results were better than I expected. If I were to ask someone to find these repairs, I don't think they would be able to do so. They are smooth to the touch, and extremely difficult to see. They did dry clear for me, and after a few days, still look great. There is probably enough epoxy in the syringe for another few repairs, assuming it doesn't dry out. From my experience, this was a great product, and I'd reorder if/when needed. Tip: It's not obvious from the directions, but keep the curing strip on until the epoxy has hardened, which was about 10 to 15 minutes for me (it's really just a small plastic sheet about 2 inches square).
U**R
Works well to fix even a difficult chip
I think the first thing with any repair product is to be realistic about what the finished results are going to be like. Obviously in an ideal world I would want there to be no evidence that there was ever a chip in the granite. However, I am cynical enough to realize that a 10-minute quick fix kit just ain't gonna make this happen, so all I really want is for this to be a pretty good repair (pretty being the operative word here). That being said this kit does indeed do a pretty good job. The instructions are easy to follow, although be careful not to lose the "curing strip", as this is only a transparent square of flexible plastic and I was expecting more. We had a chip on the corner of a sink top and this has done a good job of repairing it (see photos) despite it being in what I would consider a difficult place to repair. I think the kit would be excellent for a more straightforward chip away from an edge. The whole repair took about 30 minutes. Also be aware that you will need alcohol or acetone to clean the repair as this is not supplied. It was not a problem for me as my kids seem to paint and repaint their nails almost daily so we are awash with acetone-containing nail polish remover.
Trustpilot
1 month ago
4 days ago