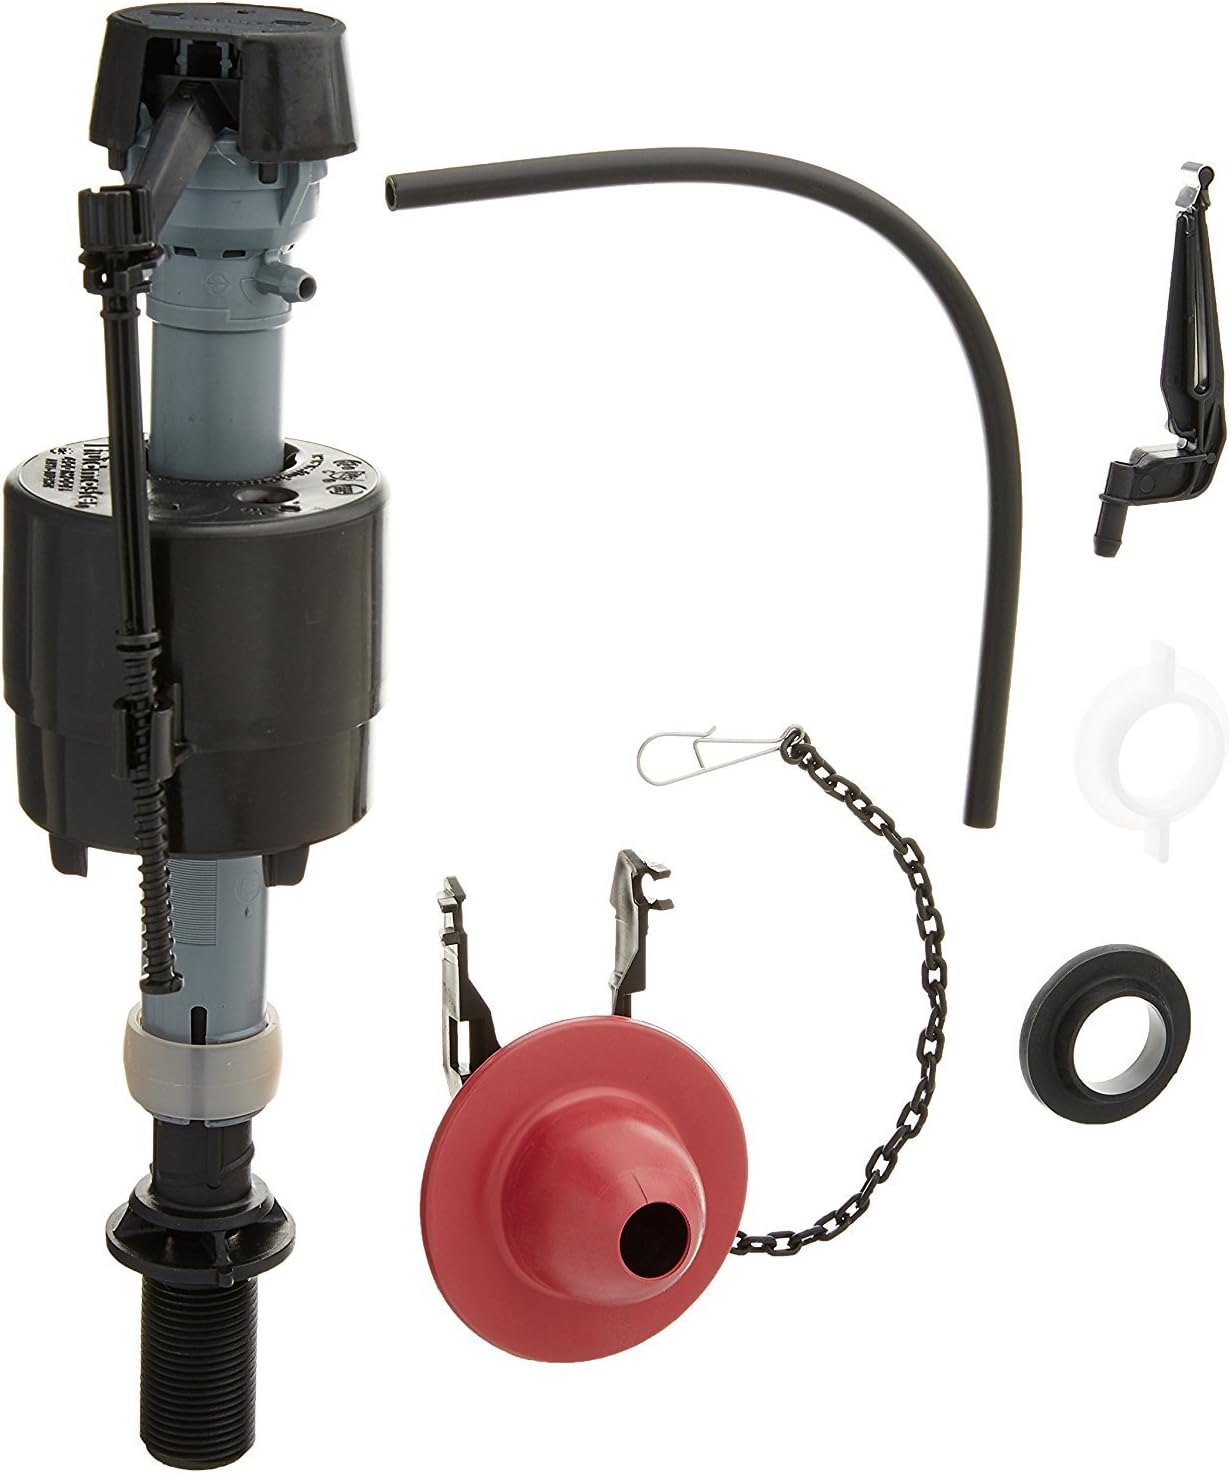
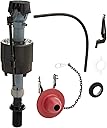
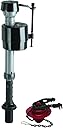
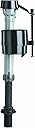
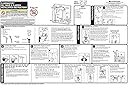
🚽 Upgrade your throne with quiet, reliable flush power!
The Fluidmaster 400CRP14 is a USA-made toilet repair kit featuring an adjustable anti-siphon fill valve (9-14 inches) and a 2-inch Microban-treated flapper. Designed to fit most 2-inch flush valve toilets using 1.6 to 3.5 gallons per flush, it offers corrosion resistance and easy installation in under 10 minutes, solving common noisy and running toilet issues efficiently.
Material | Chlorine Resistant Materials |
Brand | Fluidmaster |
Item dimensions L x W x H | 3.71 x 6 x 15.76 inches |
Inlet Connection Size | 2 Inches |
Inlet Connection Type | Threaded |
Outlet Connection Type | Threaded |
Number of Ports | 2 |
Outlet Connection Size | 2 Inches |
Specification Met | Simplified design eliminates old brackets, lift wires and assures positive alignment |
Valve Type | Adjustable Anti-Siphon |
Global Trade Identification Number | 00039961402707 |
Manufacturer | Fluidmaster |
UPC | 796716388920 796716399773 039961402707 |
Part Number | 400CRP14 |
Item Weight | 9.6 ounces |
Product Dimensions | 3.71 x 6 x 15.76 inches |
Item model number | 400CR |
Is Discontinued By Manufacturer | No |
Size | 1- Pack |
Color | Multicolor |
Style | 400CRP14 |
Pattern | Kit |
Shape | shape |
Item Package Quantity | 1 |
Special Features | Water resistant |
Usage | Amateur, Professional |
Included Components | 1 pk |
Batteries Included? | No |
Batteries Required? | No |
R**B
Commode fill valve
Best price around 👍
P**A
your standard flush valve - easy to install and durable.
easy to install even if you do not need to read the instructions.
M**D
Perfect for the low toilet tanks but don't use the flapper
I have a low toilet tank. It is 9 1/2 inches high. Most if not all sold at the hardware stores including the big box stores sell the standard 10 inch valve. I have used the 10 inch and it never allows me to close the tank. Also in time the bottom of the valve will crack. This one starts at 9 inches and can expand to 14 inches. This one fit perfectly and allowed the tank lid to close.The installation is so easy, just remember to turn the water valve off first. Always easier when there is no running water! You don't need any major tools. All can be done with just your hands. Easy to screw on and screw off. Can be done in 15 minutes.The noise on this is average. I have had the low-noise valves and the only difference is a piece of foam. The foam muffles the sound. Also that foam expands with time and makes your toilet into a slow fill tank. The only way to remedy that is to remove the foam which can be done and easy to do. Or you can buy a new valve with no foam. Flushing noise is better than a toilet that takes 5 minutes for the water tank to fill.The only gripe I have is the flapper. It sticks so don't use it. You will have to buy a flapper or keep your old one.
J**M
Sometimes you need more than just a new flapper...
I've already reviewed the flapper (stopper) separately so I'll just summarize and say that after adjusting the pull chain length (30 seconds) and perhaps cleaning off the edge/surface against which the flapper seals, it stays up when you flush and then seals well every time. I've replaced all the flappers in my house using this particular brand/model. Sometimes, however, your toilet might need a little more "love" and that's where this set comes in handy. Whether your toilet continues to run/fill even after the flapper comes down because the internal mechanism is worn out (you know...the kind with the arm and ball float in the tank) or because you might want to reduce the amount of water used per flush (while still insuring that enough water is used to make sure all the stuff that's supposed to go away actually goes away) this is an excellent option. There are other options that have more ways to adjust tank and bowl water levels, but I'm always skeptical about the devices with all those knobs and levers...too many ways to fail. As long as there's no issue with the joint where tank meets bowl or other plumbing issues (which would require other fittings and hardware) you can return two toilets to functionality and with a little tinkering, reduce water usage (saving water and saving on water bills). This is also a very simple do-it-yourself project that will potentially save you hundreds on a visit by a plumber. One qualification: although in my experience, the flapper has worked well for many years without need of replacement (well beyond the warantee period), I don't know how long the fill mechanism will last. I have a similar mechanism in one toilet in my home which is still going strong for more than a decade but this version is a newer model.
C**.
Read and Follow the Instructions Carefully
I bought this assembly to replace an old ball float assembly toilet system which was leaking continually and wasting water. I was a little skeptical at first, but I thought I would try this system which is so much different that the old ball float system.Please read the instructions carefully and make sure you have a tape measure, bucket, large sponge, towel, wipe rag, non-scratch scrub sponge and pliers handy before you start. Also mark the water line in the holding tank before you drain the toilet tank (some toilet manufacturers already have a water line etched into the side of the water holding tank - look at the interior of the water tank to see if there is already a water line mark there). Turn off the water connection to the toilet (underneath the toilet generally) and flush the toilet to drain the tank. Before you loosen the water line connection to the tank, make sure you place an old towel underneath the tank on the floor to catch any water that drains from the shut-off water line once it's disconnected. If you have a hard time loosening the water line from the toilet tank by hand after it is shut-off, carefully use a pair of pliers to assist with the loosening of the water line connection.Use a large sponge to extract any left over water in the tank and wring out the sponge in an empty bucket until there is no longer any water in the tank (completely drained). I then used a rag to wipe down the interior of the tank and used a Scotch-Brite non-scratch scrub sponge to remove any built up water deposits and to also clean the flapper drain pipe (the surface opening where the flapper sits on). Make sure you clean up any debris inside the tank before you start installing the new system.NOTE: Follow the supplied instructions carefully, especially relative to the tank water line and measurements needed on the proper installation of the system! Make sure the float clears the sides of the toilet when installing. Also make sure you trim the supplied tube as needed and DO NOT over-tighten connections when installing. The manufacturer also recommends that you do not use any dissolving chlorine tablets in the tank as they may possibly damage the system (see the instructions for more information).Once installed I found that the system works great and I no longer have any "water leak" issues. Hopefully this system will last just as long as the old ball float system did.
D**N
Nice ballcock
Great lil ballcock!
Trustpilot
2 months ago
2 months ago