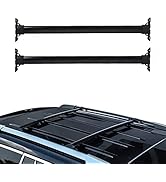
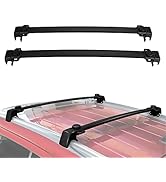
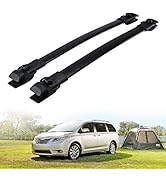
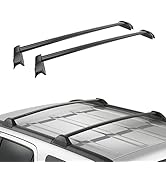
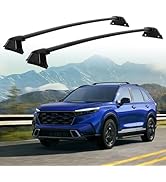
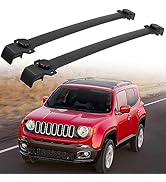
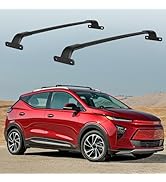
๐ Elevate your Mazda CX-7 adventures with sleek, sturdy roof racks that carry your lifestyle.
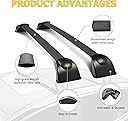
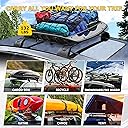
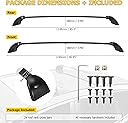
The Auxmart 2-piece roof rack cross bars are precision-designed for Mazda CX-7 models from 2007 to 2012, featuring aircraft-grade aluminum construction and ABS plastic for lightweight durability. Measuring 43 inches in length and supporting up to 165 lbs, these black cross bars provide a reliable platform for transporting luggage, sports gear, and outdoor equipment. The package includes all mounting hardware and brackets for easy installation, making it the ultimate cargo solution for active professionals on the go.


| ASIN | B016UC3IS2 |
| Automotive Fit Type | Vehicle Specific Fit |
| Brand | Auxmart |
| Brand Name | Auxmart |
| Colour | Black |
| Compatible with Vehicle Type | Motorcycle |
| Customer Reviews | 4.4 out of 5 stars 135 Reviews |
| Is Foldable | No |
| Item Dimensions | 110 x 11 x 13 centimetres |
| Item Weight | 6.61 Pounds |
| Item dimensions L x W x H | 110 x 11 x 13 centimetres |
| Item weight | 6.61 Pounds |
| Manufacturer | Auxmart |
| Manufacturer Part Number | 97119207 |
| Material | Aluminium , Plastic |
| Material Type | Aluminium, Plastic |
| Model Number | For 2007-2012 Mazda CX-7 Roof Rack |
| Mounting Type | Roof Mounted |
| OEM Equivalent Part Number | 0000-8L-M01B |
| UPC | 702865976673 |
| Vehicle service type | Motorcycle |
R**N
Some installation tips..
Installed on a 2011 CX-7 no problem. I did mess up the install a few times, but easy fixes. To save you time and energy, here's some installation tips: - The bars aren't the same size, the longer one goes in front, shorter in back - The covers that you would put on last have L and R written on the insides. Look at the clip patterns, this will tell you which mount you should be putting where - The rubber foot gaskets have cutouts with words in them, to represent front left, front right, rear left, and rear right. They have little square and rectangle tabs that stick up, you will want to find the correct mount, that correlates. -Once you have the rubber pads on the right mounts, you'll be ready to install. Make sure that you checked the mount covers' tab orientation on the inside, otherwise you'll have to go back to step 1. The package comes with two silver tabs, which won't make sense as they don't feature in the instructions. These are replacement tabs for the mount covers. Hold onto them.
E**C
Parfait
Parfait
A**R
Fits 2011 Mazda CX-7
Fairly easy to install but also fairly easy to overload with box, sleeping bags, tarps, tent and camping chairs. The covers for the mounting positions would not stay on at any highway speed (clip on if your lucky). I used one screw per cover to secure them. That being said it will do the trick for a family of 5 camping.
E**Y
Great
Great fit
G**S
Great price, need extra labor for most cars, great price and quality
Best price if you are willing to spend a couple hours sawing/cutting crossbars to fit width of your car. In my case a Mazda 5. 1-attach the mounts 2-measure how much you would need to chop crossbars. Place one end of crossbars in a mount and calculate how much you would need to cut in order for the longer side of the crossbars to fit into the other mount. Use a pencil or scratch and use this as a marker for the next step ( the side of the mount where the crossbar needs to be cut). DO MARK/LABEL crossbars front and rear to avoid confusion as these widths are not the same. 3-draw a marker or simply scratch through the hole where you would need to drill in order to insert the NEW SCREWS and NUTS YOU NEED TO GET. This requires a bit of precision but it isnโt difficult to figure it out. I would unmount the mounts that would eventually attach to the chopped ends of the crossbars since screwing with these on top of the car could be very difficult. 4-cut/chop where you place/drew the crossbar marker. Be careful and label which crossbar is the front one and which one is the rear one) 5-since you chopped the longer ends of the crossbars this means you no longer have the machined holes where you would screw the original screws. Hence you need the 4 screws with their respective nuts, 2 for each crossbar. This was a little hard for me and had to get a bit of help since holding the nut inside of such tiny space is not easy but also not impossible. 6-attach the mounts to your roof. In my case it was easier to screw the new screws on the floor so in my case I attached the mounts with one end of the crossbar already attached. 7- enjoy. I used these rack with a large Yakima carrier to Yosemite on my Mazda 5 and it worked great. Felt great doing this even though my dad did all the sawing. I did the drilling and the rest. I wish the manufacturer documented some of these adjustments . For 70 dollars this is a steal compared to 400 dollars with other alternatives. Super happy and now I can go anywhere that I can attac my Yakima carrier on this rack.
Trustpilot
3 weeks ago
1 day ago