Desertcart purchases this item on your behalf and handles shipping, customs, and support to Japan.
🚀 Print Faster, Smarter & Quieter — Join the 3D Printing Revolution!
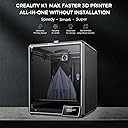
The Creality K1C 3D Printer combines cutting-edge CoreXY mechanics with a blazing 600mm/s speed and 20,000mm/s² acceleration for rapid, high-quality prints. Featuring an AI camera for real-time monitoring, one-tap auto bed leveling, and a tri-metal nozzle capable of handling advanced filaments like carbon fiber, it’s designed for both beginners and pros seeking reliability and precision. Its quiet operation with activated carbon filtration makes it ideal for professional environments, while its compact aluminum frame ensures portability and durability.


| Best Sellers Rank | #86,690 in Industrial & Scientific ( See Top 100 in Industrial & Scientific ) #109 in 3D Printers |
| Brand | Creality |
| Color | black |
| Compatible Devices | Personal Computer |
| Customer Reviews | 4.2 out of 5 stars 2,726 Reviews |
| Item Weight | 10 kg |
| Material | Steel |
| Product Dimensions | 12"D x 12"W x 12"H |
J**1
A good printer for a beginner and daily user
If I were a fresh-faced newbie to the world of 3D printing, this would be a great printer to start out with. This is an excellent printer for not just the price, but for a person who is new to 3D printing, or someone more experienced but wanting a secondary daily driver. The ease of use and the quality of the prints is comparable to many more expensive printers. I'd not think twice about purchasing another if I end up needing another printer. I've owned four printers by different manufacturers since roughly 2015-ish. Being on a budget, I went with printers marketed towards consumers and gradually learned about the use, updating and sometimes repairs, of printers. I joined various Facebook groups to improve my knowledge and experience. I purchased a Creality Ender-2, the ancestor of this model, back in 2019(?). It was a little intimidating to assemble, but the instructions and a few Youtube videos helped me and I was up and running after an hour or two. The Ender-2 was a tinkerers dream. I did upgrades and replacements for various components over time. It served me well. The biggest changes were replacing the cooling fans and the factory board. Those particular upgrades were to make the printer quieter. I didn't know back then that the loud fans it came with were required to move an adequate amount of air for cooling. The silent fans available then (and now) couldn't do the job adequately. Anyway, I replaced the hot end cooling fan with a silent fan, and had annoying clogs from time to time. But hey, the printer was quiet, LOL! The old board couldn't support drivers that would have silenced the stepper motors. The replacement board helped make the printer whisper quiet. But recently the controller board suffered a destructive short (very likely my fault). I was going to replace the board, but dreaded the work of compiling the firmware that it would have required to operate the printer correctly and safely. (I'm not the brightest guy and compiling firmware was a frustrating process). At about the same time, I started hearing about the Ender-2 Pro, an updated model based on the original design. I started investigating. Of particular note were all the design upgrades. All the old flaws of the original Ender-2 were addressed. They made the new model much more compact and portable. The reviews for it were good. The price for this printer was about the same as what I'd paid for the Ender-2. My overall positive experience with the Creality brand, plus what I learned from researching this new printer convinced me to buy it. When it arrived, I was delighted to see that it was like the first time I'd purchased a printer made by Creality. It had all the little extras and was even better packed than the first time. It was easier and faster to assemble than its ancestor. Now for the fly in the pudding. It initially worked great. I used the test g-code file to do an initially test run print and the printer was great. I use Ideamaker for my slicer software as it has more options for fine tuning slicer profiles. I modified an existing profile for the Ender 2 to work with the Ender 2-Pro. It worked flawlessly for a couple of days, then it started throwing out runaway thermal warnings. I'm glad to say that the printer did exactly what it was supposed to do. It warned me with a loud audio tone and shut down all the heaters to prevent a possible fire. That is a safety feature that wasn't common with printers but is becoming more widespread. In my opinion, it is an absolute must for safety. The frustrating thing was that I couldn't figure out what was causing it. I tried to find the answer at the new Facebook group for this model of printer. I did a lot of googling. I asked here on Amazon if any other customers had the same problem and had a solution. I was in a hurry to get back to printing. I didn't want to start blindly replacing stock parts so soon after buying this printer without knowing what the problem was. Happily Amazon let me return the printer without hassle. At the same time I opted to get a replacement at no extra charge. I know that virtually 100% of anything made and built for retail use has a lemon or two that slips past quality control. I've run into it in everything from no-name companies to big brand names. It is an unescapable fact of life. Creality is no exception. After I'd already returned the first printer and received its replacement a representative from Creality reached out to me. Finding out that someone from Creality actively watches the reviews here means they care about the customer experience and satisfaction. I'm impressed by that simple gesture and it reinforces my decision to stick with Creality. The replacement was delivered fast. It was brand new, factory sealed, and was quickly was assembled and running. Everything worked and the test print turned out flawlessly. The printer has been working almost non-stop since. I'm planning on keeping it bone stock for as long as possible. Adding third party parts can add new features and refinements, but for now I'm not interested modifying what works just fine. Well wait. One thing I immediately replaced were the bed springs. The factory springs seem to be a weakness in Creality's printers but are easily and quickly replaced. I used heavy duty yellow springs cited frequently in 3D printing groups and reviews. Those can be found for sale here and elsewhere. They are far more stiff and will not easily deflect like the originals. (I've been hearing about people using silicone spacers but I've not tried that yet). Now I don't have to re-level the bed very often. It helps that I'm using the included removable magnetic bed sheet. When I go to take off finished prints I remove the sheet and I can simply peel them off. Then I put the sheet back on. No muss, no fuss. The worst thing I can say about it is that it has a droning sound that is noticeable. The best comparison I can make is that it sounds like an average microwave humming. Not deafening or excessively loud, but enough to be noticed if it is in the same room with you. It is mostly due to the cooling fans and possibly the controller board. The factory control board that the printer came with might not have the updated firmware drivers that could silence the stepper motors. There were two slightly different controller boards that were used with this model. One of them can have the firmware updated but the other can't. In my case, I got a board that can't be updated. There are different controller boards sold by Creality, Big Tree Tech, etc, that can replace the stock board, but I'm not bothered by the printer noise. As for the fans, that is really inescapable. There doesn't seem to be silent fans in the same size range that can do the job the loud fans do. If the sounds are too much, you can move the printer to another room and close the door. The printer works without complaint. It has been reliable and easy to use. The updated design has made it truly portable. When I've traveled with it, I only had to double check the bed to make sure it was level, then started printing. I can print a bit faster now than I could with the older printer. I've been able to print a multipart four foot/120 centimeter Statue of Liberty in under a month. I think it would have taken at least a month and a half to do the same thing with my previous printer. Aside from the initial hiccup with the faulty first printer, I've not had another problem with the Ender-2 Pro. I wouldn't hesitate for an instant to buy another one. For my needs, it is more than up to the job.
L**.
Amazing Printer for the cost
For any people who were/are not happy with the resin printing experience: This printer really went above and beyond my expectations of not only a low cost printer but an FDM printer in general. I got into the printing world by purchasing a resin printer that Amazon had on sale. I thought I would really enjoy the hobby but the extensive pre and post processing of those prints as well as handling toxic chemical turned me off completely. After a month I figured printing wasn't for me, but I started looking into FDM printers(which this is one, filament based instead of resin) and decided to on a whim buy a low cost but well liked printer. WHAT A DECISION! This printer completely opened my eyes to what I thought 3D printing would be like. It's so much fun! the resin printer's build plate was way smaller and in general more ideal for miniature models, whereas this printer (Ender 5) has a huge build plate and can print just about anything to great results. So if you are turned off my resin printers and you're not sure if printing is for you , I suggest returning your resin printer and giving FDM a shot because it's a whole different experience. Being able to simply pull something(maybe pry is a better word) from your build plate immediately after it's finished and admire it is really still amazing each time I do it. Ender5 : The setup on this model wasn't bad at all, there's a few videos online you could probably search for to give you an idea of what to expect, but out of the box the directions do a pretty good job of guiding you through it. I would definitely recommend checking out a video because you are almost guaranteed to have to adjust something structural on this machine right out of the box. It's nothing major and doesn't require any technical skills but if you aren't looking for it you could very well slam your machine together incorrectly and have problems down the road you can't diagnose because you started with a bad structure. For me the top rail box would lay flush on the unit. If I didn't know to look out for possible adjustments then I very well may have just muscled down the top screws and call it a day, but I knew to check all my connections because all the reviews and videos told me to. I saw that a mount in one corner was tightened down from the factory crooked and caused the top piece to be uneven. So I loosened the necessary mounts, leveled it properly, and then tightened. The top mounted flush as it should and that was that. It was a minor inconvenience but knowing to look for these things is invaluable. Aside from that the build went very quickly and I was printing immediately. Printing: I adjusted the bed to what I thought was level and began printing. I never bothered with the CReality prints and started with some facemask ear savers. I noticed no matter how much I adjusted the bed it never quite felt level. After some prints I accidentally broke my Bowden Tube so I had to order a new, and decided to upgrade. I bought a Capricorn Bowden tube, All-Metal Extruder, and also got the Creality Glass bed. Those three upgrades turned my stringy few first prints and turned them into something I could be proud of. After installing the glass bed I realized my initial build plate was warped, which made proper leveling impossible but the glass bed cleared that up. I have to use a glue stick now (just cheap purple Staples glue stick)and haven't had any adhesion issues since starting that. Printed Bed struts to help with keeping the bed from moving while printing and it made a world of difference. This printer really prints with amazing quality and detail. After the few upgrades I made I am more than happy about this purchase and would recommend this printer to anyone looking to get into the world of FDM printing. Summary: Awesome printer for the price. Recommend upgrading to Glass Bed, Capricorn Bowden Tube, and Metal Extruder.
J**N
Loving this thing to death.
Lots of fun and really easy to setup. This printer has a ton of guides on the various "Video Websites" You May Want to Tune into for instruction. Literally this machine is very supported by the 3d printer community rich poor alike. IT runs great out of the box prints nicely. Cura looks daunting but the files you import have the settings in them already some prints may need adhesion or support checked but do be sure in Cura that it is set to only 0.2 for layer height. I upgraded this to the SKR 1.4 Turbo with TMC2209 stepper motor drivers and put it into my old grow tent which at the time I didn't know would be beneficial. This tent also has a heat controller on it so I may have accidentally placed my printer in optimal environmental settings. I didn't have bugs installing the original components that came with the printer but the extruder should be upgraded to the metal one since all the plastic ones only last about one week to a few months.. Like a $13 part. And the white hot end PTFE tube causes jams and under extrusion. I fixed with some blue Capricorn ptfe tubing so far it's working amazingly.. My problems with the original is it's a bit clunky slow and makes annoying high pich noise which isn't at all annoying it's actually interesting to hear it but it is detracting and I have ADHD. Prints came out fine with all stock parts. Learning the slicing software can be hard. If you upgrade learning to flash marlin can be hard but you can do pretty much anything at the forfront of 3d printing with this thing because literally every one doing prototyping has this thing unless they had some government grant money or don't like to actually tinker which is insane. why buy one of these at all if you're not that type of person.
R**T
Is it really as good as everyone says it is?
On 09/03/19 I ordered this printer, It was delivered quickly with Prime which was awesome! The assembly was fairly easy taking roughly two hours from unboxing to printing the Dog that came on the SDcard. This initial print was perfect in all regards, I was thoroughly impressed, that is until I started trying to print my second piece. At this point I struggled to get the same perfect print the dog showed that this printer can do. I did everything from hardware to software tweaking everything I could, finally after joining the Creality facebook group I was greeted with some advice that got me back on track (the Z axis rollers were too tight causing binding). Along with this I also had a warped bed that required me removing it and sanding it down, to do this I had to remove the magnet bed which then called for an upgrade to the Ender glass bed. Fast forward a few prints my X axis stepper started making a horrible grinding noise - this followed with ringing in this axis showing up on the prints. I then began to have slight layer shifting that would occur randomly followed with difficulty again in the original Z axis issue. I also started having issues with the bowden tube so upgraded it to a Capricorn tube, along with needing to upgrade my couplers since all of the stock ones had failed at this point. This all lead to quite a bit of frustration chasing solutions to all my issues. I upgraded the hotend to a Microswiss setup and started going at printing again, at this point I was still having similar issues with ringing and the Z axis issue. After all of this, yesterday 09/29/19 I decided to request an exchange on the printer, I am now typing this out 09/30/19 after receiving and putting together the new printer. Right out of the box the Y Axis limit switch was falling off, I fixed that and started the assembly. I just printed a test cube and as of right now am pleased with the print, time will tell if this printer proves itself as it has with many other owners. I am a first time owner to a 3D printer and while I am tech savvy and love to tinker it is absolutely absurd for myself or anyone to experience these kind of issues. The silver lining to all of this is I believe it was a good learning experience to know what is normal and not with the kind of issues these printers can have. As well the fact that I was able to exchange the printer was a huge relief. Now my rant is over and I hope you, who have sat here and read it, can take something from it. Time to go print more on this new printer and see if it can live up to the Ender 3's reputation!
B**S
nothing but problems
Disappointed with the Creality K1 Max – Not Worth the Hype I had high expectations for the Creality K1 Max, but after several weeks of frustration, I regret my purchase. While it promises high-speed printing and a large build volume, the execution is seriously flawed. 1. Quality Control Issues – Right out of the box, I encountered multiple problems. The auto-bed leveling was inconsistent, leading to frequent print failures. The extruder also started clogging within the first few prints, requiring constant troubleshooting. 2. Poor Software & Connectivity – The printer’s software feels unpolished. The Creality Cloud is slow and buggy, often failing to send prints correctly. Wi-Fi connectivity is unreliable, forcing me to rely on a USB stick to transfer files. 3. Overheating & Fan Noise – This printer runs extremely loud due to its high-speed printing, and the cooling fans don’t seem efficient enough. Overheating issues have led to warped prints, even when using recommended settings. 4. False "Out of the Box" Functionality – Despite being advertised as "plug and play," I had to spend hours fine-tuning settings, adjusting belts, and updating firmware just to get halfway decent prints. A beginner would be completely lost with this printer. 5. Customer Support is Useless – Creality’s support is slow to respond, and when they do, they often provide vague or unhelpful advice. If you get a defective unit, good luck getting a replacement or refund. Overall, for the price, the K1 Max is not worth it. There are better options from Bambu Lab or Prusa that offer more reliability and a smoother experience. If you’re looking for a hassle-free 3D printer, this is NOT it
Z**H
Beginner Friendly, Great Value, Impressive Prints, Large Community of Support
= What I Wanted As I am new to 3D printing, I wanted something that: - Easy to setup and get going on - Sufficiently capable to avoid quickly "outgrowing" it - Affordable (<$300) = Why I Choose the Ender 3 Pro I was torn between the Ender 3 and the Ender 3 Pro. I settled on the Pro, as I figured that the Pro represented the best and most refined version out-of-box. The Ender 3 is a tried and true model with it's strengths and weakness well known. There are numerous howtos available on how to address the various short comings of the Ender 3. However, several of the enhancements offered by the Ender 3 Pro are either more difficult or cost - approaching or exceeding the cost differential between the 3 and 3 Pro. For example, the upgraded (sturdier) Y-axis base is more difficult to do on your own and requires significant disassembly and reassembly. The upgraded PSU is nearly the cost difference alone and results in an unused item in your drawer that you paid for. = Out of the Box Experience The printer was easy to assemble and worked well without any modifications. It is critically important to get the bed "level" - not as in bubble level but as in consistent height from the extruder nozzle (I used the paper method). It is also important to make sure that the wheel/track assembles are straight and true with proper tightness. I found several helpful guide videos online for this specific model that do a good job of walking you through it. My device came with the latest FW at the time of writing (1.1.6.2), so I have no experience in FW flashing yet. I do plan on setting up an OctoPi/OctoPrint solution, but for now the including SDcard and adapter has worked fine. I've printed with both PLA and PETG and both come out surprisingly well in my opinion. I've been using the latest version of Ultimaker Cura at the time of writing (4.5.0) for slicing STL files. = Notes on Usage A note on print times. I have no experience from which to base my expectations on print times however, you do need to be patient as many prints can take 5, 10, 15+ *hours*. I haven't tinkered around much with the print settings to see how much of a reduction in time I can achieve and at what quality tradeoffs. Nor have I experimented much to see how print quality and time stacks up when printing multiple parts simultaneously versus multiple prints of singular parts. You should monitor your prints - initially to make sure it lays down a good first layer that adheres well and then periodically check on it to make sure it doesn't go awry. Also, make sure you have enough filament to finish the print and that you plan for the duration. Things like - Are you comfortable with it printing overnight or while you are away? - Will the printer be free from vibrations/bumps/drafts in it's location (e.g. dining room table) from foot traffic, AC vents, etc for the duration of the print? = Final Thoughts Overall, I've been very happy with this purchase and foresee a long service given it's performance, upgradability, and available of spares in case of part failure.
N**.
Despite some build quality issues, it printed great right out of the box!
Creality consistency and build quality is hit and miss, but with this sort of machine you sort of have to be an enthusiast and willing to dive in and take it apart a few times. I've been messing with 3d printers for about 10 years and am actually pleasantly surprised with this one. It shipped almost fully assembled and was easy to set up, frame is reasonably square and all the connectors / cables are well protected and routed out of the way. The setup was slightly marred by Creality's cloud server not being found for the first day or two (ended up being able to connect it the second day). During the initial self test the bed was tilted off by about 1.2mm from diagonal corner to corner and did not have a straightforward manual leveling system. It was reasonably flat despite not being level, although not to the standard of my other printers so I expected bad first layers / prints. The auto-leveling is actually only automatic compensation based on the bed height readings, but it works shockingly well on this machine. I was able to get a nearly perfect benchy print from the built-in model in about 13 minutes. This printer is FAST and the print quality is excellent so far with the Creality Slicer built in profiles. I'm still working on shims / adjustment of the bed mounts to level it better and some minor upgrades (lighting mostly and a textured build plate) but so far there's very little that needs to be done for this to be put into use straight away.
M**D
Quick and easy, most importantly for a beginner
As a beginner getting started for the first time this was an excellent choice. I'm a DIY hobbyist and wanted something less expensive that I could learn as I build. The Ender-5 came with all the parts necessary to get get started quickly. It came packed in four parts: the base with power supply, the heated Z axis platform, the X-Y axis extruder top and the corner up-rights. All the screws and parts were included, even a small spool of PLA filament to get started. It took me about an hour to assemble, basically not rushing and doing all the belt and alignment adjustments after watching several youtube videos before purchase. It took me another hour before I was able to start the test print object on the supplied microSD. New users take precaution when inserting the microSD. I initially thought the slot was broken because the card could not be inserted properly. Turn the card upside down with the metal contacts facing UP. My miroSD did not have the current version of CURA (the 3D object "slicing" program) and some other files, so I went to the Creality web site, downloaded the updated files and was set. The test file dog took about 5hrs and 20minutes to print and ended up beautiful. Realize, it is NOT smooth and I believe NO 3D printer will make a smooth object. You could sand, or expose the object to an acetone mist for a few minutes. My first 3D printed object was downloaded off a model site, loaded and sliced in CURA and also printed nicely. The Ender-5 preset is not yet in CURA , so searching youtube I was able to find the process of adding it. Which is easy. It has a heated bed with a removable, flexible magnetic adhesion material the object adheres to. The PLA sticks nicely even when not heated. I just ordered PETG filament that requires heating but have not tested yet. I did have an issue with the metal heated platform, which came with a divot taken out of one of the corners. Obviously from the manufacturing process. It made one of the corners impossible to level. Though, it was way off the area where any object could be printed. I notified the company, took pictures and they promptly sent out a new heated platform.
M**H
Gute Qualität, einfache Bedienung
Als absoluter 3D Druckanfänger wollte ich keine Bastelbude, sondern nen Gerät, das direkt funktioniert. Nach Problemen mit der Werkstückhaftung (Druckbett mit Aceton Kleber der Schutzfolie abwischen!) läuft er super, selbst ohne viele Einstellungen (nur Temp 220/65Grad Düse/Bett für PLA angepasst). Durch den gekapselten Bauraum relativ leise und man kann auch ABS und Co drucken. Für mich als Anfänger für ca 500€ Einstieg ok - nutze Ihn viel und gern (Deko und Ersatzteile/Halterungen etc. Tipp: Die Kamera nachrüsten (22-40€) - Kabel etc vorbereitet - nur anstecken und sichern - dann sieht man vom PC aus den Druck.
A**L
Harika cihaz..
Fiyatına göre başarılı buldum. Cihazın alt kısmı montaj yapılmış diğer yerlerin montajı size bırakılmış... Cihazın içinden çıkan usb de kod dönüstürücü bir program, demo yazdırma figürleri ve montaj videosu var. Videoyu izleyerek veya tıpkı lego inşaa eder gibi 12 kareden oluşan katoloğundanda kolayca montajı yapılabilir. Kalibrasyonu çok kolay oldu bir not kağıdı yardımıyla yapılabilir. Kutunun içinden montaj ve yazdırma ile ilgili her aparat çıkıyor, hatta deneme yazdırması için bir miktar filament bile var. Tavsiyem en küçük obje olan kediyi yazdırmanız ( %100 hızda 6 saat sürdü). Diğer objeler baya büyük. Aracı firma Ankara da, baya ilgili ve yardıma açık. Alırken korkmuştum ama sorunsuz bir alışveriş oldu. Başlangıç seviyesi için harika bir cihaz hatta pro cihazlara daha yakın diyebilirim...
R**R
Sem palavras
Máquina sensacional! Totalmente automatizada. Qualidade absurda (robustez tremenda). Super recomendo!
C**S
Atendeu minas necessidades 100%
Impressora nota 10, já fiz muita peça para o meu uso próprio e agora estou focando em fazer peças para vender,.
S**E
Good printer but some issues
Printer is good but bed leveling problematic. Bed seems to distort if used a lot in a day, middle of plate when in constant use seems to bow low on the z. The bow makes it difficult to set a constant z offset, this affects quality of first as leaves visible defects. This will not matter unless first layer is not on show though. Creality print can take a while to conect to mobile devices.
Trustpilot
3 weeks ago
1 month ago