🔥 Heat Up Your Adventures with Style!
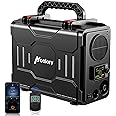
The HCALORY12V Portable Diesel Air Heater is a powerful 5KW all-in-one solution designed for cars, trucks, boats, buses, RVs, and motor homes. It features Bluetooth APP control, a compact toolbox design for easy transport, and operates quietly, making it perfect for both travel and residential use. Safety is prioritized with automatic shutdown and overload protection, ensuring a worry-free experience.


| Manufacturer | HCALORY |
| Brand | HCALORY |
| Model | HC-A1 |
| Item Weight | 21 pounds |
| Package Dimensions | 21.25 x 19.25 x 11.5 inches |
| Country of Origin | China |
| Item model number | HC-A1 |
| Exterior | Painted |
| Manufacturer Part Number | Heater9485598 |
D**N
Working great so far!
The media could not be loaded. Bought this unit so I can camp with my family during the winter in our roof top tent with an annex. So far I like it. The app is a little wonky. At first it would start up and shut down, but I believe that was to user error on not understanding the app. It’s best to just start it up and set a temperature.Setup: there were zero instructions on how to set it up. You need to use your critical thinking skills. I did watch many videos on YouTube on how to set it up prior.You’ll definitely want to open it up and check all of the connections out of the box. Some spring clamps for the fuel lines were out of place, some of the hose clamps were not fully tightened.For the fuel tank, it’s better to start with a smaller hole and enlarge if you need to. Make sure there is one o-ring on the fitting for inside the tank, and one o-ring on the outside. Use some pliers to hold the fitting while you tighten down the fastener snug so it sandwiches the o-rings and creates a seal.Heat Output: I ran this for 4 hours straight as a preliminary test at a constant level 2. It barely used any fuel at all, and provided a steady flow of heat. I suspect in winter temperatures I will need to turn it up, so its fuel consumption will increase.USE THE RIGHT POWER SOURCE: most people’s problems come from NOT using the correct battery. If you plug it into your wall outlet at home, not much to worry about. Whatever you end up using, just know it will draw over 10amps at start up. So a 12v cigarette plug on your portable power station will most likely not be sufficient, as those have a 10amp rating. You want at least 15-20amp rating. I hooked up mine directly to the battery but will be using a 15a cigarette lighter plug.I started with 100% power with my lithium iron phosphate battery (lifepo4) and after 4 hours of run time and only the initial start up, it went down to 90% according to the volt meter on my battery. Not sure how accurate that really is. If you only start it up once, the power it draws is very minimal after you get it going.This was the best value and design for the money. Other diesel heaters have the intake and exhaust out from under the unit. These are on the back and front of the unit.My only gripe is the power plug. That has a right angle connector and I needed to put a 2x4 under the unit. Other than that, it’s a pretty good unit for my first one. I might end up taking it all apart and using/redesigning the box so it’s an all in one but we’ll see. Hope this helps someone.
M**N
Stranded in 5f cold weather. After 6th day of owning 🙄
All these things are the same. You really do get what you pay for. This heater plays off the cool factor of custom cased heaters that are 10x the price. SKIP this heater and if you want to get a cheap Chinese diesel heater grab the Vevor with 4x the reviews.ALSO! Buy 2 of the vevors while you’re at it, so you have a backup while you’re out remote cold weather camping.This was the 6th day I had this heater. I turned it on around 9,400 feet elevation. It ran from 5p until 1:10a … by that point I was in my tent asleep when I heard the fuel pump stop and the heater went into “self check”. Meaning it indefinitely stops heating and just stays in this “self check” mode with the fan running. I have a 4” extension duct on mine and use the supplied 3” tube. I also don’t elbow the line until after the provided 3” tube is fully straight out extended, and even then it’s a gradual incline to the tent. All that to say it WASNT the common overheating issue these have with 3” ducting.Luckily I have a Mr buddy heater as a backup but what a nightmare this could have been.I didn’t expect perfection but after 6 days of use? I always let the unit shut down completely to not build up soot, and have researched A TON of the common problems to set my expectations. This is not a “I expected $1,500 performance from this $220 item review”. Therefore I have to urge you to pass on this.MAYBE it’s due to this unit not self adapting to elevation like the Vevor does? I’m not sure. But either way DO NOT purchase this heater unless you enjoy the challenge of either:A. Carrying 4 backups with youB. Trying not to freeze to death
C**N
A solid "diesel heater kit" that still needs some changes
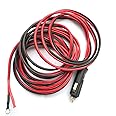
The biggest thing I'll call out is the electrical because it's not clear on youtube. Don't expect to be able to use DC power unless you are hooking up directly to battery terminals. The solar generators / portable battery units like jackery and ecoflow only have cigarette lighter outlets which are rated for 120W aka 10A @ 12v. And the demands during startup slightly exceed that. Yes some of the time, for certain battery units, you may not trip the breaker, but if you want a reliable works-every-time setup with a solar generator, you're going to need to use an AC adapter and enable your generator's AC inverter. I got this waterproof one https://www.amazon.com/Waterproof-Transformer-Voltage-3-Prong-Computer/dp/B07Y61R8SRSmall nit-pick, I popped the electrical plug out and flipped it upside down. The way it came from factory, the right angle plug faced toward the ground and was difficult to get in/take out. So I rotated the plug in the case.The 5L tank that comes with it is not mounted flush with the ground which means it wants to tip. I've ordered a 10L tank which this unit does have mounting holes for, but I'm not sure yet if the holes will have the tank flush with the ground, hopefully they do otherwise I'm going to have to drill new holes in the case.The controller doesn't come with a wire long enough to use it as a thermostat, but it's a standard 3-pin plug (the kind you see in a computer case that powers fans) that I'm sure you could buy or make an extension for.The case itself is thin and flimsy, but after being closed up it's fairly rigid. It wasn't clear from youtube or the pictures but the case has a ton of ventilation, there are grills and openings on every face except the handle surface on top. For that reason I felt comfortable moving the small air inlet filter inside the case so it was one less thing sticking out.I didn't attach either of the brackets to the outside of the box for holding the exhaust and intake hoses fixed. I want this thing to be able to sit in my trunk with all my other gear. So I just slip fit the exhaust on when I use it, and keep it stored in the tank when not in use. And my intake is mounted and ziptied right inside the case.The small bracket that holds the controller/thermostat onto the outside is really loose for some reason. I also couldn't determine if it's waterproof or not. So I flipped the bracket around and mounted it through the factory holes from the inside of the case and I keep the controller in there. I'm definitely going to make/buy an extension but it seems to work fine inside the case in the meantime.The controller works well, the app is glitchy but works alright-ish but the remote works great, so no big deal.I've ordered an AC C13 port and I'm mounting the AC adapter right inside the case and wiring it directly in, so I'll be able to power it via DC or AC by plugging in the right cord. I also ordered exhaust wrap, I already started melting a wire where it touched the exhaust hose. Finally I wrapped a 4" hose clamp around the body of the muffler and bent the excess clamp material to form 2 legs, so that the muffler's weep hole is elevated off the ground and facing down.I've gone back and forth on the diesel tank mounting location. I don't like the exposed fuel line that comes with exterior mounting, but I've also spilled diesel (using one of those spillproof nozzles, go figure) filling it almost every time I've gone to fill it, and I would rather that happen outside the box than inside. So I've landed on keeping fuel outside of the box and just working to ensure I mount the fuel line in such a way that it's not very exposed (such as how KeeganBuilds does his)I'm also replacing the cap (which has a vent hole) with a solid cap that has no vent, and then drilling a dedicated vent cap that I can screw/unscrew. That way diesel sloshing around my backseat doesn't drip out of the vent.-----------------Final thoughts-----------------Out of the box, aside from the power draw being too much for solar generators, I think this will definitely do the trick for at least one or two nights a year. The components all work nicely and it wasn't too painful to put together especially after watching a few folks do it on youtube. And for the price you really can't complain, it's a complete kit with basically everything you need pre-assembled in a pretty small package. I got it mainly because I was on a time crunch and wanted to have it for an upcoming trip in time, and it definitely did its job well.But if you plan to use this often, expect to need to make lots of modifications. It doesn't pack or store well unless you fully assemble/disassemble it each time. It doesn't seem very rainproof out of the box. The remote doesn't extend into your tent. It may or may not work off your solar generator. The vented cap will leak if the tank is tipped over or sloshed heavily. The fuel line is very exposed with the default mounting position. The exhaust is hot and easy to burn yourself, if you have kids it's definitely a danger.If I were starting over I would probably buy the parts that KeeganBuilds used for his and build one just like this https://www.youtube.com/watch?v=lKwzue3poDABut given that I have this unit, it works well enough currently that I'm not going to throw it out and start over, but instead slowly work my way closer to the KeeganBuilds setup
Trustpilot
2 days ago
1 week ago