Desertcart purchases this item on your behalf and handles shipping, customs, and support to Japan.
๐ค Upgrade your Durangoโs vibeโwhere style meets precision.
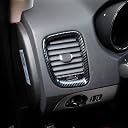
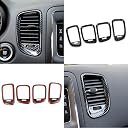
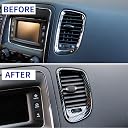
The crosselec Carbon Fiber Dashboard Air Vent Cover is a precision-engineered trim kit designed exclusively for Dodge Durango models from 2011 to 2020. Crafted from high-quality ABS plastic with a triple-layer finish mimicking carbon fiber, it offers a sporty, scratch-resistant upgrade to your vehicleโs interior. Easy to install with double-sided adhesive tape and backed by a 30-day satisfaction guarantee, this kit transforms your dashboard with minimal effort and maximum style.
| ASIN | B09P3PPR97 |
| Automotive Fit Type | Vehicle Specific Fit |
| Best Sellers Rank | #17,127 in Automotive ( See Top 100 in Automotive ) #56 in Car Interior Moldings |
| Brand | crosselec |
| Brand Name | crosselec |
| Customer Reviews | 4.6 out of 5 stars 207 Reviews |
| Fit Type | Vehicle Specific Fit |
| Fit type | Vehicle Specific Fit |
| Manufacturer | crosselec |
| Manufacturer Part Number | 21JG-DDG18-005 |
| Model Number | 21JG-DDG18-005 |
| Number of Items | 1 |
| Number of Packs | 1 |
| OEM Equivalent Part Number | 21JG-DDG18-005 |
| OEM part number | 21JG-DDG18-005 |
| Product Grade | Replacement Part |
| Product grade | Replacement Part |
| Shape | Oval |
| UPC | 757249513630 |
| Unit Count | 1.0 Count |
S**M
Ac vent trim
I like the fitment of the product,great quality ๐
O**R
Good
Fit perfectly on Durango 2015
C**K
Upgraded look
Fit perfectly on my Dodge Durango. Very stylish, many compliments on the upgraded look. They stick with tape and don't damage the car at all.
P**P
Worth it!
Great product, lasts long and looks great!
R**B
Game Changer
Fits great and love the quality of the material. Easy application and sticks right on with the adhesive tape. Recommendations since people complain about the adhesive tape. 1. Purchase some 70% Rubbing alcohol and cotton balls. Wipe down the area you plan to put your part or piece with a dab of rubbing alcohol on the cotton ball and let air dry for about a minute. 2. Peel off your adhesive tape. It's easier to take a flat head scre driver and peel from one end. It comes right off or enough to grab and pull off. Dont use your nails as you can ruin the adhesive. They do send you extra tape If u want to add more. Press part firmly for about thirty seconds working one side and sliding your hand across to the other side. 3. If for any reason the adhesive still does not work, pick up some automotive glue. Use a thin layer over the taped portions of your part and press firmly when you get it set in place. Work one side and slide to the other side. Takes about thirty seconds and bonds fast. FYI: Do not over use this glue. If you do it will slip out of your part when you apply pressure. Like I said...a thin layer is all you need. This glue bonds to chrome, plastic, rubber, and other interior portions of your ride. It only costs about $6. I recommend getting when you buy your parts so you have handy. 4. Cleaning: wipe with windex or interior cleaning solution and a rag. No need for the fancy chemicals.
Trustpilot
3 days ago
2 weeks ago