Desertcart purchases this item on your behalf and handles shipping, customs, and support to Japan.
🎞️ Digitize your past, own your memories—before they fade away!
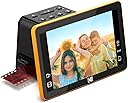
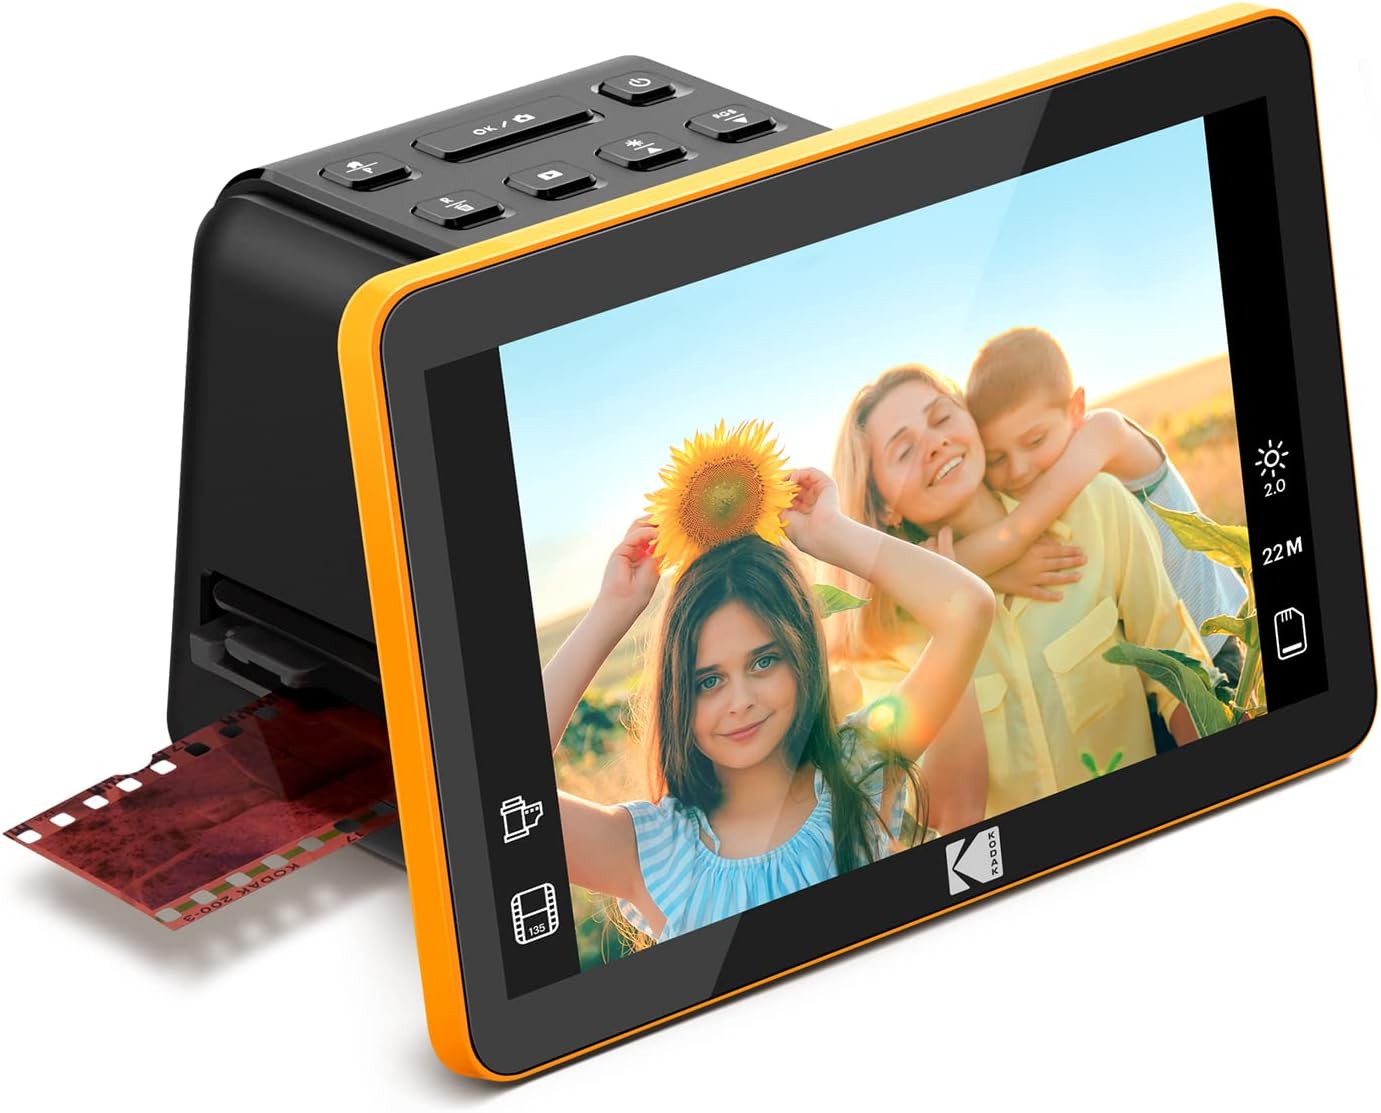
The KODAK Slide N Scan Max is a versatile 22MP film scanner designed for professionals and enthusiasts alike. It converts 35mm, 110, and 126mm negatives and 50mm slides into high-quality JPEG digital files. Featuring a large 7" tiltable LCD for easy preview and editing, a continuous-feed tray system for efficient batch scanning, and multi-format adapters included, it streamlines the digitization of decades-old film archives. With USB-C connectivity and SD card support, it offers seamless transfer and storage options, making it the ultimate tool to preserve and share your photographic legacy.


| ASIN | B0B3F6KJJ2 |
| Best Sellers Rank | #23,046 in Office Products ( See Top 100 in Office Products ) #4 in Slide & Negative Scanners |
| Brand | KODAK |
| Color Depth | 24 bits |
| Connection Type | USB |
| Connectivity Technology | USB |
| Customer Reviews | 4.2 out of 5 stars 1,821 Reviews |
| Item Dimensions D x W x H | 6.69"D x 5.35"W x 4.45"H |
| Item Weight | 16 ounces |
| Light Source Type | LED |
| Manufacturer | KODAK |
| Media Type | Negatives, Photo, Slide |
| Minimum System Requirements | Windows 7 |
| Model Name | KODAK SLIDE N SCAN Digital Film Scanner 7" Max |
| Optical Sensor Technology | CMOS |
| Product Dimensions | 6.69"D x 5.35"W x 4.45"H |
| Resolution | 3200 |
| Scanner Type | Film |
| Standard Sheet Capacity | 100 |
| UPC | 843812167529 |
| Unit Count | 1 Count |
| Warranty Description | 1 Year Limited |
| Wattage | 50 watts |
L**R
A great scanner, especially at the price!
I used this scanner to scan about 1500 slides over about four months. I found it to be fast, reliable, accurate and easy to use. I was eventually able to scan 150 to 175 slides an hour. I would start with three slides loaded into the scanning carrier, push the scan button and wait for the scan to finish. I would advance the slides manually and once the new slide was positioned add a new slide to the right side of the carrier, pushing a finished slide out the left slide. I barely glanced at the scanned slide, instead I concentrated on keeping the workflow going. One warning I would give is that this is strictly a WYSIWYG operation. The slides I was scanning were 50+ year old and had degenerated from age and bad storage conditions. The scanner did nothing to improve the quality, but it did give me a decent image to start with when I got to Photoshop Elements. The scanner is OUTSTANDING. Scanner was priced right, shipped quickly and arrived in perfect shape. The scanner is OUTSTANDING. Easy to set up, easy to use. produces great scans. It took me a few minutes to get in to a work flow rhythm but I was doing about 2 scans a minute once I got rolling. I suspect this will get up to at least 3 scans a minute.
M**S
Impressive quality and easy to use
I spent my entire career working in a camera store and always had access to the latest equipment. That also meant I took a lot of photographs. In the late 70s and early early 80s I was mostly using slides. Throughout the years I back burned them as digital came along. This Christmas I decided to scan the slides so I can hand them over to my daughters. 10 years ago a slide scanner was absolutely out of reach for average consumers when it came to the cost. They were bulky, very finicky, and the took forever to scan each slide. This scanner takes less than five seconds to scan each one. It also does negative films if you no loner thave the origianl photo. Scanning to a jpeg file makes it very easy to file permanently in a cloud, and also to upload to a photo printing service. I'm extremely impressed with the ability of the unit to do auto color and light corrections. If it doesn't do as well, as you hoped, you can manually go in also and adjust brightness, color and contrast. The images is shown in my review are from 1978. The originals didn't look nearly as vibrant as the ones that came out in the scanner. The only thing I don't like is, although the slides load easily, and are for the most part automatic, (although manual), I do not like the way the loader is in the back. The screen is large, which is wonderful, but you have to look around the back to get each slide in. When scanning thousands of slides, that can really take a toll on your back as you reach around to get into the backside of the loader. I suppose, if I would've turned it sideways that would help. But I wanted to see the images front to check or adjust any color or light issues. Also to be sure that they were fully in the scanner area. For the cost, I don't think you can do better. It's just too simple to use and very versatile. I would recommend as a great gift for your family photographer to get the old slides and negatives into the cloud onr on a SD card. Or if you're the photographer, you will be pleasntly surprised at the quality and want to put thi on you wish list.
B**O
Quick, Easy, Economical and Acceptable Scanning
First – Am I happy with it? YES. If you mainly want ACCEPTABLE SCANS of your memories, it’s QUICK and EASY. Perfectionists or serious photographers who sell photos should buy something more professional or use commercial scanning services; still, it’s good for quick scanning of many less important slides. Helpful articles: DPReview Jan 2021 “Reporting: Lab scan vs. Kodak Slide ‘n Scan” and Dec 2019 “Scanning vs photographing slides” (includes a video of Library of Congress archiving methods). I spent many hours reading articles and watching videos about digitizing. I gave it 4 stars rather than 5 because it lacks the superior quality of far more expensive scanners and it limits exposure compensation. But overall, it’s easy, speedy, and good quality. Scanning is a tradeoff between TIME, QUALITY, and PRICE; top quality demands a lot more money and time. Pro film photographers often grimace and groan when asked if they’ve digitized all their old negatives and slides! Best methods: a dedicated film scanner (Epson, Nikon, etc. at $400 to $1000+), a flatbed scanner (min 2000dpi) with a transparency media adapter or homemade “Backlighter,” a DSLR with a macro lens setup ($300+), extension tubes ($40+), or an old slide duplicator/reverser ($40 on e-bay, but requires a full-frame camera), and other creative setups found on the internet. I scanned over 6000 slides from the 1970s to 80s. My Kodak Ektachrome and Kodakchrome slides retained more original colors than my Fujichrome. Commercial scanning companies charge about $0.20 to 0.70 per slide and more depending on quantity (e.g. $140 for 200 slides, $1000 for 5000 slides); custom scans cost even more. So it cost me $240 / 6000 slides = $0.04 per slide. It’s more economical IF you have thousands of slides. An average roll (36 exposures) took me less than 10 minutes to scan (longer if I had many adjustments), so about 5 rolls per hour including saving photos to my hard drive. Compare that to one pro that used a high-end scanner who spent four 8-hour days to scan 1800 slides (about 1 minute per slide). I haven’t scanned negatives…for most photo memories, I simply place nine 4x6 prints together and use a DSLR to photograph them at max megapixel; I save only irreplaceable negatives. TIPS: Years ago, I bought a Wolverine F2D 20-Super, but it sat in a box until recently. Its 1-inch monitor is useless, so I hooked it up to my TV – after a month its connection mysteriously failed. Besides, adjusting exposures and colors was time consuming – make a small change, press OK, and then it displayed the changes. So I bought the Kodak – you can adjust exposures and colors in REAL TIME – you see your changes immediately before saving (A MAJOR PLUS, no matter what scanner you buy – expect MANY exposure adjustments). I chose the 7-inch over the 5-inch screen to facilitate editing in a pinch and to use later as a digital picture frame (approximating a 4 x 6 photo), but I always planned to connect it to a large monitor. Reviewers of the 5-inch scanner had some software issues, so I hoped the 7-inch model was upgraded. MONITOR: The 7-inch screen is acceptable for many photos, but definitely not for fine detail adjustments. Use a large computer monitor with HDMI input (for a VGA monitor, use a female HDMI to male VGA adapter). To connect the scanner, you need a male mini-HDMI to female standard-HDMI adapter; plug the male end into the scanner, and then use a standard male to male HDMI cable to connect to your monitor. (You can eliminate the adapter by using a special male mini-HDMI to male standard-HDMI cable.) I mainly share photos with friends on my computer monitor or large screen TV (which essentially replaced my old slide projector and white screen), but calibrating colors on a computer monitor is easier than most TVs. If you’re going to display photos on a large screen, then use a large screen to edit them! COMPUTER: Connecting the scanner’s USB cable to my desktop computer as a power source also allowed easy transfer of images to my hard drive. The computer (or laptop) has its own separate monitor, so I could use my photo editor immediately after image transfer (so I use 2 monitors; 1 connected to the computer, and 1 connected only to the scanner) as well as listen to music while scanning. PRIORITIZE SLIDES TO BE TIME EFFICIENT: 1) Slides to scan and then discard. 2) Slides to scan and then send to relatives and friends who may want to professionally scan them and make enlargements. 3) Slides to professionally scan (especially where exposure and color adjustments are crucial) – slides that are irreplaceable and/or make money; I still keep those original slides. Or if you prefer, use one of the other homemade setups and do it yourself – the DSLR method seems best. In the late 70s, I ordered “inter-negatives” of slides I sold as huge enlargements (low concert lighting required slide film processed at higher ASAs, not possible with negative film back then). A slide loupe magnifier and LED light table or panel ($15 at a home building store) sometime help when you’re not exactly sure. ALWAYS CLEAN your scanner and slides. Small specks are obvious, especially in the sky (or maybe specks were birds or dust on your camera lens). Constantly check the scanner screen for dust and use its wiper brush. Clean your slides with a wide photo brush stick (easier to use and hold in the same hand while inserting a slide) and use a separate blower for lots of dust. When you still see specks on the screen, simply remove the slide holder and clean your slide and scanner screen if necessary (or flick the slide on the left side to eject the slide on the right side so you can clean it). BE PATIENT – cleaning is easier than touching up later! EASIER SCANNING: Save a junk “pusher” slide to insert on the left side of the slide holder to help line up your first slide, and also to push your last slide into the scanner. And use a nice comfortable chair if you’re scanning for hours! UNEXPECTED CROPPING: The scanner crops some of the photo; long ago, slide photography taught me to avoid filling the entire frame since enlargements often cropped the edges, but sometimes it wasn’t enough. E.g. vertically, the scanner cropped off the top of an Egyptian pyramid, so I simply used a scissors to trim the bottom of the slide so the slide moved downward in the holder to make the pyramid top visible. Horizontally, you have to choose between what’s more important, the left or right edge. EXPOSURE ADJUSTMENTS AND LIMITATIONS: Remember – the scanner is actually a camera taking a digital photo of the slide. I had to adjust exposure on MOST slides. Aim for an exposure (often underexposed) that reveals the MOST DETAILS (look for letters in signs, lines in buildings, light poles, mountain tops, no hot spots in facial features, etc.). It’s like adjusting EV on a digital camera, but the scanner only takes an AVERAGE exposure of the entire frame, not a SPOT exposure of a specific area. Photos with great differences between light and dark areas can be frustrating. Examples: – Eiffel Tower dark intricate steel framework from below against a bright sky – Friends on a beach with the sun behind them where you wished you used a flash to illuminate their faces – Bright sky photos with a dark airplane (like a Navy Blue Angel) – Night photos (concerts, performers, fireworks) where most of the background is black; the scanner may overexpose the main subject. In existing light photography, you turn off your exposure meter and manually set your speed and aperture to avoid overexposures. Sometimes even Kodak’s +/-2 EV isn’t enough; I suggest +/-4 EV for future models. To fool the scanner exposure meter to go beyond +/-2 EV, sometimes I slid the slide slightly in the holder to areas of the photo I planned to crop, or I made a little physical dark paper mask and stuck it (with a glue stick) on the bottom of the slide to block part of the scanner light source to decrease average exposures. If the photo is very important, make a few scans (like bracketing exposures) to work on later with your photo editor. Treat it like a multiple-exposure HDR Capture (High Dynamic Range); some software can combine all the exposures into one photo, OR send that slide to the commercial scanning services! When it doubt, ask yourself, “Is this slide worth $1 to pay a lab to custom scan? OR should I take multiple exposures and use HDR software to combine the images myself. OR should I spend a lot of time and money using expensive scanning or camera equipment?” KNOW YOUR PHOTO EDITOR: At first, after scanning a roll, I saved it to my computer (already connected to the scanner’s USB cable). Then I used photo editing software to crop and Auto Enhance for colors, brightness and contrast, bringing many colors from 40 years ago back to life. By knowing the capabilities of your photo editor, it’s easier to choose better adjustments beforehand with the Kodak scanner. I seldom adjusted Kodak’s RGB unless colors were washed-out; do it before using your photo editor. (Remember, you’re actually adjusting the scanner’s camera to photograph your slide; it’s always better to start with a good photo before using any photo editor. Old, washed-out slides need a good photo editor to revive the original colors even with the best scanner on the market.) My Kodak scanner and photo editing software work together as a team so I get a better feel on exposures; sometimes underexposure on the Kodak gave better results when my photo editor executed Auto Enhance. Once I understood what my photo editor could do, I then scanned all my slides, leaving photo editing for later. TO MAKE IT EASIER AND FASTER when you need to adjust thousands of slides, use one of the new economical photo editors with Artificial Intelligence (AI) to do most of your work, such as Luminar, Movavi, Photoshop CC, etc. Expect a fair amount of post editing, so make it easy. Even pros are praising the new AI photo editors – hours of complicated editing can now be done in less than a minute! SOME PHOTOS JUST WON’T SCAN PROPERLY: Either send them to a custom service or forget them – if you haven’t looked at them for 30 years, they’re not that important! (Remember when your uncle would invite everyone over to watch a 2-hour slide show of his vacation?) Treat it like “photo triage” – do you really want to spend the money and time on an expensive scanner? Save the handful of complex scans for the pros and pay them for their expensive machines. Trying to scan every single slide to perfection quickly turns tedious. I still have around 2000 slides of night concerts to scan where exposure is very tricky. I’ll use the Kodak scanner to save the less important slides, but make a DSLR setup for the prime slides that require a lot of time to digitize. I’ll shoot RAW with the camera tethered to my computer monitor and photo editor. For the absolute best, I’ll use a custom lab. Afterwards, I’ll hermetically seal and store them. ORGANIZING: I organize each roll into a file directory; some photo editors do this. If you can’t remember dates of your slides, see if the processing lab stamped the slides with a month and lot order number (generally, if you sent several rolls to process at the same time, they all had the same lot number). Label your directories with that info, and after scanning all your slides, look at the photos to sort the directories chronologically. CONCLUSION: Use the Kodak scanner to scan most photos to make it cost and time efficient, and for the most precious photos, use a superior setup (film scanner or DSLR, but requires more time) or a commercial lab. The Kodak scanner saved me a lot of time and money! HAVE FUN! Seeing memories from 40 years ago and remembering family and old friends is terrific for your spirits!
T**D
Perfect For What It Claims
Perfect, it does what it claims well and fast. I have an Epson Perfection V 600, maybe close to the gold standard for negative and slide scanners, but it's slow, very slow. First try I used the Slide N Scan on a mix of 1,260 mostly 35 mm black and white and color negatives, all over 50 years old. I captured images for 394 of them, 1.57 GB. It took 2-1/2 hours. Some, not all, of the color images had a greenish hue I could not see on the Slide N Scan, it has some ability to color correct, but those color imbalances can be automatically corrected with photo editing software more easily anyway. The B&Ws were all good. The image quality is good enough for casual use. Of the 394 images worth capturing, I set aside 46 that had enough importance to run through the Epson scanner, the others were good enough for "sharing" without additional editing. I suppose we are to the point where AI can fix anything in an image. The Slide N Scan is not intuitive, however it makes sense once you wade through the instructions or a YouTube video and it isn't necessary to resort back to the manual. The ONLY downside is if your negatives have a curl, an arch to them, the scans will be marginally "soft focused." Most of my negatives were stored in holders designed for them, so they're flat, a few were loose in drawers, a few had curls that were bad enough there were problems feeding them through the Slide N Scan. There are procedures for flattening negatives, but none of the curled ones justified the effort. Great buy.
D**O
Overpriced, doesn't work with slides
This is an OK item for scanning 35mm negatives. Very convenient, but image quality is such that this unit should not cost more than $100. The downfall is slide scanning. No matter what slide mount I tried, it still clips two sides of the slide, so that you cannot scan the full frame. Evidently a design flaw of the unit, since slides sit higher on the tray- hence closer to the lens- than negatives. Ok, but the description needs to disclose this. Strike One. Also, as you push in the next slide for scanning, it often slips under or over the previous slide, without pushing out that previous slide. So the first slide won't move on- the only solution is to extract the tray, resulting in that first slide falling into the interior of the device. Very difficult then to remove that stuck slide. Happens almost every time. Strike two. Strike Three is when you contact Kodak support to invoke the one year warranty, submitting photos and detailed description . Good luck. Delay, asking over and over again for same info you've provided multiple times, when you answer one question there is always another, forever. Refusal to escalate, refusal to care. If I assume no warranty I would have seen the same result. Fortunately, Amazon customer service stepped on to save the day, no thanks to Kodak.
R**H
Quick and Easy Amateur Slide & Negative Viewer/Scanner
Though maybe not the highest quality or fullest-featured transparency scanner, this product is GREAT for quickly and easily reviewing and scanning old family slides and negatives. The native 13MP image sensor is fine for the amateur family slides and snapshots from old cameras, in my opinion. 35mm negatives and slides produce 4320 x 2880 pixel image files, which seem to be about as clear as I would expect the old film to produce, if the original photo was sharp and clear (largely a function of the camera quality). Reviewing and scanning color negatives is especially nice, as it is very difficult to post-process color negatives in software - you can't just "invert" a color negative accurately with most photo editing software. With this viewer, you can just select "Color Negative" and view (and scan) your negative strips as if they were positive slides! Very handy and useful, something you can't do with just a light box and a magnifying glass. I also really appreciate the auto-exposure feature. It automatically compensates for over- and under-exposure in the slide or negative, making it quick and easy to correct and scan amateur shots. It seems to do quite well with compensating for a wide range of over- and under-exposed shots. The color correction feature, if needed, also seems to do a decent job with some fiddling - sometimes saving the extra step of post-processing some color corrections in photo editing software. I do wish they had a mode for over-scanning some slides and negatives, to reduce the auto-cropping of slides and negative frames. As other reviews have described, the scanner crops the images a little from what is usually available on the film. This is handy for most images, since it cleans up the edges by cropping off the "fuzzy" edges and rounded corners on slides and some negatives - but sometimes you need to capture the very edges of amateur shots for some critical details. With this scanner, you sometimes need to make small sacrifices over what might have been possible if you could scan more of each film frame, and do your own edge clean-up when needed. The only other issue I had was with some old non-35mm square negatives (127 format film, 40mm x 40mm image sizes). I WAS able to scan most of these negatives in a 35mm form by NOT using a film adapter (just the slide carrier), and selectively cropping a fair amount from the top and bottom, and a little from the sides. But it would be nice to be able to better handle more of the 40mm square negatives that seemed to be popular in the 50s and 60s or later. And REALLY, Kodak - not allowing the date to be set earlier than 1980?? Come on! Those old negatives and slides from our parents and grand-parents are still relevant today! My photo editing software allows the date and time "Taken" on digital images to be changed (EXIF "DateTimeOriginal"), but apparently the scanned date (EXIF "DateTimeDigitized") from the Kodak scanner is still retained in the image meta data. This causes issues with some handling in my photo organization software (Photoshop Elements Organizer). Overall, I am very satisfied with this scanner for my main purpose of easily viewing and digitizing old slides and negatives!
B**N
Good for quick-and-dirty digitization of film where quality is not important, otherwise stay away.
Pros: -It technically works and scans film -It is very quick to use, you can scan a ton of negatives very quickly -The HDMI so you can hook it up to a monitor or TV for a larger image is neat -The auto-exposure/brightness seems fairly accurate Cons: -Sensor is only 13MP, the 22MP image resolution is artificial/fake, and even a bit tricky to turn on -Only outputs heavily compressed JPEG, no PNG, RAW, BMP option, so you are stuck with nasty compression artifacts -Doesn't fully capture the negative, it always crops a bit, at least with the provided 35mm negative holder. -Negative holder has some wiggle-room, easy to scan film crooked. I recently got back into film photography and wanted a way to digitize both my old and new negatives. I thought this would be good entry point for that. Turns out that the 'high' resolution 22MP mode isn't really 22MP. The sensor is only 13MP and the 22MP mode is faked somehow and doesn't really look any better or resolve more detail. On top of the lower-than-advertised resolution, this device seems to overly-compress the resulting images. It only outputs highly-compressed JPEGS, with no option for lossless PNG, or uncompressed RAW or BMP formats. Between the lower-resolution sensor and the heavy compression, the resulting scans really aren't great--this device won't resolve down to the film grain even on relatively grainy film, and the images aren't really sharp enough to crop or print. Now, if you just need to get through hundreds of negatives to get an idea of which ones are important enough to scan or print properly, than this device would be great for that since it only takes a second or two per image, but I wouldn't use this with the intention of trying to crop/print/display the resulting images. On top of the general image quality, I also don't like that this device effectively crops in all your images. You can't get the whole negative in the frame, instead it will always cut off a bit from the top/bottom and the left/right of the image. You can wiggle the film/holder around to try and get the best framing you can, but this will ALWAYS cut off part of your image. The downside of the wiggle room is that it is easy to end up scanning your pictures at a bit of a diagonal, messing up the framing. Overall, I would say this is fine if you are trying to get hundreds of old negatives into digital so you at least can look at or share them that way, but it isn't worth buying if you have any intentions of editing, cropping, or printing the scans, the quality just isn't good enough. If they ever update this so it can output a higher-quality JPEG, or a lossless format, the image quality might be a lot better, even with the limited resolution from the sensor.
R**D
Easy to use slide scanner
I inherited thousands of photos from my father, all on slides. It would cost a fortune to have them all scanned into digital media. This little scanner is great. Scans are easy and quick, allowing me to save them onto my computer where I can make CD's of them and store them digitally as well.
C**G
Ideal pour revoir et sauvegarder les vieilles diapos oubliées
Un scanner simple, efficace et rapide, largement suffisant pour redonner vie aux souvenirs de vacances. Certes ce n'est pas un équipement professionnel mais la définition est suffisante pour des diapos d'amateur pas toujours parfaites et les fichiers générés sont de taille raisonnable (3 à 4 Mo). Le paramétrage à 22 Mp n'apporte rien de plus (interpolation). L'image est légèrement recadrée latéralement mais ce n'est pas gênant car les bords de diapo sont souvent pas très nets et on peut choisir le coté qui est supprimé en déplaçant légèrement la diapo sur le support. La mise en place des diapos est plutôt aisée (chaque nouvelle diapo pousse l'ancienne) et le scan est quasiment instantané (1 à 2 secondes). Possibilité de réglage manuel de la luminosité et des couleurs (RGB) pour corriger les diapos mal exposées mais le réglage automatique est généralement correct. Pas de réglage de la mise au point. L'écran de 7" est suffisant pour ajuster le cadrage, apprécier le résultat et effectuer les éventuels réglages. Il est possible de raccorder un écran plus grand en HDMI mais ce n'est pas indispensable. Le transfert des fichiers se fait par le câble USB fourni mais il est indispensable d'insérer une carte SD (max 32 Go) dans le scanner. En conclusion : cet appareil permet de scanner rapidement une grande quantité de diapos pour un prix raisonnable et ensuite de sélectionner les meilleures pour les faire scanner par un professionnel.
J**A
Prosty szybki w obsłudze
Prosty i szybki w obsłudze. Zdjęcie po obróbce dobra jakość cyfrowa . Polecam
R**N
Does the job
Just right for making those old slides accessible. The process is easy enough and speedy once you get a rhythm going. Annoying that it can't handle portrait orientation but I just rotated in photo editing. I had 1500 1960's slides to preserve and it took me 4 sessions to do them all, onto a 32gb SD card. Then put the card in a card reader, connected to my phone and uploaded to Google photos, in batches of 100, at 5 minutes per batch. Then a quick bit of rotating/cropping/filter editing and I shared the album with my family. They were delighted with the quality and memories. Quality wise, they were fine for viewing on phones/monitors but to be honest, we were more interested in the memory than in the sharpness. Overall, an excellent purchase and would definitely recommend for use as a way of preserving what might be lost - I doubt it would meet the needs of a serious photographer, but I don't think that's it's market.
Y**A
a marca já é consagrada.
excelente
Y**Z
Escaneo rápido de negativos para fotógrafos para mostrarlos en las redes sociales.
Es un escáner útil para las fotos familiares y también para un escaneo rápido de negativos para fotógrafos para mostrarlos en las redes sociales.
Trustpilot
3 weeks ago
2 days ago