Desertcart purchases this item on your behalf and handles shipping, customs, and support to Japan.
🖤 Patch it. Wear it. Own the waves.
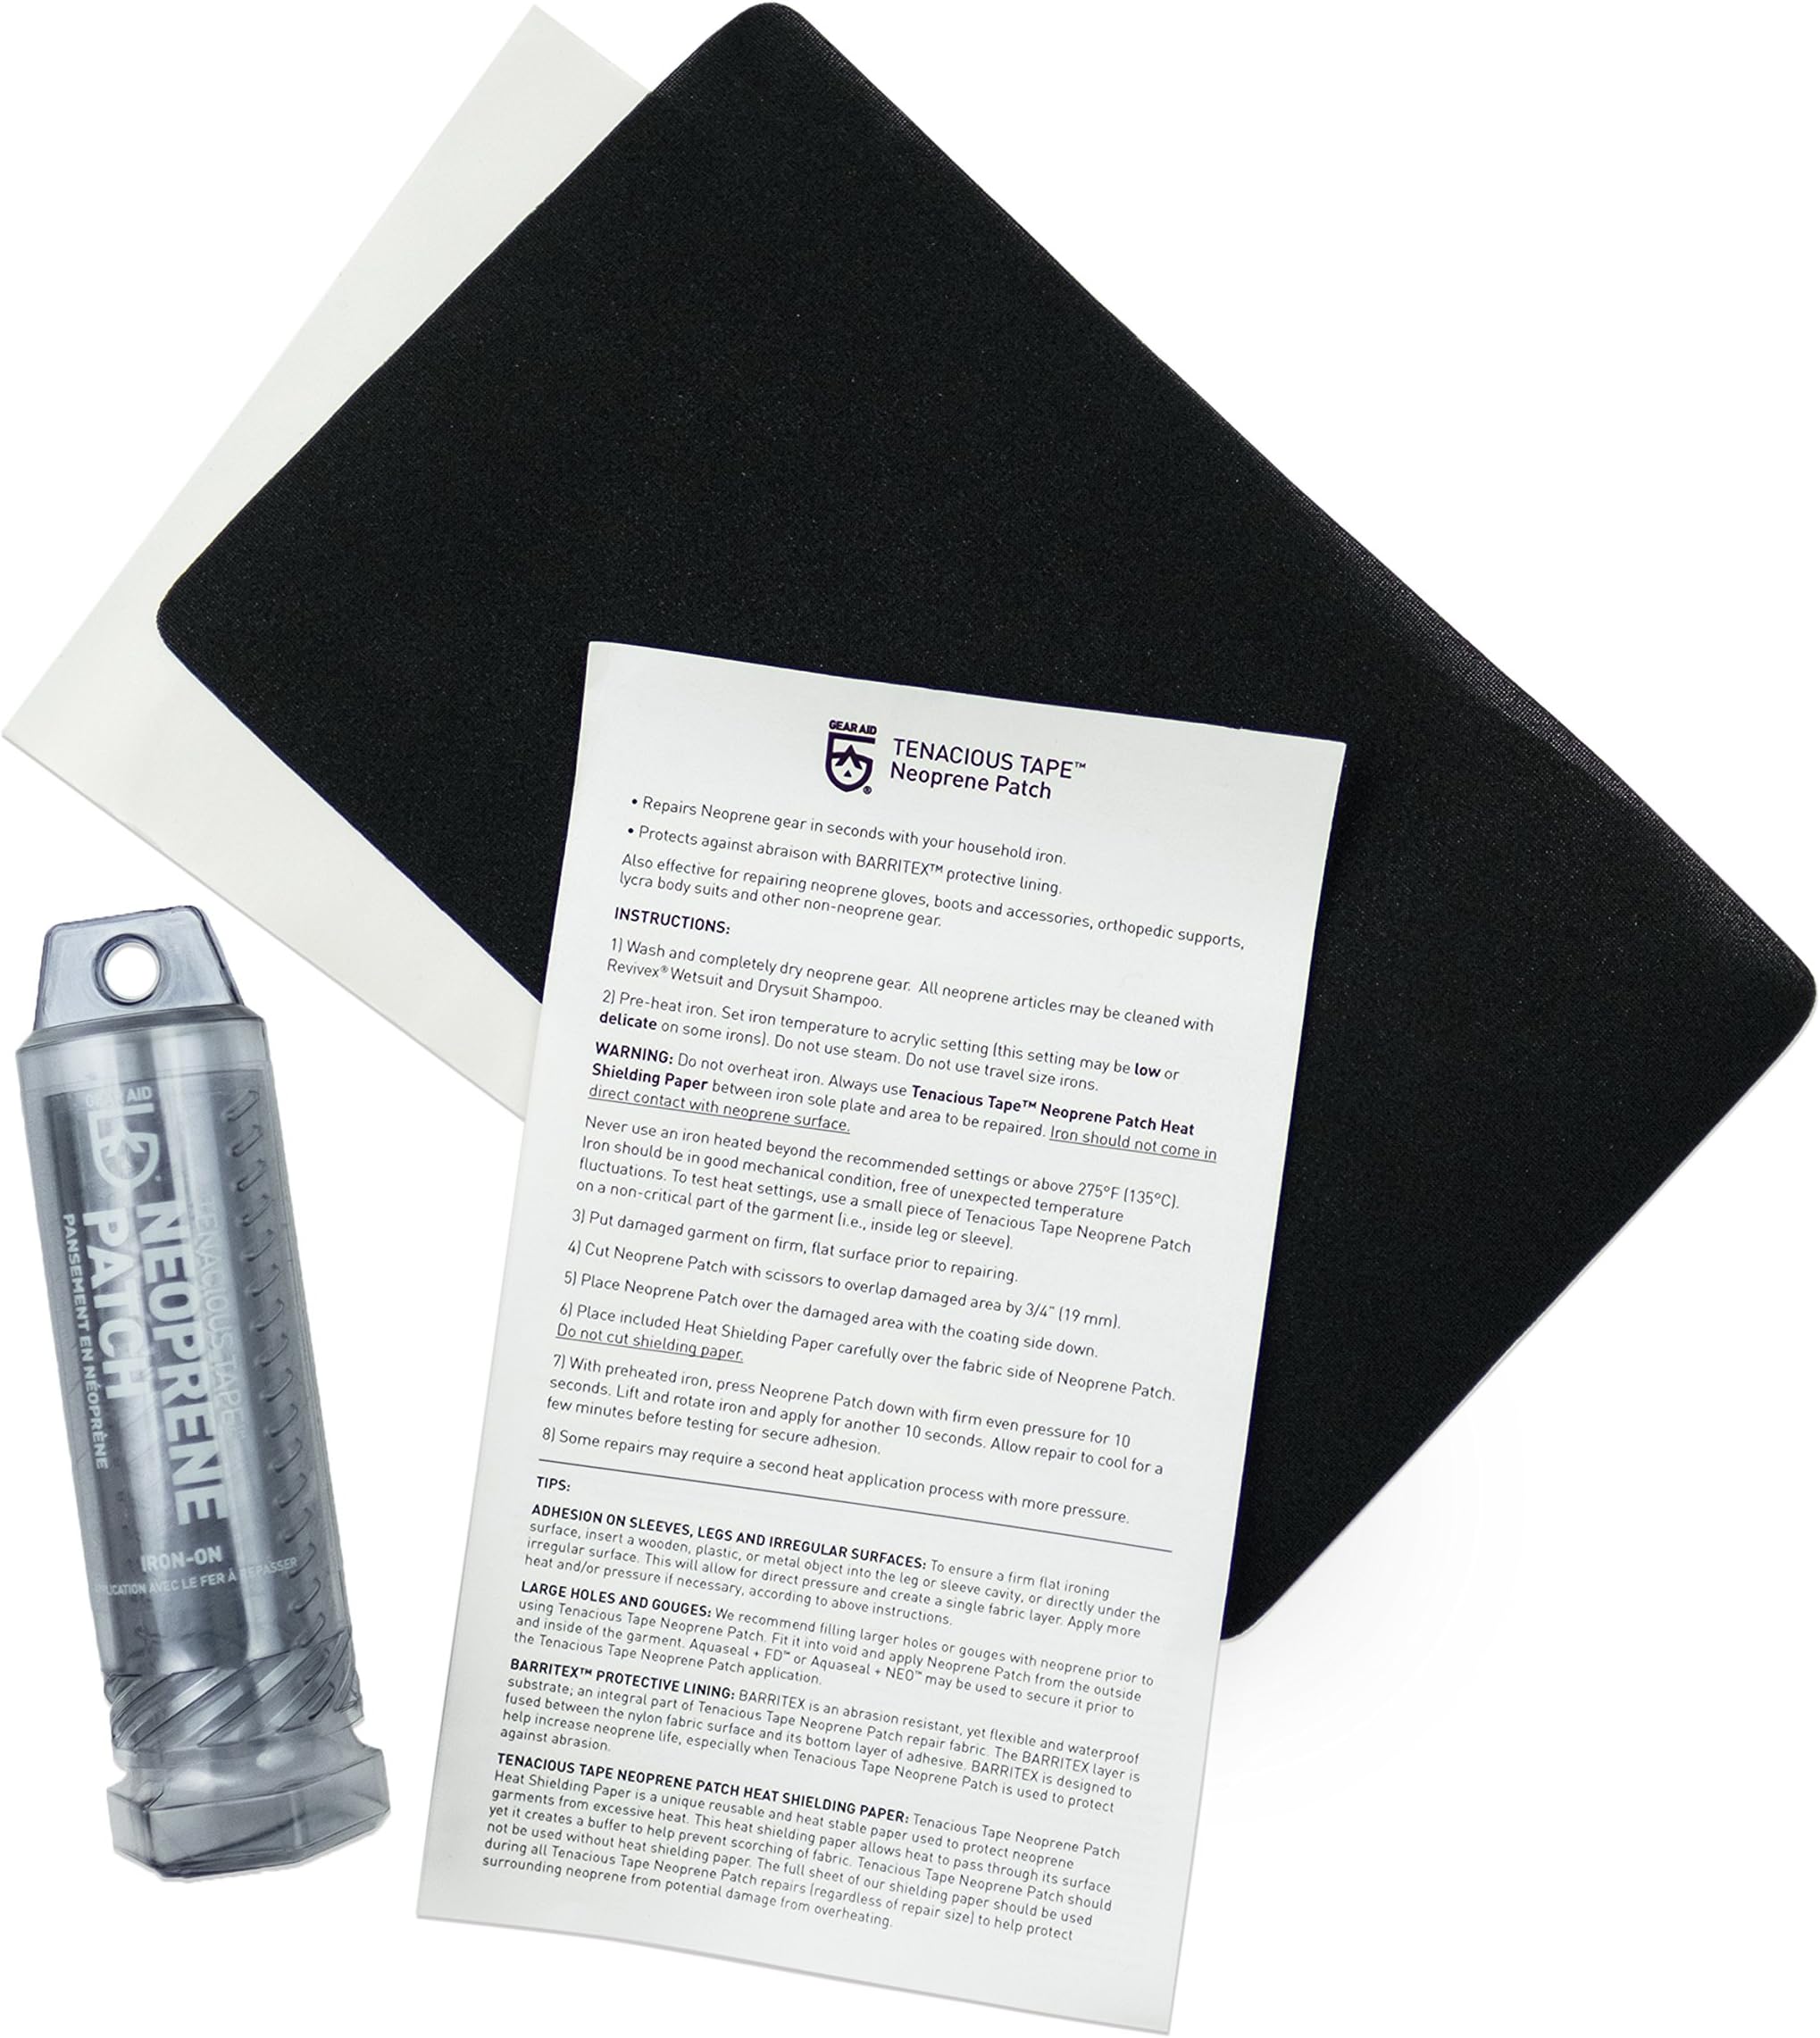
The GEAR AID Wetsuit Repair Kit features a 10"x6" black neoprene patch that permanently bonds with heat from a household iron. Engineered for neoprene and other stretch fabrics like spandex and Lycra, it offers abrasion- and tear-resistant reinforcement for high-stress areas such as elbows and knees. Easy to customize and apply, this kit extends the life of wetsuits, drysuits, booties, gloves, and more, backed by a 2-year warranty.


| ASIN | B000GT471S |
| Adhesive Format | Pad |
| Adhesive Location | Single Sided |
| Adhesive Material | Neoprene |
| Adhesive Side Count | 1 |
| Best Sellers Rank | #20,977 in Sports & Outdoors ( See Top 100 in Sports & Outdoors ) #30 in Outdoor Gear Repair Equipment |
| Brand | GEAR AID |
| Brand Name | GEAR AID |
| Color | Black |
| Compatible Material | Neoprene |
| Customer Reviews | 4.2 out of 5 stars 1,166 Reviews |
| Global Trade Identification Number | 00021563161106 |
| Included Components | GEAR AID Wetsuit Repair Kit with Neoprene Patch, Fix Seams and Tears |
| Item Resistance | Abrasion Resistant, Tear Resistant |
| Item Type Name | Neoprene Patch |
| Item Weight | 1.44 ounces |
| Manufacturer | GEAR AID |
| Material | Neoprene |
| Material Type | Neoprene |
| Model | 16110 |
| Number of Items | 1 |
| Package Size Name | Neoprene Patch, 1 Pack |
| Part Number | 16110 |
| Size | Neoprene Patch, 1 Pack |
| Size Name | Neoprene Patch, 1 Pack |
| Surface Recommendation | Cloth |
| UPC | 021563161106 |
| Unit Count | 1 Count |
| Warranty Description | 2 Year Warranty |
P**E
Works well and easy to use
The girth of my thighs always causes the inseams near the crotch of my pants to wear out before any other wear begins to show. When this area of my neoprene workout pants started to wear thin and make it too embarrassing for me to do floor work when anyone else was around to see my pasty skin or underpants through the ever-widening thin spots, I finally got this patch kit and fixed my pants. It took a little creative maneuvering to get the most out of this patch and get sufficient coverage over the worn spots on account of the contours of the crotchular region I was needing to patch. Here's how I did it: 1. Assess the damage 2. Create a paper template that sufficiently covers the area to be patched 3. Cut pieces from patch material. I used 2 patches for the worn spots in the crotch on both sides (inside & outside) on both the front and back of the pants then used another little piece to cover a small rip on the waistband (not shown here) 4. I don't have a tailor's ham or a mini iron, so I used a piece of scrap fabric and glass-head pins over an old oven mitt to use my own hand to manipulate and hold the material while pressing small areas of the patch with the tip of my large iron 5. Position patch and use glass-head pins on seams to hold in place while ironing 6. Spot iron patch a little bit at a time, covering less contoured areas first then spot iron areas on either side of a pucker (being mindful not to iron a pucker or fold into the pants) 7. Carefully use scissors to snip the patch over the places where the pants are puckering (sorry for the blurry image - it was difficult to hold both the pants and scissors while taking a picture) 8. Spot iron both sides of the snip on either side of the pucker I did this in on both sides of the pants (inside and out) on the worn spots on both the front and back of the pants. It was probably overkill, but I had enough of the patch material for this amount of coverage and I didn't want to risk further wear on either side. The patches held up so well, they outlasted the whole rest of the pants. I would totally use this product in the future if/when I ever again have worn or torn neoprene to fix.
J**E
This worked very well for repairing my bike bib
This worked very well for repairing my bike bib. Since my bib is black, this was a perfect match. Pros: 1. Easy to apply. 2. Material stretch like the bike bib. Cons: 1. A little expensive for a 6"x10" patch. On the other side, it saved my $180 bike bib. 2. Kind of hard to find the right temp to melt the glue the first time. There is such varying different temp for a given iron. 3. Only 1 color - black. Tips: 1. Start with medium temp setting on you iron. Adjust as needed. I was on middle high or my iron. I set it to high and it actually left iron mark on my bib in about a second. When I was done, I actually see a little thin line of glue on the edge of the patch. Keep moving the iron around so it doesn't burn anything. 2. Us a thin cloth or provided wax paper over and underneath the patch (if there is a hole). 3. Make sure there is no sharp edge when cutting the patch - round them or it'll start piling there. 4. Cut patch about a 1/4 inch or move on all sides for the repair area.
A**N
Works OK but instructions are incorrect
I could NOT get the patch to stay on at a low iron setting. My recommendation is to fold the material and/or surround the patch area with other fabric to iron directly on the wetsuit as little as possible. Then I emptied the iron of water (I read on the instructions steam is bad). Then turned the iron up! I was up toward 5/6 by the time the patch actually stuck. I gave this 4 stars because I used my wetsuit 2 days later and the patch stayed on. The corners of the patch did come up a bit. Since then I put some cement on them though, and they've been fine. I'd recommend putting some cement or one of the other wetsuit repair products along the edge of the patch if possible.
D**E
Great Product
Worked Excellent!! Almost invisible on black jacket that had a burn hole
R**4
Didn’t work on my cycling bibs
Used as directed iron on low 8 seconds with protection in place and it didn’t stick and melted my cycling bibs . Didn’t work for me 😢
R**G
Solid patch, very easy to use with a few tweaks
I bought this to repair an old wetsuit with a torn seam. I was a little trepidatious after reading the reviews, which had conflicting instructions. In the end, I pretty much followed the instructions that came with the repair kit exactly, with a few tweaks. Here's what I did: -- Cleaned area with rubbing alcohol beforehand and let it dry completely -- Made sure wetsuit was on a flat surface with NO WRINKLES (this is more important than people emphasize - if your wetsuit is not completely flat, the patch will not totally adhere to wrinkles and I have a feeling it could mess up the whole patch) -- Cut material with rounded corners and plenty with plenty of room to spare -- Turned iron up to Wool setting (not Synthetic/Delicate like the instructions say - I did Synthetic first and the material didn't seem to quite be adhering. I changed it to Wool and then I started seeing the extra glue glistening around the edges (shown in pic) and it seemed much more secure) -- Used the ironing paper that came with the kit. I didn't use a towel as others suggested. I thought that would reduce the heat too much, especially if you used the Synthetic/Delicate setting! -- Held it down as hard as I could for 10 seconds at a time, then repositioned the paper and iron. -- There were several wrinkles in my wetsuit and this is where I would caution you. If you have a section that doesn't quite lay flat, I would recommend cutting separate pieces of the patch material, as many as you need for each piece to lay flat. I ended up snipping little gaps in the patch to allow each piece to lie flat, since the material was stretched over a wrinkle in my wetsuit and I'm worried it could become a new hole. All in all, this was pretty quick, easy to use and the patch seemed to be adhered well. If you're reading this, assume I'm surfing toastily ever after. I'll update this review if not!
X**L
An absolute lifesaver!
This is an absolutely fantastic product! I was worried I’d have to drop hundreds on gear, but this kit completely saved my trusted wetsuit. A quick piece of advice for anyone using it: make sure to follow the included instructions, and work slowly and patiently during the application. I highly recommend you read other reviews first to use other people's tips on how to use it successfully. For example, I found that if you set the iron temperature between gentle and wool for better results, the patch bonds perfectly without damaging the surrounding neoprene. It feels as good as new and is completely watertight again. Highly recommended!
A**G
Doesn't hold up to heavy surf
I purchased this for a hole near a chest seam in my O'neill Pyscho wetsuit, that has kept me pretty cold during surf sessions this winter. For starters, it says in the instructions to use the lowest setting on the iron, which literally does nothing when you try to iron it on. You need to set the heat up around the middle on the iron in order for this to adhere at all. I used this in addition to the McNett Aquaseal for a "waterproof" fix, and followed all the instructions and cure times to the letter, but whereas the Aquaseal worked great (even though the bottle had a date listed on it showing it was expired), the Iron mend has already begun peeling off after only 1 time out surfing since. I would only recommend this as a temporary fix, just don't expect it to last.
O**E
Bueno
Práctico y portable
E**O
Perfeito
Perfeito. Segue as instruções e confia.
A**R
Gear Aid repair kit
Perfect for repairing cycling shorts and bibs. Be careful not to apply too much heat!
S**R
So far so good
Used it on a hole in my wetsuit armpit and bum. A little stitching and then this patch over the top and so far it works well , could have gotten longer life out of several wetsuits if i had have known about this patch earlier.
R**N
Muy bueno
Ideal para reparar neoprenos. Si el agujero es grande , debes pegarlo con el adhesivo color negro para esto.
Trustpilot
1 month ago
4 days ago