Desertcart purchases this item on your behalf and handles shipping, customs, and support to Japan.
🔧 Fix it once, fix it like a pro – no more creaks, just sleek floors!
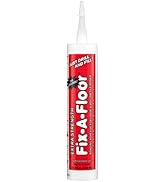
The Original Fix-A-Floor PRO Pack is a professional-grade adhesive solution designed to permanently repair loose, hollow, and creaky tiles and wood floors. Featuring an extra strength formula, micro syringe injector, and drill bits, it enables precise, durable repairs across multiple flooring materials. Proudly made in the USA, this kit empowers both DIY enthusiasts and professionals to restore floors efficiently without costly replacements.


| ASIN | B0B1BJ8C7K |
| Best Sellers Rank | #11,832 in Tools & Home Improvement ( See Top 100 in Tools & Home Improvement ) #17 in Flooring Adhesives & Mortars |
| Brand | Fix-A-Floor |
| Brand Name | Fix-A-Floor |
| Color | White |
| Compatible Material | Ceramic, Engineered Wood, Marble, Stone, Wood |
| Container Type | Tube |
| Customer Reviews | 3.8 out of 5 stars 683 Reviews |
| Full Cure Time | 24 hours |
| Global Trade Identification Number | 00859704003318 |
| Included Components | 2 Micro Syringe Injectors and Two Drill Bits |
| Item Form | Liquid |
| Item Package Quantity | 2 |
| Item Type Name | The Original Fix-A-Floor Micro Syringe Injector for Loose & Hollow Tile Repair PRO Pack (2) *USE The Recommended Caulk Gun* |
| Item Weight | 1.6 pounds |
| Manufacturer | Fix-A-Floor Worldwide, Inc. |
| Material | CoPolymer |
| Material Type | CoPolymer |
| Model | FIXPRO2 |
| Number of Pieces | 2 |
| Other Special Features of the Product | Non Toxic, Self Leveling, Strong |
| Part Number | FIXPRO2 |
| Special Feature | Non Toxic, Self Leveling, Strong |
| Specific Uses For Product | Repairs: loose tiles, hollow tiles & creaky wood floors. Great for underfloor heated areas |
| UPC | 859704003318 |
| Unit Count | 20.2 Fluid Ounces |
| Viscosity Level | Low |
| Volume | 20.2 fluid ounces |
| Water Resistance Level | Water Resistant |
M**G
Works Great on Noisy and Loose Floor Tiles
Seals loose indoor tiles inexpensively. Note that you may need to fill surrounding tiles as well if the sub-surface is uneven and moves/creaks upon walking across the floor. Start with the noisiest tiles first and days later check for other creaking tiles near the treated tiles and fill them too. It’s a work in progress but a simple and inexpensive fix. Hints: drill bits can break while drilling so have extras on hand; and, the cartridge nozzle will keep dripping after filling the hole and pulling the needle out, so keep a cloth or soda can cardboard box nearby to catch the drips or it’s a messy cleanup. Glad I found this product; must had fixed over twenty noisy floor tiles over the past three years. Always kept a cartridge on hand for when I find a noisy tile.
U**L
We Will See...
Okay, so I only gave it only 3 stars because the first impression is not great. The drill bits that come with the kit, once you drill a hole in the end of the tube of adhesive, throw them out. They are useless. Go and buy carbide tipped masonry bit to drill through the grout. I have 1/4" grout lines so I used a 3/16" bit to drill the hole and then screwed on plastic tip that came with the adhesive tube instead of the needle tips that came with the kit, which are also useless... at least for my application. I cut the screw on plastic tip so that it fit the diameter of the hole drilled into the grout. Also I found that not every hole I drilled went into a void that would allow me to inject the adhesive. You can tell almost immediately if you have a void or not. The adhesive will either go slowly and smoothly into the floor or it will back-up out of the hole all over the floor. Be prepared to drill multiple holes to get one that will work. I was finally able to inject most of the adhesive into the tile floor. I say "most of", because the rest of it leaked all over the top of my tile floor. At least it can be cleaned up with a sponge and water. It's almost like Elmers glue. I'm now in the 24 hour drying period. We will see if it works. I will revise my review depending upon how it turns out. My guess at this point is it will take 1 tube for every two 12" tiles... ***Update*** Okay so the tiles set and there are solid. Bouncing a golf ball on the tiles there is no longer a hollow dead thud. I have ordered 12 more tubes as that is what's I have figured it will take to fix the remaining loose tiles. I have also revised my rating to 5 stars in spite of the initial issues I had which are detailed above.
A**N
Heed the warnings!
I read the negative reviews and thought "They must be doing it wrong. I'll have a go". I really believe that this product has the potential to be exactly what I was needing: To fill the hollow cavities beneath several tiles in my home. But the application is flawed. First, the drill bits that come with the kit broke almost immediately - Fine, I'll use my own. Next, I drilled multiple holes through the grout (making sure that I reached the cavity space beneath the tile) - I wanted to be certain that I didn't get any back pressure during application. But then, as soon as I started applying very light pressure to my caulk gun, the product began leaking from everywhere on the tube EXCEPT the applicator tip. I cut the applicator tip shorter, which allowed proper flow, and then tried again. Even without any pressure on the trigger at all - just allowing the product to "leak" out of the tip into the cavity, it still just poured up and out of the holes I had drilled. I was able to get SOME product under ONE of my tiles before it backed up on me. I saw recommendations to just buy the tub and use your own syringe, but I did not need a gallon of product, so the cost was not justifiable. My next attempt might be to buy a plastic syringe and then pour the contents of the remaining tube into a container and try that method. Overall, I would not recommend this product in this application form. I'm sure the product is effective, but the manner of application is not. ONE good thing - It does clean up easily with water.
I**S
AWESOME product, GREAT experience working with it!!!
GREAT fix!!! Follow the directions... The product does look and have the consistency & viscosity of Elmer's glue. Some notes from our experience: 1) We drilled 2 holes for short distance repair run (i.e. 6" or so), and 3-4 holes equal distance apart for longer distance runs. 2) We used our home vacuum cleaner hose over the next nearest hole to the hole we were pumping the product into to help the product find the path to the hole under the grout line. We continuously removed the hose every 3-5 seconds until we saw the product coming up to the surface of that hole. A little of the product got into the beginning of the vacuum hose but was easily removed. Once the product was up to the surface of the hole we continued pumping the product into the original hole until the product started to come out of the second hole without any vacuum assist. We then pumped product into the 2nd hole to top it off if it was a 2 hole run, or we pumped product into the 2nd hole and moved the vacuum down to the 3rd hole, and repeated the process always topping off the hole that the vacuum was last used on. 3) I read that some people had broken several of the drill bits supplied. We probably drilled 20 or so holes and never broke a bit. We have a 1/8" sanded grout lines and large format porcelain tiles. If you have porcelain tile you have to be careful not to hit the side of the tile when drilling through the grout, you could feel and hear the bit when it clips the side of the tile, as porcelain is super hard and can easily stick and break the bit. 4) After filling the holes, we placed a 5 gallon bucket filled with 3-4 gallons of water over the repaired tile grout lines for the full 24-hours as noted in the instructions. We then grouted the 3/32" holes we had drilled. Once the grout was dried we couldn't see where the holes were, looks perfect! Since this was the first time using the product we will keep an ear out to hear if any of the repaired areas becomes loose again. Right now, no loose tiles, no crackling sounds when we walk over them, and a VERY happy customer!!!
D**5
Works great, but it depends on what's under the tile.
I have 17 inch square tile floors over concrete, and some had tented and a large number of other were hollow and had come loose from the thin set. All have very thin grout lines about the width of a box cutter blade. The only space to drill into the grout line, which is how they describe to use this product, was in the corners where the tiles meet. Unfortunately, because of how the thinset was originally laid under the tiles, this product would not flow under the hollow tiles. However, once I removed the tented tiles, I was able to cut out the hollow tiles that had come loose from the thin set, and lift them out. If the thin set was still secured to the concrete and in good condition, I was able to use the Fix a Floor, and spread it over the top of the existing hard thinset, and relay the tile. This worked perfectly. It secured the tiles to the existing thinset and eliminated the hollow sound from the tiles. Once the tiles were re-grouted, it looks and sounds like a new floor. (It's actually 25 years old.) As described in other reviews, the consistency of the Fix-a-Floor is similar to a runny white carpenters clue. (it dries clear) As also described by others, it can be messy, but if you are careful and release the pressure from the calking gun and recap the tube, once you want to move to another location, it's not a big deal. If it gets on something you don't want it to get on, just wipe if off with a damp sponge. If I ever have the same issue with loose tile, I would definitely use this again.
J**D
Qualified Approval
It worked for us. We used the product on four large vinyl tiles in the kitchen. Although the end result was satisfactory, the process was very tedious. The drill bits provided by the seller are very fragile and break easily. We had to purchase a new bit at the local big box store to complete the project. In addition the micro injection needles kept coming loose and oozing glue. Finally, three of the four tiles took the glue easily but, one of the tiles took forever to take a barely adequate amount of glue. It is likely that success with this product has a "luck of the draw" quality depending on what's going on with the mortar under each individual tile so, "Results may Vary." Anyway, mark us down for qualified approval of this product.
T**H
The Original Fix-A-Floor Loose Tile Repair Adhesive with Micro Syringe Injector
**Ease of Use** I recently purchased The Original Fix-A-Floor Loose Tile Repair Adhesive with Micro Syringe Injector to fix some loose tiles in my kitchen. The product was incredibly easy to use. The kit includes a 10.1 oz tube of adhesive, a micro syringe injector, and various tips to customize the application. The instructions were clear, and I was able to use a standard caulking gun to apply the adhesive. **Effectiveness** The adhesive worked wonders on my loose tiles. After drilling small holes into the grout lines, I injected the adhesive underneath the tiles. The product flowed smoothly and filled the voids effectively. Within a day, the tiles were firmly in place and no longer made that annoying hollow sound when walked on. **Versatility** What I appreciated most about this product is its versatility. It is suitable for various types of flooring, including tile, porcelain, ceramic, marble, stone, and wood. This makes it a one-stop solution for different types of loose or hollow flooring issues. I even used it to fix a squeaky wood floor in another room, and it worked just as well. **Value for Money** At $29.99 for a pack of two tubes, the Fix-A-Floor adhesive offers excellent value for money. It's a cost-effective solution compared to hiring professionals or replacing entire sections of flooring. Each tube covers a significant area, and the strong bonding ensures long-lasting results. Plus, the adhesive is non-toxic and eco-friendly, making it a safe choice for homes. **Customer Support** The product also comes with a detailed instruction manual and access to how-to videos on the Fix-A-Floor website. Additionally, their customer support was responsive when I had a question about using the product on my linoleum floor. They confirmed that it could be used effectively on linoleum and luxury vinyl plank (LVP) flooring. **Final Thoughts** Overall, The Original Fix-A-Floor Loose Tile Repair Adhesive with Micro Syringe Injector is a fantastic product for DIY enthusiasts looking to fix loose or hollow tiles. Its ease of use, effectiveness, versatility, and value for money make it a must-have for any home repair toolkit. Whether you're dealing with tile, marble, stone, or wood floors, this adhesive will help you achieve professional results without the hefty price tag. **Pros:** - Easy to use with clear instructions - Effective on various types of flooring - Cost-effective and eco-friendly - Strong and flexible adhesive **Cons:** - Can be a bit messy during application - Requires a standard caulking gun for use I highly recommend this product for anyone looking to tackle loose or hollow tile repairs on their own.
I**.
Worthless drill bit, leaking tubes an applicator tips.
The included drill bits are worthless. If you’re going to use this product I recommend two things. First go slow with your caulk gun and second have your own drill bit ready to use or you will waste your time and ruin the included syringe. The included syringe clogs up if you stop for more than a minute and ordering replacements cost almost as much as the product! IMO this is by design so they can screw you into spending $11 on $.75 worth of plastic and a metal tube. One more thing, have a box and lots of wet rags ready for when the back of the tube blows out and you lose half the product and muck up your work site and caulking gun. As an added bonus, the included syringe leaks out the sides and gets everywhere. Out of six tubes, I maybe managed to get one full tube under the tile. I ordered a dozen tubes and am out of the tips. Waiting on two replacements that I just paid $32 for! It does work but they need to fix the issues with the cheap drill bits, tubes blowing out and the syringes leaking badly. I should have taken a picture of the mess and what the drill bit looked like after drilling the first hole.
B**R
Pas facile
A priori, le principe d'injection est simple.mais en pratique, les cartouches fuient soit à l'aiguille soit au piston.resultat, l'application n'est pas du tout évidemment. J'ai mis plus de temps à nettoyer mon chantier qu'à injecter.
R**T
This works amazingly, just be patient when using a caulking gun…2-3 hours to empty one tube!
This stuff saved my entire brand new bathroom. For some reason, one of my 36x36 inch tiles developed a bounce and the grout was cracking. Brand new install but that one tile was moving. The second problem is if I had to remove it, chances are I would have scraped my heated floor cable as this is where the cable starts. Literally a potential complete bathroom floor redo including all the mouldings etc…. I tried out of desperation this filler. Let me tell you, it works! Be patient when installing the needle point into your grout joint (you must remove the grout which is a job in itself, because easy o chip a tile!). I used my auto back off caulking gun which I believe is a must. It took me about 2 hours to empty one full tube int the void. Be patient, slightly pull the caulking gun trigger and wait….2-3 min yes later do it again. Be ready for an extremely slow process. But, it saved me about 10k$ of tiles, mouldings, heated floor cable and a week or two of gruelling work! Do not listen to the complainers, they just did not know how to use this product. Plenty of YouTube videos showing how. Be ready to stit on the floor with gun in hand and have the patience for at least 2 hours to empty one tube. Highly recommended! Love this stuff, it saved me a ton of money and a potential burnout! Lol
L**A
Worth the money
Worked great
A**R
Don't bother
Didnt work, failed to fill under tiles
A**9
Faulty Drill Bits
We have very narrow grout lines, so we bought this kit hoping that the injection needles and drill bits would help us. The drill bits both shattered trying to drill through the grout and sent shards flying. Somehow our grout isn’t strong enough that it’s cracking from subfloor movement, but strong enough to resist the included “diamond” drill bits. Ultimately we’ve come to terms with no quick fixes to our debonded tiles, and that we will have to replace the floor. I’d recommend saving yourself the headache of a DIY product like this if you can
Trustpilot
2 weeks ago
1 day ago