⌨️ Build your vibe, command your space, and never miss a beat.
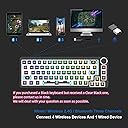
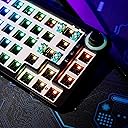
The GK GAMAKAY LK67 is a sleek 65% mechanical keyboard kit featuring 67 hot-swappable keys compatible with 3pin/5pin MX switches. It offers triple-mode connectivity—Bluetooth 5.0, 2.4GHz wireless, and USB-C wired—for seamless device switching. Equipped with a multifunctional knob and immersive RGB lighting via a unique mesh bottom and side design, this compact keyboard is fully programmable and designed for professionals and gamers seeking customizable performance and style.


| ASIN | B09PRN726P |
| Antenna Location | Gaming |
| Box Contents | USB Cable |
| Brand | GK GAMAKAY |
| Brand Name | GK GAMAKAY |
| Button Quantity | 67 |
| Colour | Black |
| Compatible Devices | Laptop |
| Connectivity Technology | USB |
| Customer Reviews | 4.3 out of 5 stars 474 Reviews |
| Enclosure Material | Plastic |
| Generation | 3rd Generation |
| Hand Orientation | Ambidextrous |
| Item Dimensions L x W x H | 33L x 12W x 3.5H Centimeters |
| Item Type Name | keyboard |
| Keyboard Backlighting Color Support | RGB |
| Keyboard Description | Mechanical, Gaming |
| Keyboard Layout | QWERTY |
| Manufacturer | GK GAMAKAY |
| Model Name | LK67 |
| Model Number | LK67 |
| Number of Items | 1 |
| Number of Keys | 67 |
| Number of Packs | 1 |
| Number of Sections | 6 |
| Power Source | Battery Powered |
| Product Features | Backlit |
| Recommended Uses For Product | Gaming |
| Special Feature | Backlit |
| Style Name | Contemporary |
| Theme | Gaming Keyboards |
| Unit Count | 1.0 Count |
M**H
This board is an INSANE value for the money
Now I just want to say that this is my first custom built mechanical keyboard and this review may be long because I don't want to stop typing lol. My current setup: Personally Lubed Glorious Panda Switches Green matcha keycaps with hiragana from Amazon 4 layer tape mod on the PCB Microfoam surgical Foam tape on the bottom plastic Glorious coiled nebula cable Building the board: Taking the board apart for modding was actually a fairly straight forward experience. The top case comes off by snapping it out of place and lifting it off of the bottom case. Then you unscrew a few screws to take off the plate and PCB from the bottom case. This is the part that usually trips people up though. While taking off the plate and PCB (which are attached by screws on the underside of the PCB), you have to be EXTREMELY careful so as not to destroy the mode selector switch on the back of the case. This part took the longest for me to do because I really wasn't trying to have to buy another board. Be cautious and take your time with this part if you are planning on modding your board. After taking the PCB out and not breaking the switch, I was able to start modding. I lubed my stabilizers and got them feeling perfect. Then I proceeded to tape mod the PCB by using 4 layers of masking tape. I know people generally use 3 layers but I was going for and extremely deep thocky sound. After tape modding the PCB I then applied hospital like foam tape to the bottom case to help dampen the sound even further. Used about 4 to 5 layers on this part. After applying my mods, I had to create holes in the tape on my PCB to allow me to be able to screw it back in. I was careful putting the mode selector switch back in place and all was well. Features: The board comes with MANY RGB features. I'm not a super fan of RGB in general but the mode I use kind of serves as a decent backlight at night. The three modes it comes with are nice to have. You can essentially connect up to 5 devices for this keyboard. 3 bluetooth devices, 1 2.4 GHz device and a wired connection. Layout: The keyboard layout is your standard ANSI layout so not much to say there. Functionality: I checked all the connections on the keyboard with a pair of tweezers before setting the board up just to make sure all the keys worked. They did. The rotary knob also works flawlessly and is really convenient when trying to change the volume of media. Even works on Mac. Connectivity: Connectivity is great on this keyboard. I have no issues whatsoever using the 2.4GHz connection on my MacBook Pro M1, BT on my iPad Pro and wired for my custom gaming PC. No dropouts or anything like that. Sound: Overall I did not try this keyboard stock because based on the reviews I watched it would have sounded akin to my corsair K65 lux that I finally retired after 5 years of use. I wanted nothing to do with the hollow sounds of a keyboard. I wanted something way more substantial and deep. My cost breakdown: This keyboard - $70 Personally Lubed Glorious Panda Switches - $50 for 2 packs Green matcha keycaps with hiragana from Amazon - $35 4 layer tape mod on the PCB - $4 Microfoam surgical Foam tape on the bottom plastic - $7-8 Glorious coiled nebula cable - $50 Krytox 205g0 - $13 Switch lubing supplies - $10 Glorious Switch opener (I would not recommend this one) - $10 TOTAL: $250 oof... Final thoughts: For $70, this keyboard is a phenomenal value. It is of decent quality and you can really make it sound like an expensive board. Now as you saw above this board cost me $250+ dollars to build and about 6 hours of build time. You're probably wondering why I turned a $70 board into one thats $250... Well that is because I had to buy all the supplies for it. I didn't have switch lube, I didn't have brushes, a switch opener, masking tape, keycaps, switches, etc. I was literally starting from 0. I also wanted a really nice coiled cable to go with the board instead of the one that was included. I didn't have to do any of this. A simple setup without lubing and starting from 0 can literally cost you around $130 with just the board, Akko switches, and $30 keycaps and possibly no mods if you don't have masking tape lying around. Even at $130 this board is still a very great value. I would HIGHLY recommend to anyone thinking of buying this to use for a build. Thank you for coming to my TED Talk lol. P.S. I ended up using Microsoft Power Toys to change the keybindings, because I didn't really trust the software that was recommended to use for the board.
S**D
Amazing value
Once I got the keyboard, I started modding it, I put a thin layer of foam in the case, tape modded the pcb, lubed all of the stabs and lubed the switches, the wire balance is amazing and it’s poppy, the parts for this is the Akko cs crystal switches, milk Japanese keycaps
N**H
GK gamakay lk67
the lk67 is an amazing pcb, this was my first custom keyboard build using novelkey x cream switches and it was super easy to put together the stabilisers are perfect and it looks incredible, it is on the expensive side but well worth it!
T**N
Es grandiosos este teclado, sin embargo...
Es magnífico si vienes de un teclado ya armado, es decir, el típico teclado barato que ni si quiera se puede considerar ga de entrada. Ahora bien, viene la explicación del porqué de las 4 estrellas, y la razón es que el plástico se deforma cuando lo abres, puede que yo no sepa manejar correctamente el plástico, pero en mi caso, el plástico se deformó. Por lo que les recomiendo no abrirlo, utilizen mods que se puedan implementar sin abrir el teclado, como el PE Foam qje es como una pegatina y ya sería todo lo recomendable que le podrían hacer y la ultima modificación que le podrían hacer son los estabilizadores. Si gustan arriesgarse adelante, pero no lo estén abriendo constantemente solo abranlo 1 vez, pero en esa vez hagan las modificaciones correctas y traten de no equivocarse en ellas, para así evitar abrirlo, es mas si pudieran cómprense 2,uno que sea su conejillo de experimentación y el otro que sea el bueno. Muchas gracias por leer. Edicion: Si lo llegan a modificar no corten todos los postes, simplemente corten los postes de en medio, los que están en el del backspace, el de multimedia, el de las flechas, el del shift izquierdo, el de espacio y el del tabulador son los que no deben de cortar porque ayudan a que el Top Housing cierre correctamente, no cometan el error mio de cortar el del espacio. Y si quieren realizar el Tape mod solo pongan una capa para que así la entrada USB-C no esté descentrada del agujero. El PE Foam si es muy recomendable mejorará mucho más el sonido que ya tiene de stock. Y ya son todas las recomendaciones que tengo para que no cometan los mismos errores que desgraciadamente yo cometí. Segunda edicion: Después de un par de modificaciones para lograr la mejor experiencia sonora, el teclado obtuvo una cierta curvatura que hace que baile sin la presencia de un mouse Pad, por lo que recomiendo que si vas a modificar el teclado, pienses muy bien en lo que le vas a realizar para evitar el Case se deforme.
C**E
Super easy to customize!
I absolutely love this keyboard. I was able to easily customize this to what I wanted and it sounds great! I did take it apart in order to do the keyboard tape mod, I added Quinn switches and found some cute key caps that match the keyboard! I have had do issues with this board!
Trustpilot
1 month ago
4 days ago