

Desertcart purchases this item on your behalf and handles shipping, customs, and support to Japan.
☀️ Shade your space, own your outdoors — retractable style made simple!
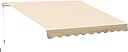
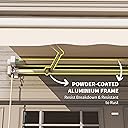
The Outsunny 10' x 8' Retractable Awning features a sturdy aluminum frame and UV- plus water-resistant polyester fabric, designed for easy manual operation via a crank handle. It offers adjustable pitch and extension arms for customizable shade, mounts securely on various surfaces, and provides reliable sun protection with a sleek beige finish—perfect for enhancing any outdoor living area.




| ASIN | B06XPZC2XW |
| Best Sellers Rank | #179,190 in Patio, Lawn & Garden ( See Top 100 in Patio, Lawn & Garden ) #138 in Patio Awnings |
| Brand | Outsunny |
| Brand Name | Outsunny |
| Color | Beige |
| Customer Reviews | 4.2 out of 5 stars 2,789 Reviews |
| Fabric Type | Polyester |
| Included Components | Hand Crank, Wall Brackets |
| Item Dimensions D x W x H | 96.5"D x 116.25"W x 59.75"H |
| Item Highlight | Manual Patio Awnings, Sunshade Shelter, UV & Water-Resistant Fabric, Aluminum Frame, for Deck Balcony Yard |
| Item Type Name | Sunshade Awning |
| Item Weight | 40.7 pounds |
| Manufacturer | Outsunny |
| Manufacturer Part Number | 840-150CW |
| Material | Aluminum, Polyester |
| Material Type | Aluminum, Polyester |
| Minimum Clearance | 11.8 inches |
| Model Number | 840-150CW |
| Number of Items | 1 |
| Number of Packs | 1 |
| Operation Mode | Manual |
| Pattern | Solid |
| Product Dimensions | 96.5"D x 116.25"W x 59.75"H |
| Projection Distance | 8 feet |
| Size | 10' x 8' |
| Style Name | Modern |
| UPC | 842525106757 |
| Unit Count | 1 Count |
M**1
Good product, with a few caveats
Overall, I am so far satisfied. With the understanding this is a sub $200 retractable awning, you get your money’s worth. The directions are precise and accurate (one exception, more details later in review). No problem following installation directions. Other buyers seem to have struggled with the installation instructions; It’s possible the company has updated the instruction manual since the other reviews were written. Works as advertised. Installation was easier than anticipated, only some minor, self-inflicted glitches. While the sturdiness of the arms seem questionable, I’ve had no issues with operation or any type of failures. I’ve only had it up a few weeks, and have only open and closed it maybe 20-30 times. Can’t attest to durability at this time. As for the instruction manual. As stated, it is precise and accurate. It does explain clearly how to assemble and install. I can understand why some may have trouble with the instructions, as they do lack detailed explanations. Proceed slowly, follow the directions step by step, study the diagrams closely, read ahead and understand what is going to be required and why, and it will make installation go smoothly and trouble free. There are 2 or 3 places where the wording is not clear, but common sense should overcome the few grammatical errors. Some suggestions on the areas which caused me confusion. Direction to roll canvas onto roller. Directions are accurate, but some of the close up images are reversed. Just follow the directions. There is a second picture showing direction of canvas onto roller in the ‘adjusting the awning’ [pitch angle]. If something about the directions don’t make sense, study it until it does. Again, the directions are highly accurate. Only one important step seemed to be missing from the instructions, and that was distance apart to mount brackets. When figuring this out for yourself, measure from center of actual canvas part of the awning, as the awning roller itself is offset onto the awning arms. You only have about an inch to play with when it comes to horizontal positioning of the awning into the right bracket. If you are trying to center the awning over an opening, line up center of canvas over center of the opening (unless you want to offset the canvas). Hint to help make sure roller and canvas is positioned correctly, if you are unsure. Roller has one end with square central nub (goes on left side of awning arms, if facing awning as shown in instructions) and round end (right side). Canvas should roll over the top, or counterclockwise if facing roller from the left (square nub) side. Minor issues. The manual states “Each awning comes with pre-set pitch/angle that is considered ideal”. Don’t believe them. I imagine those who had issues with damage to the extension arms or material roller issues might have not taken into account the awning pitch. Instructions stated make sure arms are installed level on the wall, which mine were. Upon first use, awning was not straight. One side was 2-3 inches lower than the other. I needed to adjust pitch on just one arm to correct this factory error. I had to open and close the awning a few times, loosening and retightening adjusting bolts, to make slight pitch adjustments after each operation, before finding the correct setting. The instructions did not show correct diagram explaining how to adjust pitch, but it is easy to figure out. Slightly loosen the appropriate bolt (the top one of the two) and adjust ‘Jack Bolt’ accordingly. If you can’t visualize how this is done, I’d suggest not playing around unless you understand the simple mechanics of the adjustment process. Adjusting incorrectly could probably cause problems and premature failure of the extension arm. Overall, I am happy with this product and plan on purchasing a second awning to install over my other sliding glass door.
R**Y
Good awning at a good price!
If I were a betting person . . . . I'd say I've looked at more retractable patio awnings that most people could imagine existed! Having NO experience with them, I didn't want to spend a fortune on an awning and find we didn't like it after all. The Outsunny offered the perfect size for our needs, and we thought we'd like the multicolor stripes rather than a dull beige. We are NOT disappointed! Installed, the awning IS the perfect size for our area. Installed, the stripes look AMAZING! And . . . let's face it . . . the price is kinda' unbelievably low! Installation would have been a simple process, had the instructions been clearer. I hope the company will re-think their instruction manual. You are told to assemble the 3 long metal sections, then attach the roller arms to the main body. Much later in the manual, you are instructed to do the very same thing! Should that assembly step be accomplished when first instructed, or when next instructed? Parts and their relationship are very poorly labeled - the illustrations are not nearly as clear as they could/should be. When we were finished with the assembly, prior to putting up the mounting brackets, we had parts left in one of the boxes we had no idea where they went or their purpose. It took a LOT of looking, by 3 guys, before we could figure out where they went and what their purpose was. (And believe me, we 3 guys have assembled a LOT of stuff through the years!) Would I recommend this awning? ABSOLUTELY! Just make sure you have a wanna-be mechanical engineer around who can make sense of a very un-sensical instruction book! (Did I say we LOVE the look of the awning, as well as the ease of operation?) We live in a condo complex where all the decks face into the central grounds. We had just finished installation when neighbors started coming over admiring the awning! We may have several more going up before the summer is over!
E**M
Surprisingly good for price
I received this a few weeks ago and just got around to assembling and install. I am pleasantly surprised by the quality for a $200ish item. We actually bought it thinking if it turned out to be garbage we could return or just use it for a season or two and only be out a couple hundred as opposed to what some of the "higher end" awnings cost. I'll start by saying the instructions inclosed are garbage! Absolutely clear they were written by someone who's second or third language is English. With that being said, if you take your time and just look at the pieces it's pretty obvious how they go together. I'm very mechanically inclined so it took me about an hour or so but I was in no hurry. TIP...don't tighten any of the BOLTS until its hung in place. Tighten all SCREWS completely but not the bolts as there's a good chance you'll have to adjust some pieces once in place. I thought of that during assembly and glad I did. Actually hanging it is a breeze. Assembled the awning isn't very heavy and I was able to hang it and level by myself. Another tip...take your time and measure a twice before drilling holes for the hangar brackets. There is a few inches of "wiggle room" but not a huge amount so you want to be sure your location is correct. I hung mine just below the gutters on the back of my house. The instructions state to give atleast 4 inches clearance if there will be anything above the awning. Thats actually pretty close but I would say to go closer to 4 1/2" - 5". I left myself 5" and it worked perfect. Overall it seems like a good item and I'm actually planning on buying another for the other end of my porch. 4 stars because the instructions are trash. If you're not afraid of that then go for it. Update: Just assembled and hung a second awning. Ordered the wrong color, which my wife is killing me over, but they're close so whatever. Anyway, it's been a year since the first awning we hung and we're happy. Work Everytime and handles the wind ok. If it's windy I wouldn't extend it all the way out, just use common sense. For $150-180 bucks this really a good buy. Just know that the instructions are still garbage and probably written and interpreted in Pakistan so take your time. Each time you add a piece just stop, look at it, and ask if this looks/makes sense.
C**L
OMG...BEST purchase I made all year long!!! Update
LOVE LOVE LOVE this awning! I bought a 10' one when it was on-sale because I couldn't afford it otherwise. My mistake was assuming it would be inexpensive to install!! NOT SO!! I kept getting crazy quotes near and Over (!) $1,000 to install it. I called Handymen and Contractors....some even wouldn't attempt it for fear of damaging the siding. I couldn't believe it. I was about to return and send it back because I could not afford that expense for installation. It is a small awning going on Hardy Plank...nothing fancy at all. The instructions did not look hard and there were not many pieces, but it would require 2 people. Then I found a GREAT handyman. He had installed a larger awning at his own home, so felt comfortable doing it. He only charged me $250.00. I was so happy I wanted to make him cookies and give him a beer!! I LOVE this awning. Works great and looks great!! The manual system works fine for me. Even in the rain, I keep it slightly extended a little, so I don't get rain right at my doorstep of my back door. Works perfectly!! I will roll it up if we have major winds expected. Also, it has helped to keep UV sun rays out of directly going into my den, which has kept my home cooler...a major thing if you live in the Gulf of Mexico coast where it is hot and humid. Thanks for putting this on-sale! UPDATE, almost 1 yr later, STILL LOVE this awning! No problems! Update now 1.5 yrs after install: I STILL love it! It has reduced the heat into my living room tremendously. Living in Houston, our summers (and now Spring & Fall) are brutal! The air conditioners can't keep up, nor your bank account running them! I bought the manual version to limit any potential breakdown. I do close it 90% when heavy rains are coming, which is no big deal because here we are on a daily watch for storms and flooding. The company is top notch!! Initially, because of my problems finding a reasonable installer, I wanted to return it way outside of the return policy and they graciously gave me more time to find someone, if not they'd take back. However, that kindness turned out perfect because 10 days later I found someone who installed it for a fraction of several quotes I had been given before. My only complaint is that I ordered a 10' for a 9' window area. If I did it over, I would order the 12', slightly bigger than what you think you need. One reason for that is the rain. Rain doesn't always fall straight down, so even though I may be covered above in a light rain, rain blows to the center where the door opens. A foot extension on both sides would solve that. I have absolutely no complaints with the product. Our humidity is high in rainy years. I can see where a small amount of mold is thinking about starting on the edge. But, I have to spray areas of my stone and siding house every 2 years as well. So I don't see this as an issue, but rather general home maintenance. Otherwise it still looks brand new! I don't know how long it will last but I would order a replacement in a heartbeat!!!
L**Y
3rd year with the awning and still going great!
This is for the Outsunny 10' x 8' manual retractable awning (actually two of them). I've had them on my home in the rainy Pacific Northwest for 3 years, now heading into the 4th year of use. BTW, I rarely write a review. I have no association with the company or Amazon, and no one has asked me to write this review. But, since I just uncovered them (to start the 4th year of use) I felt compelled to give it a shout out and a 5 star (but if there were 4.5 stars I'd go with that due to the instructions) I purchased the first one early summer of 2021; liked it so much purchased the 2nd a month later. I weather-covered it late fall every year (with the cover named at the bottom of this review) BTW, I agree with other reviewers that the instructions took more than a little patience and multiple re-readings (at least back then - maybe they've improved since?) but at the price point, $180ish at the time, well worth it. It IS helpful to have a decent aptitude (or have a friend who does) for assembling and mounting because they certainly weren't IKEA-level instructions, but careful reading, close diagram inspection, and patience (+ beer!) helped a lot :) BTW, there has been multiple times when I wasn't paying attention and a strong wind has flipped them up 20 -30-45 degrees (once a neighbor knocked on my door and said the awnings looked like they were about to sail away) but they never had a problem. The cover I got: BTW, this cover has been...ok...for the same years (3) I've had the awnings. Materials are strong canvas (that is, canvas as far as I could tell) and have stood the test of time for durability but the fit is certainly not 'Plug-n-Play'. Took a little 'customizing' (read: cutting) to (more or less) fit snugly at the ends, but tight cinching (I used long 1" velcro strips) kept the awnings dry all winter. The cover I got: ADVANING All-Weather Protective Cover for 10' Wide Retractable Awnings, Heavy-Duty Weather Proof Polyester Fabric, Color: Beige, AC1000-P861T
P**R
Very nice awning, just be sure to ignore the instructions!
After several years of trying to find a replacement in this size I finally lucked out and this size was in stock. Today was a decent New England day and warmer weather's on the way so it was time for assembly. My first impression as a former design technician was that there was some decent thought put into the design of this awning; fit and function are pretty well thought out, with a few opportunities for minor improvement, but nothing prohibitive. For anyone interested in doing this alone as I did, here's how it went: First, do NOT attempt this if you don't have a 15' long area which you can set up to support working on the assembly at a comfortable height. My workshop being 12' by 16' was just workable having the adjacent driveway available as well. More on that later. What you start with is several "halves" that lock together to create the full length frame. Most of this work is straightforward despite the horrid text translations. Any handyman worth their salt will have few issues here. Do yourself a HUGE favor: Once you have assembled the main frame which will be seated against your building, mount the brackets to the building NOW, making sure they are leveled and all 3 are in a straight line. Once fully assembled this thing will weigh a ton and be a beast to control, you'll be very thankful the brackets are where they need to be so you can just hoist this puppy up and into place. The rest of the assembly is pretty much "by the book", with the exception of where they tell you to set one bar "6 cm from the end of the adjacent bar"- this is BULL! DO NOT tighten the "foot brackets" until later when the rolled up fabric is installed. Center the entire roller and then tighten the brackets. Huge mistake on their part. The other main concern is sliding the fabric into the slots that hold it; use caution and be very patient here or you can tear the stitching either at the point of entry or the midpoint where the two halves join. This is also where that extra space in the driveway comes in handy- you'll have 13 feet of frame sitting there and another 13 feet of spline-line fabric you need to feed into a slot without snagging it and causing a tear! I set the roller on a ladder for support and moved both the ladder and roller closer as I worked. (this will make sense when you go to do it) A trustworthy assistant would be invaluable here to prevent an accidental snag, as feeding the fabric into the frame is a bit tedious. I managed alone, but had to be very careful especially at the points there is stitching being fed into the slots. Once fully assembled this thing is big, bulky, and heavy. As one who used to toss my 130 lb Coleman Scanoe over my head and jaunt around the yard like it was a paper bag, trust me- this thing is HUGE and hard to aim into those little tiny brackets that are up over your head and impossible to spot as you shove this monstrosity up there and nearly into place. Get two strong ladders (it's you And the canopy!) and get help. I used to put mine up and take it down myself back when I was young and healthy, and it was a chore back then. Now I'm smart enough to realize one small slip and this thing gets destroyed in an instant! Get help. You'll be glad you did. It only takes a minute to hang, but it feels like an hour!!
D**N
For the price, it's a decent product, but be prepared to spend some time to make it right.
As many others have stated...once you figure out how to put it together and it's installed, it's pretty decent. But getting to that point is a major pain in the butt. The individual pieces seem to be manufactured fairly well. Sturdy all-in-all. But, they're ability to fit together with one another as they should, is another matter. Tabs A & Slots B invariably do not line up like they're supposed to. Required a bit of re-drilling holes so they'd be in the correct position to lock in with one another. Also, as others have noted, the Chinese-to-English translated manual is a complete joke. I would think that it shouldn't be THAT difficult to find someone, somewhere that can improve upon instructions such as: "...stop when the thread leakage 1 - 2 laps", or "...the blow picture is mean the distance for bracket holes is", or my personal favorite, "...then cut the strings which raping the arms". The biggest problem we had was adjusting the tension of the torsion arms properly, once the thing was mounted up on the wall. The manual effectively says (para-phrasing here) to "adjust the tension arms properly"...with little to no guidance on just HOW to do that. It took 2 of us a couple of hours of playing around with it until we finally figured it out. It is now up & working, but I already see 2 pieces trying to pull apart from one another. Looks like I'll have to do a partial disassembly in order to re-re-drill a mounting hole so it locks in to place like it should. For the price, it's a decent product, but be prepared to spend some time to make it right.
S**0
Just about the cutest thing I've ever done!!! But the instructions were horrible!
Even after watching the video multiple times, it took 4 men about 3 1/2 hours to put the awning up as the instructions were very bad and the drawings the worst. A few close-up photos of correct placement of pieces would have helped quite a bit. But, as anticipated, the instructions were not written by native English speakers and so made it all that more difficult (Couldn't someone in OR have proof-read the instructions and had Beta testers???). But over all, when it finally came together it knocked our socks off!!! It is made for application on a house, but we wanted it for a camper-trailer. We put up a heavy board to attach it to the trailer structure, and it seems to work well. It will have to be put up and taken down for travel as the camper is from 1969 and the structure might not carry the heavy weight (about 35+ pounds) well for long distances, but it is absolutely the cutest thing I've ever done. We love the scallop of the valance and that it can be rolled up if just a small covering is wanted for sitting outside rather than dining. Not good for high wind and heavy storms particularly for this camper, but that was not our intention. The striped fabric was perfect. It matched the "port" wine paint color. Overall, I couldn't have asked for a better, nor more appropriate awning for our refurbished old camper trailer, unless it had been designed specifically for a trailer/camper. If you are looking for something cute, this is it!!! We are over-the-moon delighted with it.
T**Y
Excelente producto.
Excelente tiempo de respuesta, Buena calidad de producto, fácil de ensamblar e instalar, trae todos los accesorios necesarios. Excelente para la aplicación solicitada.
C**.
El uso va a definirá la calidad
El producto es bueno, no envían el seguimiento del artículo desde su salida hasta la entrega, y su español es muy malo.
Trustpilot
1 week ago
2 months ago