Desert Online General Trading LLC
Dubai, United Arab Emirates
Desert Online General Trading LLC
Dubai, United Arab Emirates
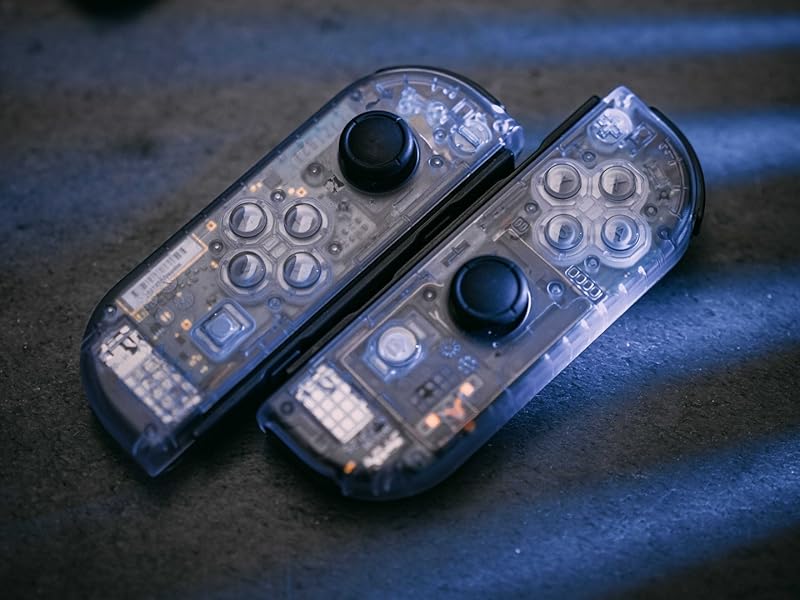
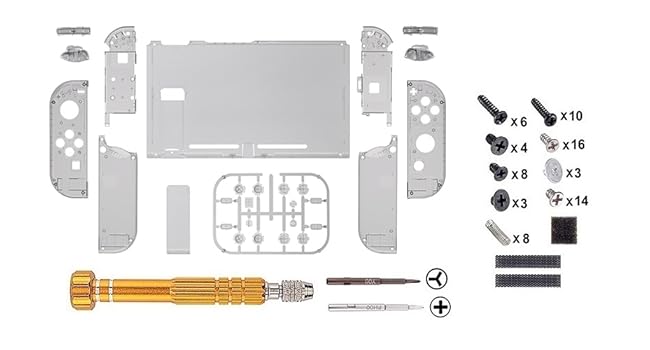
![eXtremeRate DIY Replacement Shell Buttons for Nintendo Switch, Back Plate for Switch Console, Housing with Full Set Buttons for Joycon Handheld Controller - Clear Black [No Electronics Parts]](https://m.media-amazon.com/images/I/61EYtIChFHL.jpg)


eXtremeRate DIY Replacement Shell Buttons for Nintendo Switch, Back Plate for Switch Console, Housing with Full Set Buttons for Joycon Handheld Controller - Clear Black [No Electronics Parts]


H**I
Be Careful with the screws
Not bad, looks nice after putting it on my switch.. unfortunately one screw hole was damaged so some parts were wriggling inside.. had to put back my original right joy con back cover.. so now my switch is all pink except for my right joy con Which has the original red color on the back..
D**A
Amazing. Except for screwdrivers
Everything was great. Feels good and looks nice. Except the screwdrivers. It will surely strip the Y screws. Buy your own screwdrivers guys.
K**A
So boujeee
I love it! Got mines on today, it’s a lot of work so you need to be careful! Better to get your own precision tools because the tools that comes with this is not that good. Make sure you have some tweezers too to hold the springs in place and requires alot of patience. But the results are worth it.
L**E
Please sell on amazon uae
Please
N**N
The most powerful plastic known to man
I bought this as a base to paint for my girlfriends switch as she wanted cute colours for her controllers and backplate. Basically I had to sell my soul, do several complicated rituals and spells, sacrifice the soul of a baby goat and pilgrimage to the top of a mountain to be blessed by a monk before I could get the paint to take. The material would self heal, and reject the paint. So any sanding, any paint type- the blood of the lord himself was rejected by the plastic. So if you’re worried that the “white will get dirty over time”, don’t. This plastic alone has the power of the awakened master sword- it just keeps coming back.Comes with all the screws and a screwdriver too, cute packaging so I can gift wrap it. 👌🏻👌🏻👌🏻👌🏻
A**D
Excellent switch shell
Very nice product, looks impressive as purple when you look at it in one direction and blue when in another. Surface is glossy but it doesn't attract fingerprints from what I notice, but could lose grip if you get sweaty like me :). Reason right joycon has black buttons is I forgot to put purple buttons in and didn't want to take right joycon apart as the right joycon is a lot more fiddly than the left - I ended up accidentally ripping the ribon cable on the vibration part, so had to use a different joycon, luckily the joycon I broke had been donated to me by a friend as the thumbstick drifted.I don't have any experience really in doing electronics or anything and I managed to do it, so I say have a go. But only if you don't mind possibly risking a joycon. The back plate is easy - but make sure to use the extra screws provided as I found that the phillips screws were a lot easier to take out again without accidentally stripping them (which i ended up doing to a screw near the sd card and having to use pliers to get it out).
S**W
Thay may look nice but...
It may look awesome in the photo but the tools that come with it areCrap and would not turn the screws infact it almost striped one nowI can’t put it on my switch it’s still in its box not sure what to do with itWaste of money maybe with a pro screwdriver u would have better results
M**K
The shell is good quality but do not use the supplied tools under any circumstance
I read ahead of receiving the shell about how bad the tools were but didn't think they would be that bad. Do not ignore the warnings.I attempted the backplate first with the supplied phillips and the screw on the side instantly stripped off; then spent about half an hour trying to get this screw out using the old techniques (Rubber band trick and using superglue). But the screw head is just too fine to recover and it's pretty much never coming out unless it's drilled. So the backplate is pretty much on there for good now.After this I got my hands on some proper precision tools: A 1.5mm phillips and a 1.5mm tri wing screwdriver. I then did the joy cons following the instructions on the video and had no problems at all. So now I have a default (And now permanent) backplate and modified joy cons now which luckily still look good since they fit the theme of yellow and black still and am happy with the result.It's a neat idea to have all the items you need come in one package but the execution is really bad and could cause someone to do irreversible damage to their console like I have.
L**I
Pretty cool looking
As recommended by other reviewers, I discarded the tools and instructions provided and instead used the iFixit kit I already had (no affiliation) and their instructions.It was extremely fiddly and took several hours, but once I got the left joycon done (probably you should do that one first too) I was in the swing of it and was able to do the right joycon a lot faster.The most difficult thing about the backplate was finding the screws, though protip on that one - the joycons use PH00 but the switch itself uses J000 which looks like a PH00 but absolutely isn't, so save yourself some trouble there.I ended up using the original buttons rather than the clear replacements it came with (plus a coloured button pack from the same seller) because IMO they look better, but that's an aesthetic choice.All in all I probably would have saved money and not bought the clear backplate since there's not very much to see through it, but it looks good together so I can't complain.
Trustpilot
3 days ago
3 weeks ago
1 month ago
1 day ago
![eXtremeRate DIY Replacement Shell Buttons for Nintendo Switch, Back Plate for Switch Console, Housing with Full Set Buttons for Joycon Handheld Controller - Clear Black [No Electronics Parts]](https://images-na.ssl-images-amazon.com/images/I/61EYtIChFHL._AC_UL116_SR116,116_.jpg)