📷 Snap, Scan, Share—Your Memories Await!
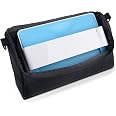
The Plustek Photo Scanner ePhoto Z300 is a high-speed photo and document scanner that digitizes your cherished memories in just 2 seconds per 4x6 photo. With an optical resolution of up to 600 dpi, it ensures stunning image quality while supporting various photo sizes and formats. Compatible with both Mac and PC, this user-friendly device enhances and restores old images, making it the perfect tool for preserving your family's history.
Item Weight | 1.5 Kilograms |
Item Dimensions D x W x H | 6.3"D x 11.4"W x 6.2"H |
Color Depth | 24 |
Standard Sheet Capacity | 1 |
Paper Size | 4x6 inches |
Optical Sensor Technology | CCD |
Light Source Type | LED |
Connection Type | USB |
Resolution | 600 dpi x 600 dpi, 300 dpi x 300dpi |
Wattage | 18 watts |
Supported Media Type | USB |
Scanner Type | Film, Photo, Document, Business Card |
Minimum System Requirements | Windows 7 |
A**R
UPDATE after one full year of use. 5 GOLD stars out of 5!!
UPDATED REVIEW after one full year of use. Still 5 out of 5 stars. In fact, 5 GOLD stars out of 5 stars!!I decided to write this lengthy review because I often rely on detailed reviews here on Amazon and this product, the Plustek ePhoto z300 scanner is such a well-made, well-functioning, durable, and reliable scanner that I wanted to share my experience with others who might be looking for something to help tackle large-quantity photo scanning.The primary reason I purchased this scanner (the Plustek Photo Scanner ePhoto Z300) was to digitize boxes and boxes of family photos I've been carting around for the past 35 years or so. I have been the keeper of 'vintage' family photos going back to the late 1920s through the early 2000s, right up until most of my family members made the complete switch to digital photography. I have tried to scan these photos in fits and starts over the decades using fairly expensive flatbed scanners - the ones with slide and film adapters and high quality/high speed scanning ability, fancy software, etc. I usually got through a few dozen photos before the tedium set in and I would stop. The time in between picking it up again was often years later and I've had to purchase newer and better scanners to start again. As my older family members have gotten, well, much older over the years, I thought I'd better get these all scanned and distributed once and for all. My collection of photos included tiny black and white pictures of varying sizes and shapes from the 1920s-50s, up to the more standardized 4x6 sized 35mm photos of the modern era.I started this photo scanning project in March, 2023 and finished in May, 2023. That's with scanning them a few hours here and a few hours there, but sticking with it since this scanner was so easy to use and so fast. In those three months I scanned 12,915 photos with this scanner (my whole collection!). Every time you scan 50 photos it asks you to save them into a scanned photo folder (of individual photos). You could scan and save each photo separately, but this feature saved A LOT of time and grief. After I saved each 50-photos, I would open the scanner front and wipe the platen and rollers with the supplied lens cloth. This was necessary because most of my photos had fine-grained dust/paper mold particles on them from years of varying-quality storage. I didn't clean any of the photos before scanning, I just dropped them in the scanner and scanned them. I can digitally clean the ones I *really* care about at a later time. The vast majority of them are just fine the way they are. For photos with writing on the back, I simply scanned the front of the photo and after it scanned I flipped it over and scanned the back side. Every photo with text came out looking great and completely legible. That's all there is to the process and that was the only maintenance I had to do during the whole project.This scanner is very fast. About 2 seconds per photo You drop it in the top and it spits out the bottom and the digital photo pops up on the screen. This is in 300dpi mode, which was more than adequate for the type and quality of my particular photos. The 600dpi mode makes much higher quality (and larger size) scans, but the speed is reduced considerably. I only used 600 mode on a very few photos. The vast majority were at 300dpi and they all look great. Here are some general observations from this experience:1. I definitely recommend this scanner for this type of project. I have purchased four or five expensive flatbed scanners over the past few decades only to tire quickly of the opening, setting the photos, closing, waiting for the PC Twain feature to work (or not work, in some cases) and scan the photos - slowly, unload the flatbed, load the new 5 or 6 photos, close the lid (trying not to disturb the photo's positions), and repeating the process. Very laborious and slow.2. The software-hardware interface is very stable and reliable. When I've upgraded my operating system, installed patches or updates, and when I installed a new printer/scanner/fax machine for my daily use, the software for this Plustek ePhoto scanner remained unfazed and it worked like a charm every time. Even today, a year later, when I scanned a few docs for my taxes, it worked like a charm. I can't say that about the flatbed scanners I've had over the years. The TWAIN software for those scanners (and even my new printers) often goes crazy and I would need to reinstall some of the software and fiddle with it all to make it work. It was always very frustrating when I decided to sit down and scan a few hundred photos only to spend most of my time getting the hardware and software working right again after some PC updates, installs, etc. Those problems have not happened even once in the year that I've owned this scanner and I've upgraded from Windows 10 to 11, installed numerous patches and updates, and two new printer/scanners. This Plustek ePhoto scanner has worked like a champ through it all.3. Ease of use. You flip the switch to turn it on, the software automatically senses the powered-up scanner and pops up on your PC (or Mac) screen, you drop a photo (or document or ID card) into the front of the scanner, and two seconds later it's on your screen in 300dpi resolution. It's amazingly simple. Once you initially set a few simple parameters (e.g., file type, save location, quality, etc.), you really never need to do anything but drop photos into the top of the scanner and boom!, they show up on your computer. The only time you interface with the software UI after setting those parameters is when you scan your 50th (or fewer) photo. You'll press the 'Save' button to save that bunch of photos to your designated folder, and the window clears and is ready for the next batch.4. Thoughts on the lack of multi-photo feeder. I found this to not be a problem at all. I worried about that before purchasing it, knowing I had many thousands of photos, but I read reviews of even the top multi-loaders having problems with photos sticking together, misfeeds, misaligned feeds due to shape/size differences in the stack, etc. I took a chance on this one-at-a-time drop-in type scanner and I do not regret that choice one bit. Given the many different photo types, sizes, shapes, thicknesses, quality, condition, cleanliness (some photos had sticky edges, old smudges, dust, etc.) that I had in my large collection, I think I would have had far more trouble with trying to get stacks of photos to feed properly in a multi-feed machine. I never had a misfeed or any problem due to the large variability of my photos. Again, this scanner worked like a champ.5. Solid interface. The user interface (UI) is fairly robust for a non-professional system. It's simple enough to not require a lot of knowledge, skill, or time to set up and use, yet robust enough to provide most of the options you might need for a large scanning project like the one I had. I think the simple interface is one of the reasons it always works when I need it to and doesn't have difficulty interacting with my PC software once it's installed. The UI is simple and effective. It gets the job done more than adequately and does it without complication, confusion, or fuss. Some will argue the UI is not "modern," like the latest iPhone or Android platform OS. Of course it's not. It's not designed to be like them or to compete with them. It's also not Photoshop, or anything like that either. It's an interface to get your physical medium (photos, cards, documents, etc.) into a digital format, quickly and without drama. It works, and it works without difficulty. This scanner also takes up very little desktop space. It sits quietly and compactly next to my PC monitor with a small cover over it and when I need it I remove the cover, flip the switch, and drop in a document or photo and it magically appears on the screen. No fuss, no muss. It's brilliant! For the cover, I purchased this one on Amazon for $23. Well worth the money. (The Perfect Dust Cover, White Vinyl Cover for Epson Workforce DS-770, DS-575W and DS-530 Color Document Scanners, Anti Static Waterproof and Double Stitched Cover by: The Perfect Dust Cover LLC)6. Cost. This scanner cost me $199, shipped. I have spent ten times that over the years on medium-quality, consumer grade flatbed scanners that did not inveigle me to finish my lengthy project and they all eventually ended up in local thrift shops, with my project remaining unfinished. For years...7. Odd-sized photos or those items that cannot be dropped into this type of roller scanner. My collection contained a few dozen or so items that simply could not be scanned using this type of scanner. Some of the items were too large for the scanner's dimensions, permanently attached to things like in book form or permanently glued in photo albums (like some really old black acid-paper type albums), etc. Indeed, this scanner, and any roller-type scanner of this nature has its limitations with these sorts of items. I simply used my $89 Canon TR4200 printer/scanner/fax machine to scan those odd items. That cheap, slow, everyday flatbed scanner/printer unit is perfectly suited to scan 300dpi quality images from those bulky anomalies in my collection.8. In conclusion, this Plustek ePhoto Z300 scanner has been the one scanner (of many over the years) that finally allowed me to finish my family photo scanning project. Nearly 13,000 photos scanned in just a few short and painless sessions, without any technology dramas or dilemmas, and with very satisfying results. I have used computing and data processing hardware and software since the early 1980s and have experienced the good and the bad during that time (there's still plenty of bad...). I have zero negative things to state about this scanner. It really is a wonderful tool and can be wielded with relative ease by the vast majority of users.I hope you enjoyed this review and found it useful. I used this Plustek scanner just today for a few documents and it reinvigorated my appreciation for how good, quick, and reliable it is as an everyday tool and as a larger-scale project scanner. I'm sure I will be using it well into the future.Thanks for reading, and good luck with your purchase and your project!----------- Original Review ---------------Recent purchase and have only scanned a few hundred old photos but this scanner works amazingly well. Very fast scans (at 300 dpi) and easy 'drop in' functionality. Far faster then my flatbed scanner and the software it comes with is very decent for adjusting, rotating, cleaning, cataloging, etc. all the photos I've scanned. The scan quality is just as good as any flatbed scanner I've used over the years (consumer-grade, not professional grade). The whole thing is super small and lightweight, and very easy to wipe clean (the platen cover rotates forward and you simply wipe the strip of glass. Just launch the software and start dropping photos into the scanner one at a time. They scan in a second or two and fall out the front into a little pile. Could not be easier. The smallest old photos I've scanned are about 1.5" square and they scan just fine. Amazing!
D**T
Simple way to scan family photos
This scanner is a good choice for general family picture archiving. Faster and better scanners are available for larger projects or professional archiving. I knew I was not likely to be stacking these old pictures to bulk scan due to the varied sizes and state of curling. Bought this scanner last year and used to archive over 15000 Family photos over the course of the year. Photos were of every size, texture, curls, thickness. From one inch square to 8x10, 1800s to 2000s. I like the simplicity of dropping the photos in to start the scan. As soon as you place the photo in the tray it gets pulled through and scanned. Then just flip it over for the writing on the back. I used my laptop on a folding table for my archiving. After 50 scans you need to upload that batch to your computer and open and wipe the lens. Photos from the 60s and 70s need some color correction before being saved which is easily done by the software. I generally saved the original scans to the computer and then selected the ones that needed color correction later. There is a button to apply a quick fix during scanning but it really does not work. For the older and smaller black and white photos I used 600 dpi. For the other 60s and 70s pictures I used 300 dpi with color correction. Very little difference to the eye when scanned in 300 or 600 dpi. Our 4x6s from the 80s and 90s did not need any color correction because the cameras we used were better. Photos and especially larger portraits from the 60s and 70s that had a matte finish did not scan well due to surface reflection and needed to be flat bed scanned. I ordered the blue matching hard case for the scanner to use when traveling and scanning photos at family events. Conclusion: if you have a large photo project with many odd sized photos, are not in a hurry, want to save some money, like things simple, have a laptop computer, then this is a good choice. If you scan documents frequently, need to scan lots of similar size pictures quickly, like the ability to scan and save two sides at once, and want improved color correction choices, wireless connectivity, then go for a higher priced scanner.
D**J
The best scanner for photos
Excellent product. Bought to scan 40+ years of family photos. Very easy to setup on a laptop using Windows11. From unboxing to first scans took about 15 minutes. Good instructions on connecting and scanning. The scanner has 300dpi or 600dpi capability. 300dpi scans in about 5 seconds and 600dpi scans in about 10 seconds. I am using 300dpi and the pictures are good quality. After scanning 50 pictures you must move your scans to a file. Dummy proof. Our project will take months to complete and this scanner makes the job simple and easy. Creating multiple file folders is easy and makes it smooth to file your scans in easy to find folders. Recommend this for any scanning project. Largest photo scanned were 8x10 and went through the scanner without any issues.
C**H
Great quality and functions. Love this scanner.
Love this little scanner. Easy to use. Lots of functions to enhance old photos. The colors in the scans are really good. Well worth it if you have thousands of old photos to digitize. We previously spent $400 more than this one for a ScanSnap and It was terrible. Only a few things they could improve upon: a better physical guide so the photos feed straight and a feeder so you don’t have to feed the photos individually. These are really the only reasons for not giving it 5 stars. The quality and functions are 5 stars. It also is NOT a duplex scanner (doesn’t scan both sides if you have captions on the backside). However, once you start adding this feature you are into a more expensive scanner. Highly recommend this scanner. We love it!
Trustpilot
2 months ago
3 weeks ago