Desertcart purchases this item on your behalf and handles shipping, customs, and support to Japan.
โก Power up your RV life with style and reliability!
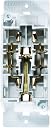
The RV Designer S831 AC Contemporary Dual Outlet offers a durable, UL-listed 15-amp dual power solution designed specifically for RVs and motorhomes. Featuring a sleek white cover plate and self-contained design, it ensures easy installation and seamless integration into your RVโs electrical system. Crafted from high-impact thermoplastic resin with brass terminals, this outlet guarantees long-lasting performance and OEM-level quality, making it the perfect upgrade for reliable power on the road.


| ASIN | B008OAF8G4 |
| Amperage | 15 |
| Best Sellers Rank | #11,214 in Automotive ( See Top 100 in Automotive ) #57 in RV Plugs, Inlets & Receptacles |
| Brand | RV Designer |
| Brand Name | RV Designer |
| Color | White |
| Compatible Devices | Air Conditioner |
| Connector Type | Plug-In |
| Customer Reviews | 4.6 out of 5 stars 1,341 Reviews |
| Global Trade Identification Number | 00601320118316 |
| Included Components | RV Designer Collection S831 Dual Outlet Speedwire W/Cover |
| Item Dimensions L x W | 4.5"L x 2.7"W |
| Item Type Name | RV Designer Collection S831 Dual Outlet Speedwire W/Cover |
| Item Weight | 3.2 ounces |
| Manufacturer | RV DESIGNER COLLECTION |
| Material | Polycarbonate (PC) |
| Material Type | Polycarbonate (PC) |
| Model | S831 |
| Number of Items | 1 |
| Number of Packs | 1 |
| Part Number | S831 |
| Power Plug Type | Type A - 2 pin (North American) |
| Product Dimensions | 4.5"L x 2.7"W |
| Specification Met | UL |
| Total Power Outlets | 2 |
| UPC | 601320118316 700115569095 |
| Unit Count | 1 Count |
| Voltage | 125 volts |
| Warranty Description | Manufacturer |
D**N
Good replacement.
Easy replacement for the RV. Perfect fit and no issues.
V**T
Great!
Simple install and replacement. Looks great, fit perfectly into our travel trailer. Multi-meter shows full power is being provided. Devices seat firmly in the sockets.
G**.
Will install soon
Havenโt installed them yet but the build quality seems good!
D**T
Replaces a standard RV 110 volt receptacle.
When your RV 110 plug outlets are simply screwed into RV paneling, this plug attaches securely with wings that tighten. The wires are considered Quick Connect and simply require pushing the wire between the tangs to create contact. Don't know if I would use this type of plug again as the one I replaced had loose wires. Time and road miles will tell if this is a good plug.
K**R
Easy install
Easy install had power in the kitchen again!
D**E
These are exactly the same as the original outlets
12/29/2025 The exact same brand that came in my 5th wheel. I had a single plug outlet inside one of the cabinets that supplied the microwave. I wanted to "hide" the Wi-Fi bridge for my Sensor Push system and this was perfect. Took a matter of minutes after flipping the breaker and verifying the circuit was dead to remove the old single outlet and reinstall the new double outlet. Make sure you have a good C clamp, a couple of pieces of plywood and some masking tape (to protect the face of the outlet) to press the back closure onto the outlet. Best of all, the price is ridiculously cheap and now my bridge is hidden and no longer using one of the outlets on the countertop. 12/31/2025 Old original single outlet on the right and the new RV Designer on the left and the one that replaced the original shown installed.
D**6
It's a 36" 2003 Winnebago Journey (for sale) if anyone is interested
I have this one, and I've ordered the exact replacement for the old one from eBay (WDR) They are extremely difficult to install without the proper $750 tool. There is a home style workaround on Youtube using 2 small pieces of wood and 2 clamps to press the wires into the outlet. PS the picture in the add I got was upside down. The you tube shows two pieces of wood about 1" thick by 2"x1" with two 4"c-clamps to compress the wires into the socket (this replaces the $750 tool} we are working on that. There is no way any one can push those wires into this socket by hand. I'm hoping I'll be able to get several tries. You have to get 2 each of hot-neutral-negative into each sockets and these are already used, bent wires. We're going to build our tool tomorrow. There are locking arms on the back/compression plate so they lock down. I'm going to cut them off of the old duplex socket and use it as a ram/jam into the new duplex socket.
R**S
Different size than most RV outlets, mounting ears are on opposite corners of most outlets
Be aware this won't fit in a hole that was cut to fit other more common sized RV self contained outlets. This one is a little big. Even worse, the mounting ears are on the "wrong" corners, opposite of most other RV outlets. In some cases this won't matter, but in my case it certainly did. Also this outlet does not come with the type of lid which forces the wires into their slots. It's just a simple lid which closes the cavity. This means you need an expensive tool to push the wires into the slots. Some people use plyers or other hacks, but that usually damages the wire and does not install it correctly.
M**N
Parfait
Parfait
J**M
Turn power off
Works perfectly no issues
P**N
Perfect match buy difficult to install
The outlet that our refrigerator was plugged into had issues and kept tripping the breaker and preventing the fridge from working. I decided to order this outlet to replace the bad one. The good news was the outlet was the exact one needed as the bad outlet was the same pressed wire style. Looking at how the wires were arranged in the old outlet made it easy to installed them in the new one. As other reviews said, however, actually connecting the wires to the outlet is not easy. Since the wires need to be pressed between the contacts, it is difficult as it is a very tight fit. It took some effort and some brute force to push the wires between the two contacts. Once the trick to determining the best method of getting the wires between the contacts was figured out, it became easier with the second set of wires. The good news is there is the white/black wire location etched on the outlet, so you know which side each wire is to be connected to. Doing it wrong would be an issue as you would need to pull out the wire and then re-press them down again. There are no instructions with the outlet, but as I mentioned, look at the current outlet to see how the wires should be connected to the outlet. Take photos of the current outlet to make remembering easier, if needed. Overall, the outlet does what it was meant today. Have something to help with pressing the wires would be good, or even some instructions. But after all the effort, we have a running fridge again.
T**N
Easy to install
easy to install and fixed the issue
P**L
right item
exctly what I wanted to replace a broken one.
Trustpilot
1 week ago
2 months ago