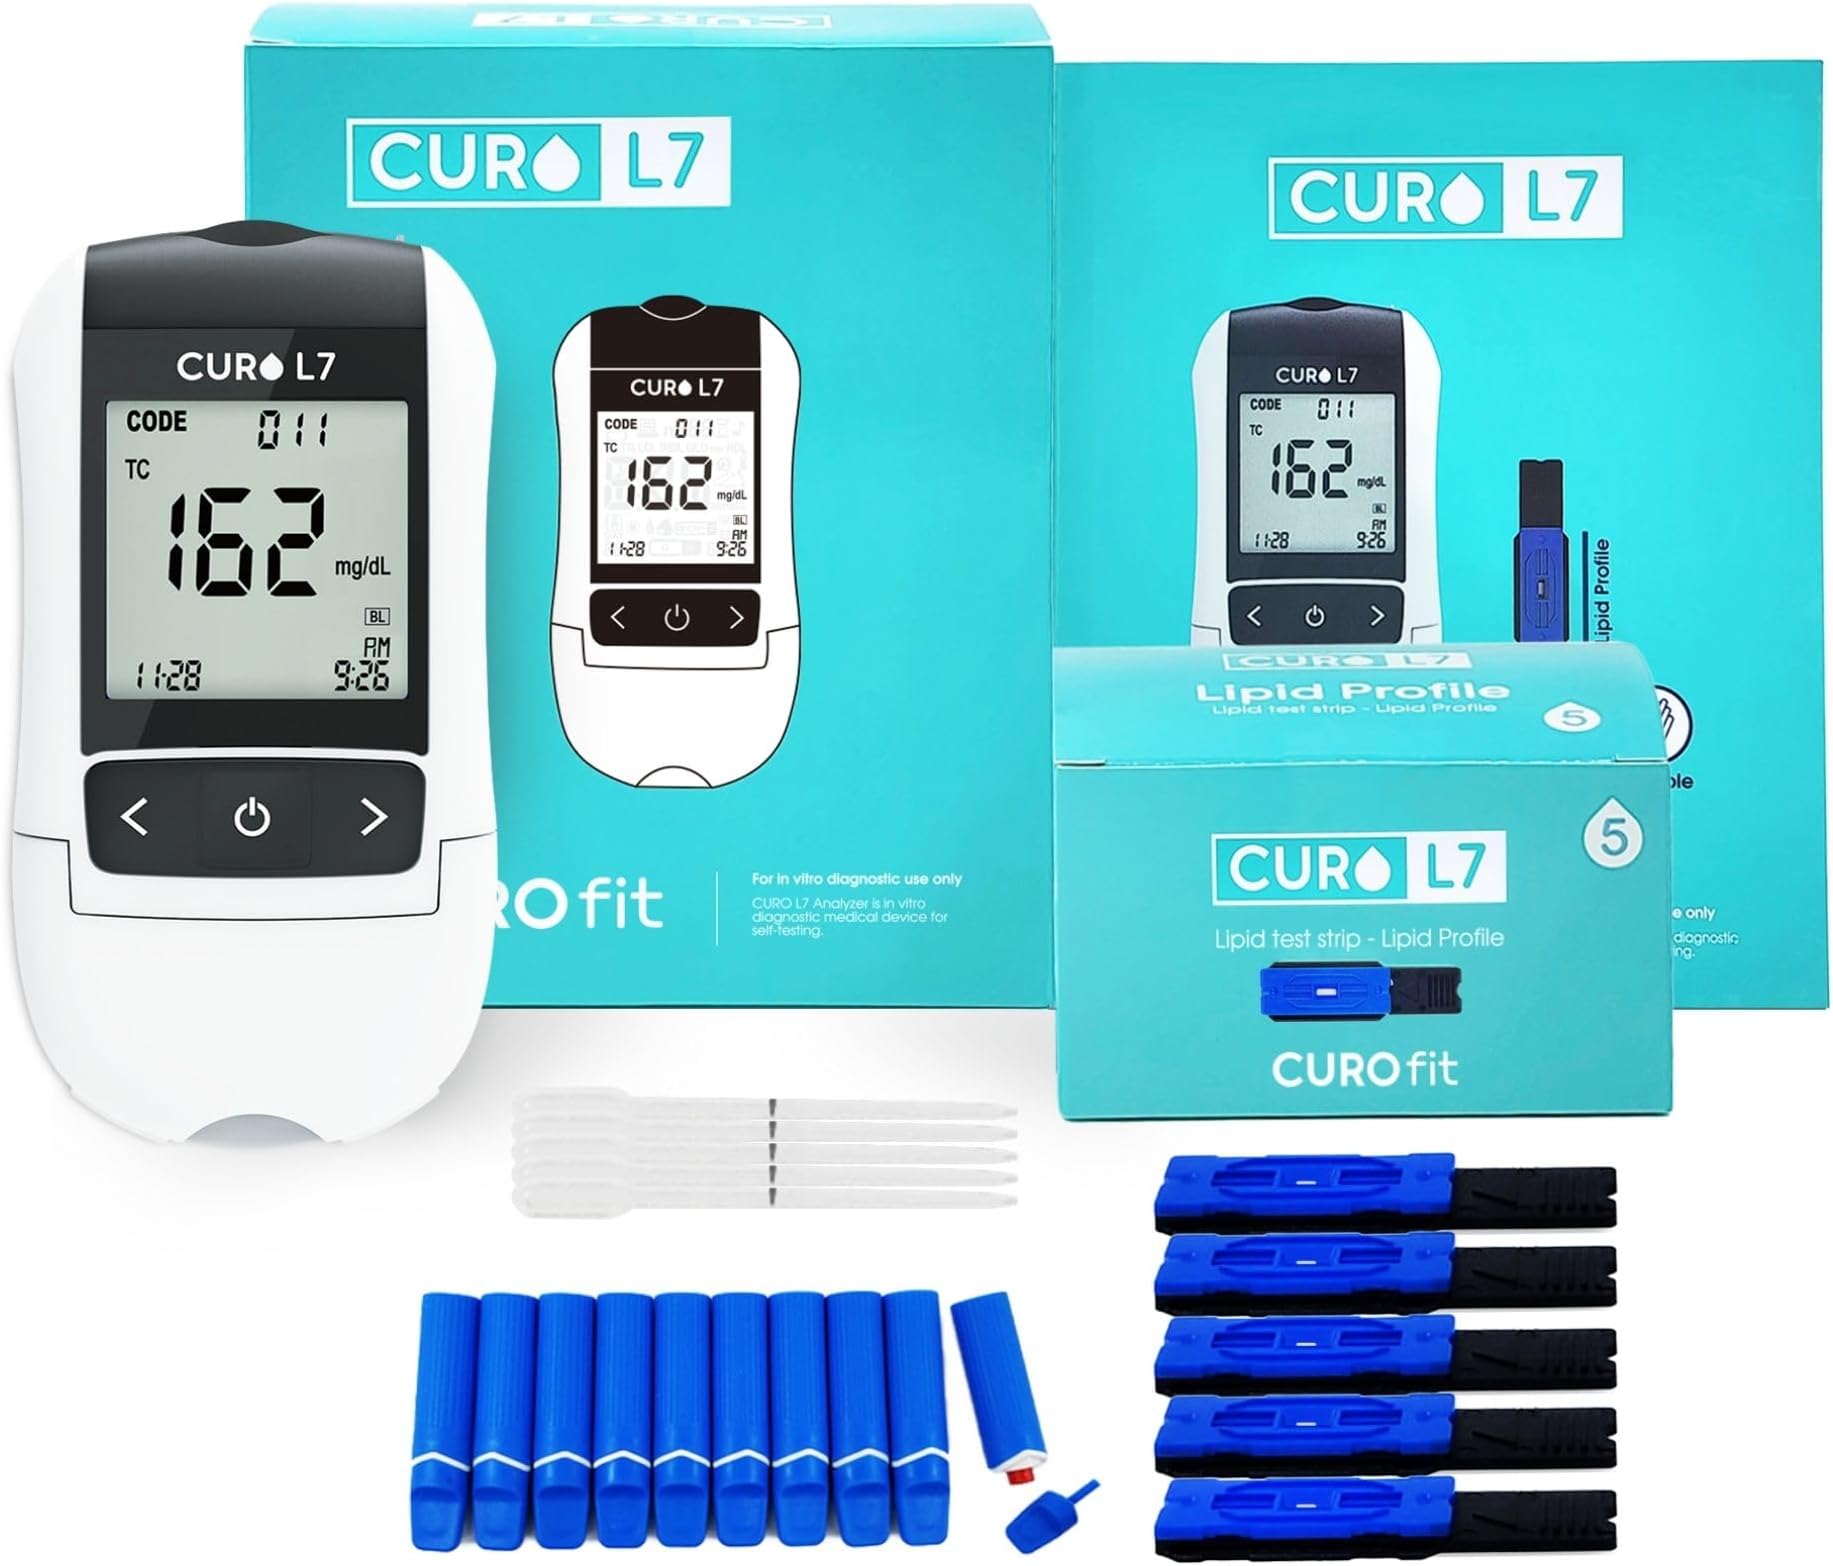
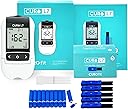


Buy anything from 5,000+ international stores. One checkout price. No surprise fees. Join 2M+ shoppers on Desertcart.
Desertcart purchases this item on your behalf and handles shipping, customs, and support to Japan.
๐ฉบ Take control of your heart healthโanytime, anywhere!
The CURO-L7 is a professional-grade, all-in-one cholesterol testing kit designed for both home and clinical use. It includes a pre-calibrated device, 5 test strips, 21ga lancets, and an EziTube rod for precise blood sampling. Compact and portable, it offers quick lipid panel results with clear instructions and dedicated customer support, empowering proactive health monitoring on your terms.


| Customer Reviews | 3.3 out of 5 stars 340 Reviews |
T**O
Lipid Panel in less than 5 minutes!
The Curo L7 was a very advance monitoring tool for both Glucose and Lipid panel. As time went by the glucose analyzer was surpass by other products that let you control the diabetes and insulin better furthermore the glucose strips are not available any more, however the lipid profiles is excellent so is what I use this kit for I have seen many negative comments for this product here in Amazon and I wonder IF some of them are users errors. I will give you some tips that help me to get excellent results. 1. Be sure that the test strip expiration date is OK. 2. The Curo L7 device is already pre-calibrated so if the device works well the numbers should be reliable. 3. First do the Initial setup of the device: User Manual page #14. Ignore "Mode change" in page 22 because when you insert the blue code chip it will default to Lipid Mode what is what you want (Be sure the analyzer is OFF when you insert the code chip) 4. Second check if the device is working well without errors. Use the plastic strip test that comes with the kit. Page #43 of the User Manual 5. Blood sampling is tricky because you need far more blood than the small drops that you use for glucose test. Also the lancet provided can not be reset. Have another lancet ready jic or even better have one of the lancet that you use for glucose testing ready in case you need to stick another finger. You do not need to fill the tube to the mark in one time, you can get another drop and complete the filling. 5. The EZ tubing is a plastic pipette with one end close with a bulb so be sure you grab the tube not the bulb and place the tip on the sampling window and then very slowly squeeze the bulb between thumb and index to drop the blood. This is key, be patient and do it slowly until the "window' port is cover with blood. User Manual #31. 6. Do the test in a flat surface where the device is lying flat. 7. Be sure the EZ tube does not roll if you accidentally touch it with the finger. I have a small piece of packing foam where I made a grove so the EZ tube can not roll. 8. Wash your hands with regular soap and let it dry well ++. If you want you can use alcohol pad also be sure the finger is dry. Test can be affected if you do not follow these precautions. 9. The Lipid Test Strips comes with a insert with some extra info, worth to read it. Hope you get the optimal numbers as describe in the User Manual page # 37. I have a couple of questions and I sent an e-mail to support and they were answered the following day which is excellent. In summary this is a great pro kit to get the lipid panel.
A**R
The test strips only worked 1 of 5 times. E1 codes & shut down
It worked as advertised when I received it 2 months ago but has not since then despite very carefully following the exact same instructions I did the 1st time. The tester gave me an E1 code for 4 of 5 test strips they sent with it, & they were nowhere near expiration. I used all the test strips (as the book suggests) & can't get any more in time for what I bought this tester for. When I called during the hours specified nobody answered the phone for days & there is no answer machine. My email was not responded to. When someone eventually answered the phone they seemed to be trying to dial out. At first they implied I did not follow the directions properly after I them very carefully following both sets of instructions the 1st time & every time since then. The test strips failed 4 out of 5 times with an E1 code Then they told me to take a video of me performing a test & seemed confused when I explained I cannot do that because I followed the instructions & used all the test strips they sent with it. They refused to send me some more test strips, & even if they did I would not get them in time for what I bought the tester for. It worked fine when I received it (the results were in the ballpark of the professional labs I got about an hour before) but all the rest of the test strips failed with an E1 code even though I very carefully followed the exact same instructions I did for the first successful test. I also tried installing new name brand batteries, reset the tester, & did the setup process all over again, but still got an E1 code followed by a tester shut down. Curofit now says I must send the tester to them for "inspection", but I told them I did not have the time left to do that before what I bought the tester for, so it is a completely useless waste of my time & money
A**R
Puzzling readings deciphered
Using the very helpful videos from other Amazon reviewers, I successfully completed my first lipid panel test this morning. Like one other reviewer, I got a puzzling reading, but dug around a bit on the FAQ page for Curofit and found what it meant (because the reviewer was correct: it was NOT coded in the accompanying instruction manual). The reading for my LDL looked like that 0-8 with the bottoms cut off. It was actually "n - A" meaning "Not Available." What this meant, I gather, was that because my triglycerides came in as "lo" (meaning below the set calculation parameters: typically below 45 or 40, depending on how the labs are set), lacking a specific TG number, no precise LDL number could be derived. Still, the device gives a TOTAL for non-HDL cholesterol, and LDL can be generally inferred from this total. I'd have to say I'm pleased with how easy the device was to use on first try: but again, this is because other reviewers gave such good advice.
B**Y
Only one thing I would change
I found it very difficult/near to impossible to gather enough blood in the collection tube and wasted a few test strips by getting error messages related to not having enough blood. I have since changed to squeezing a drop of blood directly from my fingertip onto the test strip. Because the test strip is in the device at this point, I have to clean it with alcohol each time, but thatโs easy and Iโm no longer wasting test strips. I donโt know if thereโs a better tool than their EZ tubes (or whatever theyโre called) for collecting the blood sample, but for me they were the weak link. Otherwise, Iโm pleased as punch with the ease of use and the quick results.
S**M
Not Worth Time or Money
DON'T BUY!!! I've purchased tens of thousands of dollars of items through Amazon in last 4-5 years and have NEVER WRITTEN A SINGLE REVIEW until today. This product is worthless and let me share why: 1. Requires significant amount of blood. 2. Getting blood into test area is very difficult. 3. Included tools are useless. 4. You will waste test strips without results despite lots of blood. 5. You will waste time going through all the steps with their provided poor quality tools. If you buy it, you will want your money back!!!
G**W
Follow Curo-7 published instructions especially the blood sample prep video
Initially I was not following the startup video for blood sampling and was considering sending the unit back. Talked with a Curo agent, followed exact procedure and that changed the outcome to positive. Make sure you use their auto lance to establish fast enough blood flow for the collection tube capillary draw. Never use the bulb on the tube until ready to deposit blood drawn into test strip. Test strip needs to be mounted in place before depositing blood sample. Deposit blood sample into test strip using gentle continuous pressure on the bulb. Close the monitor lid to block light since the final measurement is photometric (monitoring color changes of three reagent spots then computes test values). I cross checked the measurements by taking a fasting sample 30 minutes before going to a hospital blood lab for a draw and complete lipid panel. The results of the CURO-7 were within 5% of the hospital. As an analytical chemist and ChemE, that is spot on. I also tried a few other kits that had much lower cost for replacement test strips. Results were all over the place. Also, could not get test to test to reproduce measurements from strip to strip. In some cases other units were +- 50%. So Curo-7 with $10/test is defined in practice as the one to use. Since I can not tolerate statins, I use plant sterols daily and Bergamot caps plus extra fiber to keep blood lipids down. Seeing total cholesterol at 185 the other day was a joy. By using clinical nutrients to help do the job, I must monitor weekly to insure that blood lipids are not trending out of bounds. Keeping a lid on sugar intake does make a difference. Again, watch their videos, follow their procedure exactly, and you should have reliable outcomes. My mistake was using a standard blood glucose lance that produced blood too slowly for the sample tube and clotting in the tube can occur invalidating that blood draw tube. Provided lance produces good blood flow so sample collection should be done in 10 seconds. This is my experience as a professional and the opinions provided are for informational purposes only. Furthermore, I have no commercial interest in this company... just looking for something that worked reliably. About to order another box of 10 test strips, the fourth box.
R**Y
Not Accurate, Too Many Test Failures and Wasted Sample Strips
When it works, its not accurate, but is at least useful to gauge a trend of rising vs. falling HDL/LDL levels over time. It is very unpredictable whether a test will return usable numbers, else failed "N/A" and "Lo" results, which wastes expensive test strips and costs another finger-stick. We've had several days with three failed tests in a row (before we give up to try again next week). Sometimes a test will actually work out great, but this is so unpredictable and random. The test-procedure documentation is very poorly written and missing obvious steps (such as "turn the unit on"). As an engineer/tech-writer, I am aware how important it is to write for a wide variety of readers and to be very clear with every step, in the proper order. MANY users have reported problems deciphering and following the vague and misdirecting test procedures. I really wanted to like this system- delaying writing this review for several months, but it continues to disappoint, expensively... There is no need to use spoons or other strange rituals to gather the required blood. Instead run your arm/hand under warm water for about a minute then use the proper 21G/2.5mm lancet that comes with the test kit. We find this allows us to gather enough blood for the Curo and a diabetic-style glucose meter from the same finger-stick.
M**S
Update #3: So far . . .so good - READ THE MANUAL - ONLY AS GOOD AS ITS USER!
01/14/2021 Did my first reading yesterday and it was spot on to my Quest Diagnostics reading the previous day (wanted to compare prior to starting at home testing). DESPITE taking the time to read the instructions twice . . . and then putting them into play . . . I still did it wrong. You must insert the tester first, close the door, wait for it to tell you to open the door and then add sample. I did call customer service and they were exceedingly helpful. Such a breathe of fresh air when a company actually wants to help you use its product. Update in about 2 weeks! --------------- 01/21/2021 Update: Still going well. I have used this 3 times now in a week. You MUST FOLLOW THE DIRECTIONS IMPLICITLY! If you don't put in enough blood - it won't work. If you put in too much blood - it won't work. If you add blood sample before the reader gives you the indication it is ready - it won't work. - Insert batteries and cartridge in reader. - Go through instructions to set time/date, etc. Not difficult. - Clap your hands, shake your hands - to get your blood flowing. - Alcohol your intended lance location. - Lance your finger with the provided lancet and squeeze (pick a location that you can "squeeze" easily). - Use 2 fingers to completely depress the bulb on the collection tube . . . so you have enough suction to suction enough blood the 1st try. - Fill the tube with blood to the black line as instructed (if you don't have enough - it won't work and you will waste a test). - Put the tube of blood on the side for a minute (at an angle with opening facing up so it doesn't drip out) . . . band aid your lanced area. - Turn on the reader (that you just programmed with date/time, etc.) - Insert the sample collection "tray" - you must hear a "CLICK" to indicate it is in its proper place. You do not need to open the cover to insert this piece. If you don't hear a click - it won't work. - Wait for the reader to tell you to add the blood sample. - Once the reader tells you to add the blood sample - open the cover. - Add the proper amount of blood sample. - CLOSE the lid. You will see a "thinking" hourglass for just a second. Then the 3:00 minute timer starts. DO NOT MOVE IT. DO NOT OPEN THE COVER. JUST LET IT BE! After 3:00 minutes . . . you have all readings. Arrow through to see them (instructions indicate as much). Readings are clear and concise. --------------- 02/05/2021 Update: Had an appointment with Quest today (order from my doctor) for annual cholesterol readings. I immediately came home and while still fasting did a test. Will compare and post numbers when Quest results come back. Update on process: I was having issues with sucking the blood from my finger into the little tube. So . . . now I drip blood into a 1/4 teaspoon spoon. After I have 5 of 6 good drips, I THEN use the dropper to withdraw blood from the 1/4 teaspoon into the tube. You only have to depress the bulb once (to create the suction) and the blood flows up into the tube in one movement. No worry about "bubbles" in the tube from trying to suck blood up several times via several suction actions. โโโโโโโโ- Update: 2/22/2021 I now drip my blood into a 1/4 teaspoon and then use the tube to suction what I need. _________________ Updated: 03/12/2021 Me and this thing have a relationship now. Do a test every week. Works like a charm. YOU NEED TO KNOW HOW TO USE IT - DON'T JUST GUESS! IT'S ONLY AS GOOD AS ITS USER! Update: 06/19/2024 Years later and still going strong. Again - READ THE INSTRUCTIONS. I can do a test in less than 1 minute now.
Trustpilot
2 days ago
3 weeks ago