
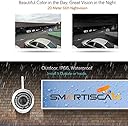

Smartiscam Wifi Camera 720P HD CCTV Wireless IP Network Camera Home Surveillance Indoor/ Outdoor Monitoring IR Bullet Security Camera HD for Iphone, Android Smartphone, Tablet or PC
Product ID: 13643791
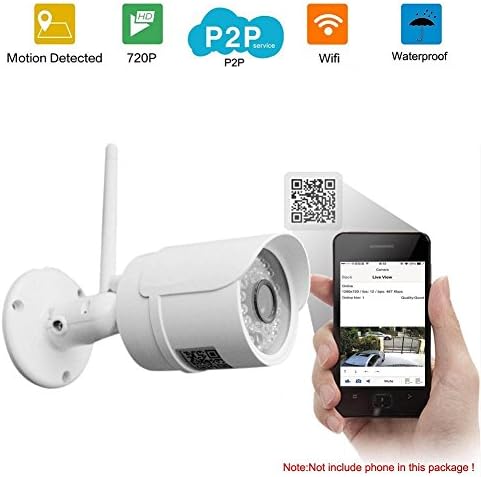
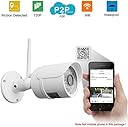
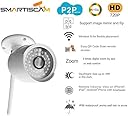
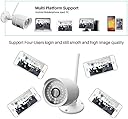
IMAGE/VIDEO Image Sensor: 1/4"Color CMOS Sensor Resolution: 1.0 Megapixel(1280x 720) Lens: f: 3.6 mm, F:2.4 (IR Lens) Viewing Angle: 70° Video Compression: H.264 Frame Rate: 30fps maximium Resolution: 720P(1280 x 720), VGA(640 x 480), QVGA(320 x 240) Audio: External RCA interface for two-way audio Night Vision: 36 IR LED lights, night vision distance 65ft IR CUT: with IR CUT, no color cast Alarm & Event Management Input Trigger: Motion detection Notification Method: E-mail, FTP, NVR Network Ethernet: One 10/100Mbps RJ-45 Supported Protocol: IP、TCP、UDP、HTTP、HTTPS、SMTP、FTP、DHCP、DDNS、UPnP、RTSP Wireless Standard: IEEE 802.11b/g/n Wireless Security: WEP,WPA,WPA2 Encryption System requirements Supported Browser: IE 6 or higher, Firefox 2.0 or higher, Safari, Google Chrome Supported OS: Windows 2000/ 2003/XP/Vista/7 and Mac OS Supported Smartphone: iPhone/iPad/Andriod phones PC based CMS software included PackingList 1 x Camera 1x Antenna 1x Bracket 1x Net cable 1x Power adapter 1x bag of screw 1x CD (online download)1x Quick installation guide Certificate FCC,CE,ROHS
J**D
Works well, minor issues with cord size.
Great quality video, somewhat technical setup. If you are an amateur, you may need to do some Googling to get it set up. I did not use the included CD.A few drawbacks: The pigtail of wires that comes with the camera means you need to put a rather large size hole (half dollar size at least) hole in the wall if you were to try to feed them inside. There is nowhere to stuff the cables inside of the camera housing. I purchased a $3 outdoor electrical box from the Home Depot and put the connector pigtail in the weatherproof box, and notched a hole out the side to run the cable to the camera. Sealed up the hole with caulk to make it weatherproof. I imagine that this is an issue with pretty much all cameras of this type.If you are connecting this to a NAS/DVR:Use the following settings on the recorder: Vendor/Model: ONVIF (Open Network Video Interface Forum) - this is a vendor neutral format. Channel 1, Protocol UDP, Port 8080, username/password is your username/password.Use the following settings on the camera: Go to Media > Network. Change ONVIF to "On" and change authorization, time zone, and image settings to "Allow." Save the settings. Go to System > Initialize and click "Reboot" to apply the settings.You should be able to now see the camera in whatever NVR system you are using.
I**S
Good camera marred by bad documentation and sloppy factory configuration
This is a review for the HD720P model. I ordered 2 of them.BEWARE: CAMERA IS SHIPPED WITH A STATIC IP OF 192.168.1.88 !!!!Wow... Talk about a pain in the a** to configure this thing.For starters this camera has no LEDs of any kind so you can't tell if it's on of off, no reset button, no labeling of any sort. The only indicator is the LED on the ethernet connector which flashes continuously. The only thing in the box were: Camera, power adapter, screws, ethernet cable, and quickstart sheet. No cd in the box and no link to software in the instructions.What you're told in the quickstart sheet to do is: Plug the camera into your wired ethernet network, download the mobile app, scan the QR code on the camera and it should be found. Sounds great, but that last step wasn't working. I kept getting an error "unknown device" and then it would say camera is offline.Although the camera looked like it was on the network (flashing link led on ethernet cable) my router would not show it as a client.Fast forward 3 hours later of trials and scouring the net for any information. I discovered Smarticam has this Dropbox software directory (Check Q&A section, Amazon doesn't allow links in reviews) that includes a search tool (for Mac & PC). When I ran that tool, 2 cameras named (IPCam) popped up with a fixed IP address of 192.168.1.88. Of course, my home router was not seeing them because my subnet was 192.168.0.xOnce I reconfigured my router to the 192.168.1.x subnet, I was able to connect to the cameras (one at a time) via a web browser (login: admin, password: admin), went to settings and changed the address from static to DHCP. I then rebooted the cameras (unplug/plug again) and from that point the iPhone app worked fine and was able to add the cameras and then configure their wifi connection.I like the price/feature point and quality looks good so far. I also like the small build factor of the camera, and the compact size of the ethernet connector (round and smaller than the bulky black cubes typical with these cameras so it's easier to run through holes.)I would've given the camera 4 starts if it weren't for the very poor job they did in leaving the camera configured with a static IP that 90% of users will not be able to discover. So I'm taking off 1 star for the 3 hours they wasted of my life.
C**T
Good quality ONVIF camera, low cost
This is a high quality ip camera at a low cost. The video quality is impressive. The wifi works fine. My issues are with integration and bandwidth.I had to use ONVIF compatibility to integrate with my surveillance system (Synology). Because of my network configuration, I had to use a custom port and setup port forwarding on my router. Then it connected fine.The bandwidth can be adjusted via adjusting pixel density and frames per second. The default settings saturated our bandwidth, and I am still working on adjustments so that the camera give decent video but wireless machines are not dropped. The camera is attached to an ASUS N router.
M**Y
Good quality camera!
So far, love this camera. This is the 4th camera I've purchased. I had to return 3 others that were different brands. I got it all set up, now I'm working on installing it. Another reviewer suggested installing an electrical box and stuff all the wires inside. Since we might be selling our home, I want to leave something value-added (not the camera, but the box). Image is high quality. Setup was easy, but this is the 4th camera I've set up, so there is a learning curve. Instructions are translated from Chinese, and the software provided is much nicer than other software that came with the first 3 cameras. I sacrificed PTZ (Pivot/Tilt/Zoom - It does have zoom feature in software, though.) for quality which means you to manually point it where you want it, but could not find PTZ on any outdoor camera that I liked. It has all the other features most security cameras have, though. I will add on to this after I install, and let you know how it works with IRC at night, but quality indoors is great. I did have trouble with the ActiveX installation in my Internet Explorer, but did get it to work in Firefox, by installing a Firefox ActiveX plugin. The mobile works fine. Have been having difficulty figuring out how to install it. It is meant to mounted on the side of the house, not underneath the roof. We tried to install underside of roof, and the antenna impairs the adjustment. The antenna attaches at the bend of the camera so it can only go one way. I suggest installing the antenna after installed, as it kept popping off from the handling. We are going to by an "L" bracket so we don't have to drill holes in our vinyl siding, attaching the camera on one end and attaching it to the underside of roof with the other half. I suppose we could purchase a mounting kit. I've seen here on Amazon some with all sorts of configuration options. Was hoping for a more simple install, though.
Trustpilot
1 month ago
1 day ago