


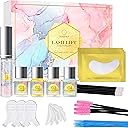
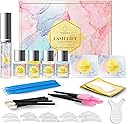
Silksence Lash lift Kit, Eyelash Perm Kit,Professional Semi-Permanent Curling Perming Wave Suitable For Salon
Product ID: 113927415
Details
- ColorSilver
- BrandSILKSENCE
- MaterialPlastic
- Model NameLash Lift Kit
- Included ComponentsEyelash Perm
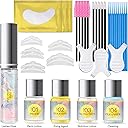
From the manufacturer Apply the Perm solution (#1) onto eyelashes, then cover with plastic film for 8-12 minutes. Apply Fixation solution (#2) onto eyelashes, then cover with plastic film for 8-12 minutes. Apply Nutrition solution (#3) to nourish eyelashes. Use Cleanser solution (#4) to clean Review: Easy enough with great results! - I have hooded eyes with long, but straight eyelashes, so I was excited to see what results this lash lift kit would give me. The first picture is before, second is after (no mascara), third is after with mascara. I was really careful and thorough with my first eye and feel like my lashes turned out great! And two weeks later, they are still curled and beautiful. My second eye, I was a little hasty and didn't get as good of a curl. I read that I should wait before trying again to avoid over processing... so just make sure to be equally patient and thorough on each eye. But overall, I'm super impressed with the results and anticipate being a repeat user! My lashes are still so beautiful and curled and really open my eyes. I love the result! I think I can probably get at least 8 more lifts from my kit, because you use such little product. Here are some tips from my experience: 1) I used Duo eyelash glue to get my lashes to stick to the silicone pad, and it worked GREAT! I will do this again. 2) I bought disposable mascara spoolies and found they were useful for getting the lashes to lay down neatly as you are applying the glue. But for the actual perm product and lotion, etc. I found cotton swabs the easiest. 3) I read that you really only want to apply perm solution to the bottom area of the lash so that you don't over process the tips. I will be taking this into account on the next round seeing as I've already permed the ends of the lashes and don't want to overdo it. 4) Don't be scared to just do it. I was so afraid of messing things up, but application is really simple and if you follow directions, you are good to go! Review: worked great on this middle-ager! - As I've aged, I can't tolerate wearing makeup every day, so things like this where I just apply once & it lasts a few weeks is like GOLD to me! I don't have as thick of lashes as I used to, so lifting my lashes & dying them really makes a difference. (You can see in the picture that my lashes aren't super full but at least you can SEE them now!) It was a bit tricky to get the silicone form glued down & get all the lashed to fully stick, so this is the part where you just need to take the time to be sure every lash is glued down. If you don't, then they will start coming unglued when you put the first solution on. On my first eye, I had to stop & re-glue everything, but the 2nd time worked like a charm, so definitely take your time with the gluing stage. From there, it was pretty easy to apply both solutions, and then I applied some lash dye while my lashes were still on the silicone form. This process will take a good 45 minutes, so if you can get a friend to do it then at least you can do both eyes at the same time. So far it's been a couple weeks & they still look great. I don't think the permanent curl will go away, I think it's just a matter of when those lashes fall out and new ones come in, as far as when I need to do this again. Anyway, I really like this product & have even recommended it to friends.


| ASIN | B07NMSG5YD |
| Best Sellers Rank | #403,425 in Beauty & Personal Care ( See Top 100 in Beauty & Personal Care ) #8,600 in Eye Makeup Brushes & Tools |
| Brand | SILKSENCE |
| Brand Name | SILKSENCE |
| Color | Silver |
| Customer Reviews | 4.1 out of 5 stars 6,829 Reviews |
| Handle Type | standard |
| Included Components | Eyelash Perm |
| Manufacturer | SILKSENCE |
| Manufacturer Part Number | SILKSENCE -77 |
| Material | Plastic |
| Material Type | Plastic |
| Model Name | Lash Lift Kit |
| Unit Count | 1 Count |
T**Y
Easy enough with great results!
I have hooded eyes with long, but straight eyelashes, so I was excited to see what results this lash lift kit would give me. The first picture is before, second is after (no mascara), third is after with mascara. I was really careful and thorough with my first eye and feel like my lashes turned out great! And two weeks later, they are still curled and beautiful. My second eye, I was a little hasty and didn't get as good of a curl. I read that I should wait before trying again to avoid over processing... so just make sure to be equally patient and thorough on each eye. But overall, I'm super impressed with the results and anticipate being a repeat user! My lashes are still so beautiful and curled and really open my eyes. I love the result! I think I can probably get at least 8 more lifts from my kit, because you use such little product. Here are some tips from my experience: 1) I used Duo eyelash glue to get my lashes to stick to the silicone pad, and it worked GREAT! I will do this again. 2) I bought disposable mascara spoolies and found they were useful for getting the lashes to lay down neatly as you are applying the glue. But for the actual perm product and lotion, etc. I found cotton swabs the easiest. 3) I read that you really only want to apply perm solution to the bottom area of the lash so that you don't over process the tips. I will be taking this into account on the next round seeing as I've already permed the ends of the lashes and don't want to overdo it. 4) Don't be scared to just do it. I was so afraid of messing things up, but application is really simple and if you follow directions, you are good to go!
C**D
worked great on this middle-ager!
As I've aged, I can't tolerate wearing makeup every day, so things like this where I just apply once & it lasts a few weeks is like GOLD to me! I don't have as thick of lashes as I used to, so lifting my lashes & dying them really makes a difference. (You can see in the picture that my lashes aren't super full but at least you can SEE them now!) It was a bit tricky to get the silicone form glued down & get all the lashed to fully stick, so this is the part where you just need to take the time to be sure every lash is glued down. If you don't, then they will start coming unglued when you put the first solution on. On my first eye, I had to stop & re-glue everything, but the 2nd time worked like a charm, so definitely take your time with the gluing stage. From there, it was pretty easy to apply both solutions, and then I applied some lash dye while my lashes were still on the silicone form. This process will take a good 45 minutes, so if you can get a friend to do it then at least you can do both eyes at the same time. So far it's been a couple weeks & they still look great. I don't think the permanent curl will go away, I think it's just a matter of when those lashes fall out and new ones come in, as far as when I need to do this again. Anyway, I really like this product & have even recommended it to friends.
A**R
Not as good as a professional lift, but so worth the money!
I used to get my lashes lifted professionally, for around $70-80. The lift was supposed to last roughly 6 weeks, but mine typically lasted 4 weeks. I have straight lashes that really don't respond well to a lash curling tool, so this was pretty much my only option. I used this for the first time about two weeks ago, and yes, it DOES work, but the curl did not last over this entire 2 week period. So, that was very disappointing. But, for the price, amount of times it can be used, and the convenience of doing it at home, in my opinion it is worth it. I don't know how many uses out of this kit I will get, because I messed up on one eye the first time around (I wasn't paying attention to the bottle labels), and I probably used more of the solution than necessary. But if done right, I can picture getting a minimum of 5 uses out of each kit, and I personally think that is a very low ball estimate. I have used it 1.5 times and still have enough for a few more applications. It'll be hard to know for sure until I completely use the kit. Some suggestions: - Use disposable nail polish or lip brushes to apply all solutions. I tried q-tips with most of the cotton snipped off, the first time. And while it did work, I could have saved a lot of product had I used small brushes. I used a couple of my small eye makeup brushes when I was re-doing my right eye a day or two later (the eye I 'messed' up originally), and it was much cleaner and easier. - If you don't mind having multiple brushes on hand, you can reuse them. Just have enough to not double-dip or cross-dip, and obviously clean the tools after each use. - Curl your lashes with your regular lash curling tool before gluing them to the eye pad. This is especially helpful if you have stick straight lashes, like me. - I accidentally spilled the "cleaning solution." I am not particularly worried, it really just felt like a weak eye makeup remover. I used a regular makeup wipe beforehand, then gently went over that eye with a damp cotton pad to remove any residue from the makeup remover. To clean my eye after, I used what was left of the cleanser with a q-tip, but I think a wipe would have been more effective. - I find the "lash nourishing solution" to be a far better cleaner and glue remover. But I did have a glue remover for false lashes on hand, just in case. But I didn't have to use it. - Use a toothpick or a slim tool to adjust your lashes the way you want them to curl. Do so quickly, before the glue dries! - you'll need cling wrap. Cut small pieces ahead of time. I used like 3" x 3" squares, and that was more than big enough. Cut 4 pieces (2 for each of the two solutions you use on each eye). Other stuff: - This would be much easier to use if you have someone to do it for you. I think lying down while another person applies the solutions, would be a lot more convenient. The eye pad would also not be such a pain to hold in place while you're trying to "arrange" your lashes before the glue dries. But don't worry, this is totally doable on your own. The more you do it, the easier it will be. - The packaging is very cute.
S**N
Look up instructions on youtube, use qtips and buy clear wrap
I can’t believe i’ve never heard of perming your eyelashes until i’m 38...wth!? y’all ladies have been holding out on me!!! lol anyways...IM IN LOVE!! My only complaints are that the pad wouldn’t stick to my eye with the glue provided, there’s no application tools or clear wrap that you’ll need, and the instructions suck and say different than what the instructions say here on amazon...BUT despite these flaws i’d STILL give it 5 stars because of the results!! Details I wish i’d known before I started and Tips i’d recommend: I’d recommend using a fake eyelash glue that is better than the one it comes with to glue the pad on your eye...I had some glue I owned already that i tested out after and the pad stuck just fine with that and I wish i’d thought of that before because the pad not sticking caused so much difficulty during this process because it kept coming up in the corners and sliding up IMPORTANT: when the instructions say choose an eye pad that fits your eye it’s NOT meaning the size of your eye.... You’re basically selecting how big of a curve you want in your lashes (if you look at them from the bottom you can see that every pad has a different size bump)....I selected the smallest bump and I wish I hadn’t because my lashes are so straight up that they are actually pressing against my eyelid so it’s hard to get eyeshadow on now...so next time i’m picking a eyelid pad with a tiny bit bigger bump so they’ll be curved further away from my eyelid. Application tools: I washed mascara applicators and was using them to apply the products but quickly saw that wasn’t going to distribute enough product... so don’t over think that, it’s more important that the product completely saturates your lashes so just use a q-tip for every step and just glob it on there. FYI you do use the glue to glue your eyelashes to the eyelid pad... the instructions didn’t seem really clear on that and it didn’t seem right to me, but that is what you do.... take your time when glueing your lashes the exact way that you want them to look after permed and make sure they’re really separated (i left a few grouped together and i can tell)...I would also just use their glue they including for this portion because it’s not strong at all so it won’t hurt your lashes and it washes off easily. About washing your eyelashes after....I saw people saying to not wash your eyelashes afterwards... and I wasn’t going to wash them because of this and got perms as a child so i remember that you aren’t supposed to wash your hair after a perm... but i dyed my eye lashes after the perm and accidentally got some in my eye and rushed to the sink was forced to wash my eyes immediately after the perm and they are still permed.... I thought the perm would fall out because of this but it has been two days since and they seem completely fine and haven’t lost any curl YAY!! In conclusion... You don’t have to be a complete pro or have everything be perfect... my eye pad was slipping and my plastic wrap I used kept slipping and my lashes still turned out good enough that i’m extremely happy and no longer have to wear ANY eye makeup Good luck ❤️
C**T
Not a good kit
First off it looks cute and it looks homey when you buy it like oh this might work. I hate to give a horrible review and talk down on something but this product did not work at all. I had to do my right eye twice before I even seen any part of a lash lift and I ended up leaving the stuff on my left eye on for 30 minutes to even get somewhat of a lift. I had to do 30 minutes of the perm solution and then 30 minutes of the fixation solution to even see any type of results of lifting on my left eye. I ended up doing two rounds on my right eye so it did get somewhat of a lift but not what you would expect. This is my first lash lift kit so I've never used them before but this was supposed to be highly recommended on a couple websites and I ended up watching a couple different reviews after I purchased the product to see how to apply it because I was confused on how the lifters went on your eyelids. A couple of the influencers on YouTube that reviewed it also said that they had issues as well so I'm unsure where the people on the reviews here are saying that the product actually works because I had an issue with it and this is my first time using any type of kit. My friend has gotten her lashes lifted for years and they don't look like this. On top of that, the lifters for your eyelids don't even fit my eyelids like they don't even take into consideration that people have different sized eyes and I have quite a hood area where my eyelids are not sunken in like other people's and so it doesn't sit well on my lashes and when I did the lash lift they weren't perfectly curved they were more straight up because the lifter did not fit my eyelid very well. I also got a chemical burn on my left eye and having to go back in twice to try to do it to see if the second time would get any type of lift, I understand you're probably not supposed to do that but I got a chemical burn the first time just to be clear on that. But the second time that I went in it burns close to the bottom of your root of your lashes because you've already put a perm solution on it. I would not recommend I would get a different kit from a professional company rather than something off Amazon cuz it seems like they all have issues.
L**A
One time use! Please read!
I used this as soon as i got it with help from Youtube vids, and I was in love with my lift! It worked really well and was relatively easy, and it felt like the lift lasted for a long time, it was great. Downside- I tried to use it again to lift my lashes maybe 4-5 months later, and none of the solutions worked anymore. I kept everything in the original box and everything was tightly sealed, yet nothing worked anymore. The first time I put the perm solution on for only 10 minutes, but the second time 10 minutes did nothing. So I tried 20 more minutes additionally and it lifted my lashes ever so slightly, but it didn’t last. My lashes just fell right back down. The kit is a one time only kit. The solutions expire what seems like as soon as you open/use it once. For $23, it’s still compares to getting your lashes professionally lifted for $60-$80. But it’s still disappointing :/ Buy it knowing it works, but only once.
L**E
My sister and I both like it !
This product really does work. Definitely worth a try for those who are looking for longer lashes that are natural. No irritation and worked great for me and my sister!! Our eyelashes look beautiful, bigger and naturally curled. Speaking about me, I have thin straight lashes that will never hold a curl. I used a generous amount, and focused on the root of the hair. I used the glue that came with the kit. I did not struggle to take the pad off of my lid, but I did struggle a little trying to get the glue residue off of my lashes. I used a little vasaline to help take the rest of the glue off, and that worked great. I would caution everyone not to leave the product on for longer than recommended. My sister accidentally left it for too long in one eye and eyelashes curled too much. Haha! Guess she will be more careful next time. Also, when you glue your eyelashes to the glue, be as careful as possible, because they will “set”. That is, if they clump together while using the product, they will curl like that. Cheers and good luck. It’s not as difficult as it seems. I would also suggest looking at some YouTube videos to get the technique down. Overall, I really liked the kit. It’s relatively easy to use and it definitely works if you use it correctly. I would recommend the kit.
M**L
A long process...
My lashes look amazing! It took me all day for me to complete the process since I had to do it alone but it looks great. I found that curling your lashes JUST before starting the lifting process makes your lashes look longer/curled for sure. I would say that the item did not come with ALL the directions it could've. So, here are some tips/info I would've liked; 1. MAKE SURE TO APPLY EVERYTHING EXACTLY HOW YOU WANT YOUR LASHES TO LOOK (if you want them to flare out and not clump you have to make sure that when a product is applied each time you spread them out accordingly; 2. It is an increadly awkward process and everything burns when you get it in your eyes; 3. Take your time; 4. DO NOT GET THEM WET/ THOROUGHLY CLEAN THEM FOR 24+ HOURS!! 5. Use a clean mascara wand looking thing the next day after you "wash them" and brush your lashes through because there will still be some gunk in them; 6. Your lashes will not look the way you want them to until day 3 (at least that's what happened for me); 7. I did not need to use mascara at all but when I did it was great not to have to curl them again so there was no lash fallout. 8. The process is on the easier side, it just takes much much much longer when you're doing it alone. 9. My eyes did burn a little until I washed everything off 24+ hours following application; 10. My lashes look great and I will continue to lift them as I like my face a whole lot better without makeup now.
L**P
Great
My lashes are very flat and quite short so I always try to keep them Permed as cheaply as possible this kit worked very well I have sensitive eyelids and sometimes get Blepharitis but this didn't irritate them at all! . I am a mother to many children which means very little time to myself to put make up on . If I use this I don't worry about curling lashes and mascara . This isn't the first kit I've bought but they are all quite easy to use with the same instructions. The hardest step is to get all the lashes to stick to the pads. My tips are - heat an eyelash curler with a hairdryer literally for a second make sure it's not too hot obviously! Then curl the lashes before you start . The fact they now include these self adhesive pads is great, they do work very well. but they include one of each size so that's only really handy for the first use . I never use the glue included in these kits they really never seem to be strong enough which is why I've taken of one star. I buy a branded professional gel glue in a tube that costs £7.99 works wonders doesn't irritate my sensitive eyelids either and is worth the extra cost.
S**Y
Absolutely worth the money
I wasn't expecting it to work so well & i really thought I was going to mess it up Just watch a tutorial on YouTube, there are tons of them and all these different brands are basically the same. I did it one eye at a time. Do not be stingy with the glue, it comes off really easy. Put glue above your lid, then on the silicone curling piece, and wait for it to get tacky. Then do the same on the silicone curler, let it get a bit tacky, then brush ALL your lashes up. Do it in section, dont try to get it all at once. Cover with cling wrap, and i let mine sit for 8-9 mins each for step 1 & 2. As for aftercare, if you've seen Legally Blonde, you know not to wash off the perm solution for 24 hours. So make sure you've showered before and washed your face & moisturized properly BEFORE. These photos are after like a week, and I wear makeup every day and rub my eyes constantly, they were even curlier before. Will try to find a tinting kit to use with next time. I also tried doing my eyebrows, but I messed up by not going in sections. Will try again. Item arrived with no damage
K**S
Good product for the money I would buy this again!!
This product worked really well I was surprised! One thing I will suggest is if you have new regrowth lashes or if you have lashes that kinda stick straight out or hard to curl, use plastic or saran wrap over the lashes as they are processing this will keep them in place on the rods and stop them from popping off the rods.
O**S
Old
Comes expired
A**Z
Buy it!! Worth the money😊
It really works
Trustpilot
4 days ago
1 month ago