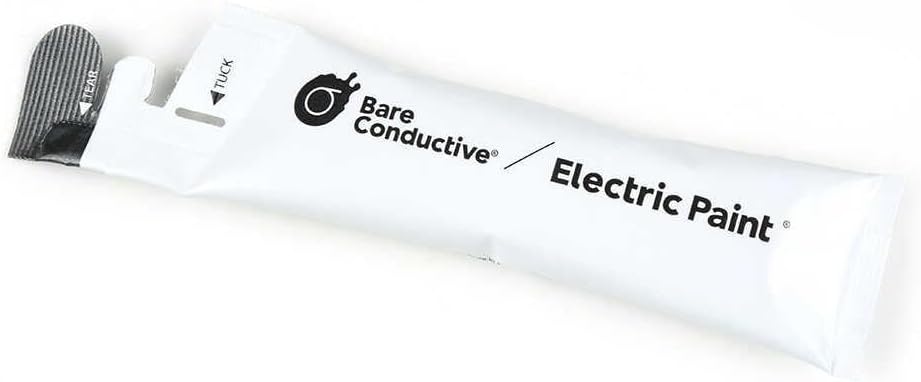


Electric Paint Pen, 10ml
Product ID: 101223251
Details
- BrandBare
- ColourBlack
- Finish TypeConductive
- SizeSmall
- Item Volume10 Millilitres
⚡Conductive electric paint
🌿Eco-friendly, easy cleanup
🖊️Compact 10ml pen format
Buy anything from 5,000+ international stores. One checkout price. No surprise fees. Join 2M+ shoppers on Desertcart.
Desertcart purchases this item on your behalf and handles shipping, customs, and support to Japan.
⚡ Electrify your creativity with precision and ease!
The Bare Conductive Electric Paint Pen (10ml) offers a sleek, portable solution for precise application of conductive paint. While the base paint is not waterproof, it allows for easy cleanup and can be layered with waterproof varnish for enhanced durability. Ideal for professionals and hobbyists alike, this pen combines reliable conductivity with user-friendly design, making it a must-have for innovative touch-ups and creative projects.
| ASIN | B00KBXT6JW |
| Age Range Description | Adult |
| Best Sellers Rank | #173,695 in Car & Motorbike ( See Top 100 in Car & Motorbike ) #638 in Touch-Up Paints |
| Brand | Bare Conductive |
| Brand Name | Bare Conductive |
| Color Code | #000000 |
| Colour | Black |
| Container Type | Pen |
| Country of Origin | USA |
| Coverage | Medium |
| Customer Reviews | 4.0 out of 5 stars 550 Reviews |
| Finish Type | Conductive |
| Global Trade Identification Number | 00701980281112 |
| Indoor Outdoor Usage | Outdoor |
| Is Waterproof | False |
| Item Form | Pen |
| Item Type Name | paint |
| Item Volume | 10 Millilitres |
| Item Weight | 0.09 Pounds |
| Manufacturer | Bare Conductive |
| Model Number | 100368 |
| Paint Type | Electric Paint |
| Part Number | 100368 |
| Size | Small |
| Special Feature | waterproof |
| Special Features | waterproof |
| Specific Uses For Product | Bright,Performance,Waterproof |
| Surface Recommendation | Fabric, Paper |
| UPC | 701980281112 |
| Unit Count | 10 Milliliters |
| Warranty Description | no warranty available |
| Water Resistance Level | Not Water Resistant |
S**R
Very good
Very good
A**R
Awesome item.
Awesome. Item received on 16 Sep 19.
A**T
Grate product
Worked as expected
A**M
Kaamchalau maal
It's not quality as price, drying time is very long, manufacturer should improve drying time. Drawing track is not zero resistance.
Trustpilot
1 month ago
1 month ago